This stream auto-updates
- Yesterday
-

White Balance
Kyle O'Brien posted a topic in DaVinci Resolve
Does anyone know of a way to white balance technically without trusting the eyes? My eyes are often quite a bit off so I am looking for a way to get accurate white balance and as much separation as I can every time without trusting my eyes. I have Mononodes skin tone DCTL that I use and I think it helps a lot but sometimes there isn't any skintone in the shot. I'm hoping either via scopes or something someone has some secret sauce. - Earlier
-
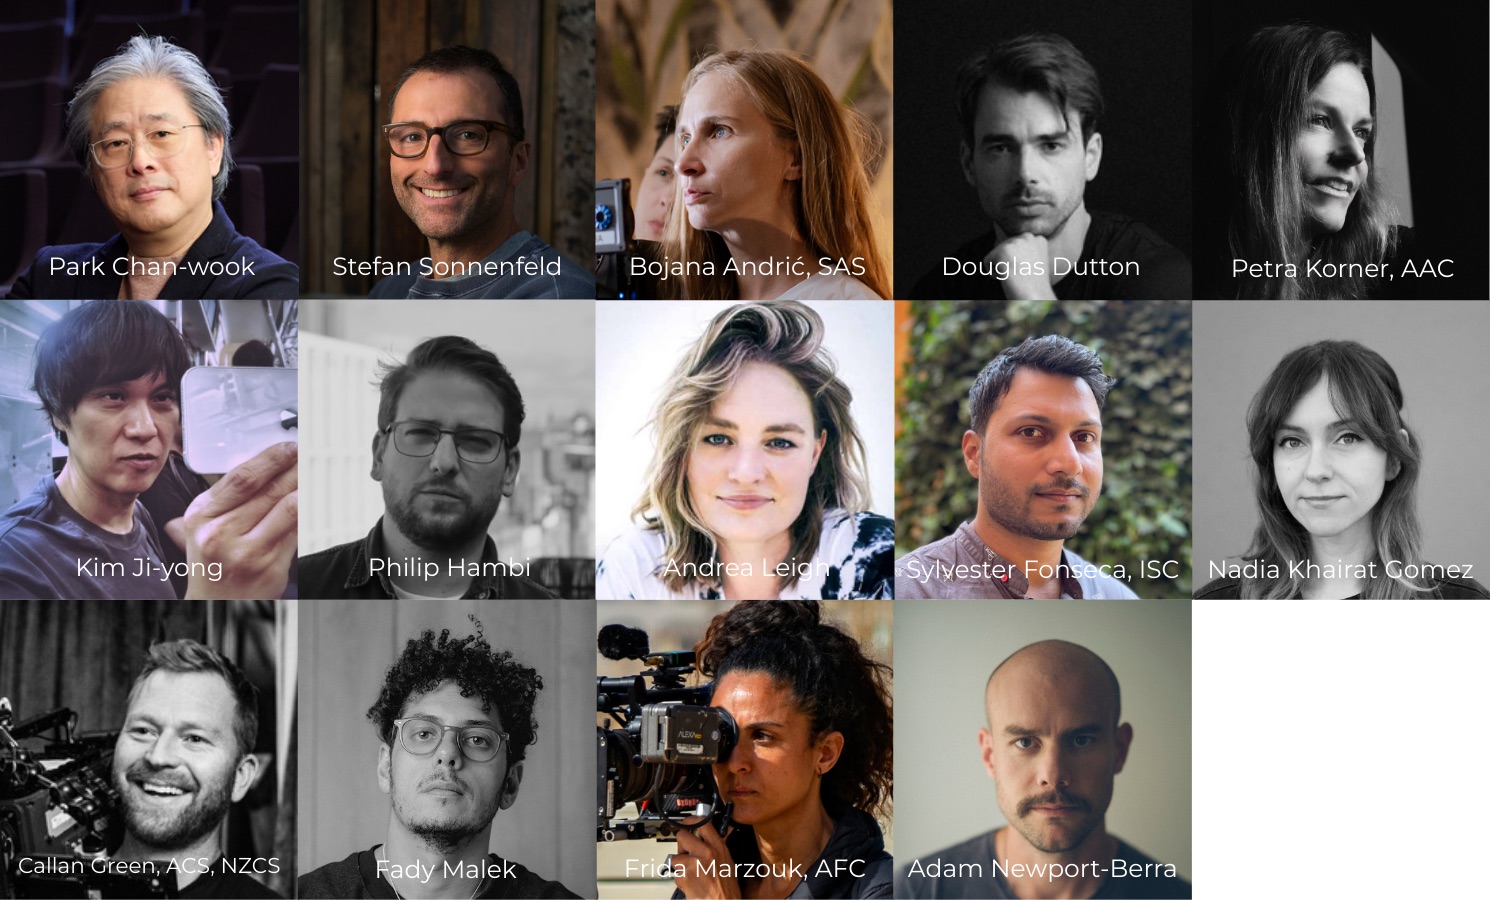
 Exceptional jury of international filmmakers, cinematographers and colourists revealed for the fifth edition of the awards IMAGE CREDIT: Park Chan-wook photo by Winnie Yeung @ Visual Voices, Image Courtesy of M+, Hong Kong FilmLight has announced the first set of creatives lined up to judge the 2025 FilmLight Colour Awards, including South Korean film director, screenwriter and producer, Park Chan-wook, who has been named the 2025 Guest of Honour; Company 3 founder and CEO, Stefan Sonnenfeld; Apple+’s, The Studio cinematographer, Adam Newport; and many more. Now in its fifth year, the FilmLight Colour Awards have quickly become an international platform for recognising excellence and artistry in colour grading. The 2025 edition will once again culminate in a ceremony held at EnergaCAMERIMAGE in November, celebrating the work of colourists across six categories: Theatrical Feature, Television Series/Episodic, Commercial, Music Video, Emerging Talent, and Spotlight. Submissions close on 31 July. 2025’s Guest of Honour and highly acclaimed film director, Park Chan-wook, is known for his bold visual storytelling and genre-defying narratives. He has captivated global audiences with landmark works such as Oldboy, The Handmaiden, and Decision to Leave. "It’s a privilege to be Guest of Honour at this year’s awards,” says Park Chan-wook. “Colour is not just a visual element. It carries stories, characteristics, ideas, and even musical elements like harmony, counterpoint, rhythm, and tone. It can also create the illusion of touch or smell. That’s why I never want to leave the colourist’s room. How wonderful would it be if I could keep working on the colour of a single project for years." Also joining this year’s panel is Stefan Sonnenfeld, founder and CEO of Company 3, widely regarded as one of the most influential colourists working today. Known for his collaborations with major directors across film and advertising, Sonnenfeld brings deep expertise and industry perspective. His portfolio includes iconic franchises such as Star Wars, Star Trek, Jurassic Park, Pirates of the Caribbean, and Transformers plus more recently Superman and F1. “I am very excited to join this distinguished panel of judges,” comments Sonnenfeld. “I have been following the FilmLight Colour Awards since their inception and have been consistently impressed with the talented cinematographers and colourists chosen to evaluate the work. The Awards have done an excellent job of highlighting the artistry of colour grading, and I am thrilled to be part of that process this year." FilmLight has also named the following international talent in its first wave of confirmed jurors: Bojana Andrić, SAS – leading cinematographer and Vice President of the Serbian Society of Cinematographers. Andrić has worked on feature films such as Follow Me, Love Cuts and Sweet Sorrow (awarded for cinematography) and her TV credits include Trail of the Beast (also awarded for cinematography), Pupin, Clinch and Andrija & Andjelka. Douglas Dutton – Paris-based freelance colourist, Dutton works across commercials, music videos, series, and video games. In 2024, he won the FilmLight Colour Award in the Emerging Talent category for his work on the Baltic Harmonical Diffraction commercial. Sylvester Fonseca, ISC – award-winning Indian cinematographer with over a decade of experience across advertising, cinema and OTT. His acclaimed work includes Amar Singh Chamkila, Kennedy (Cannes 2023), and standout projects like Lust Stories, Sacred Games, and Island City (Venice 2015). A sought-after talent in advertising, he’s behind campaigns for Fevicol, Dream11, and Ariel’s viral #ShareTheLoad. In 2024, he won his second Filmfare Award and was inducted into the Indian Society of Cinematographers (ISC), cementing his status as one of India's leading cinematographers. Callan Green, ACS, NZCS – New Zealand–born, award-winning cinematographer with over 27 years of experience. Green’s recent credits include Nobody 2 (Universal), The Beekeeper 2, and several episodes of Netflix’s The Gentlemen. He was named New Zealand Cinematographer of the Year in 2024. Philip Hambi – leading commercial colourist at Absolute in London. Hambi has worked with some of the industry’s most celebrated directors and cinematographers for global brands including; Nike, Glenmorangie, Martini, Samsung, BMW, Lexus, Meta and Google. He collected his third Silver Arrow and third D&AD awards in 2025 for his contribution to Rich Hall’s stunning Riyadh Season film, Crawford Vs Madrimov: Everything Or Nothing. Kim Ji-yong – highly acclaimed South Korean cinematographer and director known for his striking visual style and collaborations with top directors like Park Chan-wook and Hwang Dong-hyuk. He is best known for his recent work on Netflix’s popular TV Series, Squid Game, as well as films like Decision to Leave, A Bittersweet Life, and The Fortress. Nadia Khairat Gomez – freelance colourist based between Berlin and Madrid working internationally across narrative, commercial, and music video formats. Gomez won the 2024 FilmLight Colour Award in the Music Video category for Brodka x Igo – Myślę sobie Ż, praised for its bold, emotional palette. Petra Korner, AAC – award-winning cinematographer based in Europe and the US, Korner’s credits span high-end TV dramas such as A Discovery of Witches (Sky), His Dark Materials(HBO), and Shadow and Bone (Netflix), as well as feature films including The Wackness, The Informers starring Winona Ryder, Kim Basinger, Billy-Bob Thornton and Mickey Rourke; and Wes Craven’s My Soul To Take. Andrea Leigh – Canadian-born senior colourist at Harbor, Leigh’s credits span major studio films such as Neil Blomkamp’s Elysium and Chappie; Immaculate (for which she received an HPA nomination); Nightbitch; as well as award-winning indies, Mandy, directed by Panos Cosmatos. Recent credits include Sirens by Molly Smith Metzler and Piece by Piece by Morgan Neville. Fady Melek – senior colourist based in LATAM with over 20 years’ experience, best known for his work the official FIFA World Cup music video clips, such as Dreamers, performed by Jung Kook of BTS, and with over 30 feature films graded worldwide. In 2024, he received a Global Recognition Award™ and three Gold Telly Awards for Best Use of Colour. Frida Marzouk, AFC – cinematographer whose international trajectory—from France to the US and across North Africa and the Middle East—combines technical rigor with a deeply emotional visual approach. Her work spans compelling narrative and documentary cinema, earning acclaim on the world festival circuit. Adam Newport-Berra – cinematographer and director best known for his work on The Studio(Apple+), The Bear (pilot episode), Euphoria (final episodes, Season 1) and his breakthrough feature The Last Black Man in San Francisco. He has received multiple Cannes Lions and VMA nominations for Best Cinematography across commercials and music videos. The remaining jury will be announced in the coming months with this year’s call for entries closing on 31 July. A shortlist will be announced in autumn and the winners unveiled at EnergaCAMERIMAGE in November. For more, visit: www.filmlightcolourawards.com ###
-

The complexities of color grading
Michał Edwardowicz commented on Lowepost's course in Color Grading
Thanks for the insightful course, Cullen! I've tried to get the LUT assistant from the link you guys share but didn't receive anything from here https://ravengrade.com/look-development-starterkit/ . Could someone please send me this to my email: migueledwardowicz@gmail.com Thank you in advance! -

DaVinci resolve master tips
Clairechen commented on Admin's course in Color Grading Masterclasses
This is the best class in lowepost. Thank your for your kind sharing! -
Print Film Emulation Training
Clairechen commented on Lowepost's course in Workflow
hello, could you please share these film LUT? -

Need Guidance on Dolby Vision to DCI-P3 and IMAX Workflow
Andreas Brückl replied to Soumitra Sarkar's topic in Baselight
It all depends on the footage. If you have harsh highlights or a very high key image” then your HDR pass needs a lot of adjustment. In this case you do your first pass in HDR without! adjusting your top highlights too much or you have to stretch them again in P3. So you have to find a middle ground. And of course-you might have less details in P3. …less dynamic range. The DV pass is for SDR REC709, not for P3. Generally: make less contrast for the HDR pass. punch the highlights up for the SDR pass. There is no “one fits all” rule. -

Need Guidance on Dolby Vision to DCI-P3 and IMAX Workflow
Soumitra Sarkar replied to Soumitra Sarkar's topic in Baselight
Thank you sir for your valuable feedback. As per your suggestions, at first I finished my HDR grade then I just change my viewing colourspace to nomal DCI P3 & offset. Now I have to face with some problem. I notice that After convert the colour space to P3 & offset , the pick highlight of a shot have no details, to get back the details in highlight I need to regrade the shot in the first layer where I do the Base grade. On the other hand when I do the DV pass it’s getting back the pick highlight but looks muddy to see in P3 projector. need your suggestions once again. Waiting for feedback ***one more things, if I increase the saturation & brightness of a shot in first layer too much , then I insert a layer and reduce the pick highlight with BaseGrade tool & reduce the saturation with hue shift tool , is that right procedure ? Recent a DoP force me to follow this procedure but I said it’s wrong procedure to grade. Am I right or wrong ? -

Editing in DaVinci Resolve
Satyam Mishra commented on Lowepost's course in Editing & Sound
Hey Kevin, I’m using DaVinci Resolve 20. I’m able to perform a ripple cut using Cmd + \, but I’m having trouble with clip replacement. When I try to replace a clip, it also replaces the original audio — even though the audio track is locked. I’ve tried several times, but the issue persists. Not sure what’s going wrong? Thanks -

levels Resolve Video Monitoring "Use 4:4:4 SDI" question
cedric replied to Florian Rubenberger's topic in DaVinci Resolve
Hello, Is anyone have an answer to this question ? I have the same setup then Florian and the image change totally if I check or not "4:4:4 SDI" even if I'm connected via HDMI on studio monitor 3G... Thanks cedric -
 I seem to be missing the footage for Lesson 4 -Low Luma Compression Techniques
 -
Need Guidance on Dolby Vision to DCI-P3 and IMAX Workflow
Andreas Brückl replied to Soumitra Sarkar's topic in Baselight
Probably already solved, but here is the solution: You can grade in HDR-no need to make a DV pass, yet. Take the timeline once done and as you are grading in a scene referred environment it should just convert to P3 easily. Then you do a little offset. India projectors are 12ftl that’s why your offset needs a bit more power. For IMAX you can give them the normal P3 DCP render. They will do the rest. All IMAX are done at PrimeFocus in Mumbai. You can also ask them if you have any doubts. Additional info: Imax has to accept the film first as it works on a revenue share basis. If they say yes, then it will go to the IMAX cinema. good luck -

Look Development & Workflow in DaVinci Resolve
Salvador Ávila commented on Lowepost's course in The Art of Color Grading
Who is this course designed for? Intermediate colorists -
Filmlight Colour Awards opens 2025 entries
Daphne FilmLight posted a topic in General Discussions
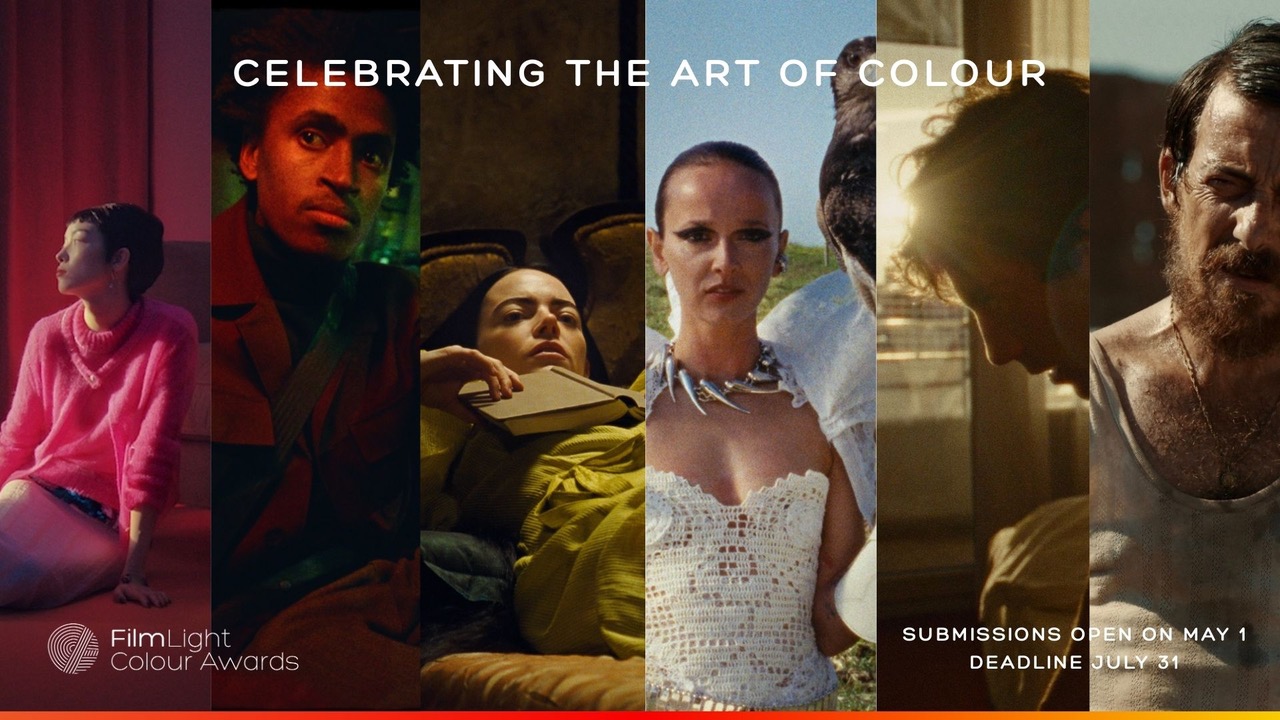
Entries open from 1 May - 31 July to colourists on any grading platform The FilmLight Colour Awards are returning for their fifth year, with colourists, production companies and facilities invited to put forward their submissions from 1 May – 31 July 2025. The awards are open to colourists working on any grading system and are independently evaluated by a panel of distinguished cinematographers, fellow colourists, media experts and industry figures. Once again this year, colourists can submit their favourite projects across six categories:Theatrical Feature; Television Series/Episodic (including documentary/non-fiction); Commercial; Music Video; Emerging Talent (open to colourists age 18-35, for commercial or music video projects); and Spotlight, which recognises colourists who have contributed to the creative impact of a film with a total budget of less than $3 million USD. Since starting in 2021, the FilmLight Colour Awards have gone from strength to strength, with more than 500 entries in 2024, from over 48 countries. “I was inspired enormously by the quality of work,” said George Miller, Jury Guest of Honor, from the 2024 ceremony. “There are many things that allow enthusiasm for the moving image, and two of them are key: the evolution of the tools we have to work with, and the artists whose brilliance we acknowledge here.” Last year FilmLight added the Emerging Talent category, to promote the work of a new generation of colourists. It was won by freelance colourist Douglas Dutton for his work on the ‘Baltic, Harmonical Diffraction’ commercial. “It’s an immense honour to be selected as a winner in the Emerging Talent category,” said Dutton. “Getting recognition from people I look up to in the industry feels phenomenal. Thank you FilmLight for organising this incredible event.” The 2025 winners will be announced at a dedicated ceremony at EnergaCAMERIMAGE on Sunday 16 November 2025, where their projects will be showcased to the global community of cinematographers, colourists and creatives attending the festival. In recognition of their achievement, all 2025 winners will also receive a one year licence for Baselight M, the new macOS version of FilmLight’s Baselight grading system. You can watch highlights from the 2024 ceremony in the new teaser video, here, and see the full list of 2024 nominees and winners here. The awards are led and organised by FilmLight, in conjunction with EnergaCAMERIMAGE. It’s also supported by the AFC (French Society of Cinematographers), AMC (Mexican Society of Cinematographers), ASC (American Society of Cinematographers), BSC (British Society of Cinematographers), BVK (German Society of Cinematographers), CNSC (Chinese Society of Cinematographers), CSI (Colorist Society International), ISC (Indian Society of Cinematographers), ShotDeck (fully-searchable cinematic image library), and more. For more information on the awards, including key dates and category guidelines, please visit: www.filmlightcolourawards.com
-

Masterclass in Color Grading with Lynette Duensing
Willard Jansen commented on Lowepost's course in Color Grading Masterclasses
This is very helpful and nicely presented. I admire your work. I wonder though about one technical issue I have. When I set my color space to Aces in the project settings, I get very dark poster fames in the edit page timeline and clips poster frames on the color page. That doesn't happen id I use unmanaged and set to Aces in nodes. Updating thumbnails doesn't help It happens on all kinds of footage, both REC709 and Log. -
Hi everyone, I’m a Baselight colorist working on an upcoming feature film where the primary output is for theatrical release (DCI-P3), but the DoP insists on grading in Dolby Vision HDR first. I initially suggested grading in P3 first since the target audience is theatre-goers, but he’s fixed on starting with Dolby Vision. I’m also aware that Dolby Vision SDR trims do not translate well to cinema P3 DCP Now, there’s an additional request to deliver a version optimized for IMAX — and here’s where I need some guidance. I’ve never delivered for IMAX before, and I want to ensure: The DCI-P3 theatrical output is not compromised, since it’s the main release. I produce a proper IMAX version without just handing over the standard P3 DCP. My Setup: Sony BVM-X300 for Dolby Vision HDR grading. Barco DCI-P3 projector for theatrical grading. please suggest popular workflow & guide
-
Introduction to visual effects in DaVinci Resolve Fusion
Willard Jansen commented on Lowepost's course in Introduction
The course really should be updated. It uses Resolve version 15. We're in 19 now -

Baselight Edition 5.0 License + Avid Controller MC Artist
Bledar Cili posted a topic in Marketplace
Hello, I am selling my Baselight Edition 5.0 for Avid Media Composer along with the Avid Controller MC Artist due to lack of use. The license is also compatible with Tangent Element Controller. Price: €900 for both Version: 5.0 (Does not include an update to version 6.0) If you’re interested or have any questions, feel free to contact me. idproductional@gmail.com -

B/W Rgb values in film stocks
Harold Bjork replied to Abby Bader's topic in Editing , Color grading & Finishing
In DaVinci R, G, and B values are adjustable from -3 to +5. The values given works fines. Check Monochrome and use decimal format of percent. 100%/100 = 1.00, etc... -

davinci resolve flashback effect
Astro77 replied to ahmed abdelmaged's topic in DaVinci Resolve
The flashback effect in DaVinci Resolve can be created using a combination of color grading, blur, and overlays. -

Masterclass in Color Grading with Lynette Duensing
D. Skousen commented on Lowepost's course in Color Grading Masterclasses
This was a very helpful class. Thank you. -
FilmLight Colour Awards - The Nominees
Astro77 replied to Daphne FilmLight's topic in General Discussions
It’s exciting to see how much the FilmLight Colour Awards have grown in just four years. The lineup for 2024 looks impressive, especially in the Theatrical Feature category with titles like Dune: Part Two and Furiosa. -

davinci resolve flashback effect
ahmed abdelmaged posted a topic in DaVinci Resolve
can any one help me to get davinci resolve flashback effect thanks you for your time -

Professional Color Grading Techniques in DaVinci Resolve
hersh chauhan commented on Lowepost's course in The Art of Color Grading
hey, does this course teaches how to create film print emulation (the industry way) ? -

Beginner's path to color grading in Lowepost
Kishore M posted a topic in Suggestions and feedback
Hi Everyone, I am new to colour grading and I would like to start with courses here in Lowepost. Is there a specific learning path for beginners in Lowepost? Thanks in Advance! -

Color grading challenge
CHANDAN HOLLA replied to Amlabme's topic in DaVinci Resolve
Yes, I'm interested!