
Jason Bowdach
-
Posts
30 -
Joined
-
Last visited
4 Followers


Recent Profile Visitors


-

Look Development & Workflow in DaVinci Resolve
Jason Bowdach commented on Lowepost's course in The Art of Color Grading
When using this method for organization, I recommend placing the IDT camera transform at the pre-clip group level, so it would stay consistent for the entire group. We're only moving from camera space to working color space (DWG or ACES usually) so we actually want it to be identical for every clip of the same camera type. Next, within the clip node tree, we can adjust each clip on an individual bases as needed in terms of exposure, contrast, saturation, etc. For other creative elements, you can use the post-clip, timeline node levels, or even adjustment layers for your scene level adjustments. Hope that helps! -
Look Development & Workflow in DaVinci Resolve
Jason Bowdach commented on Lowepost's course in The Art of Color Grading
HDR panel is not the best name - I feel a more accurate name is "Wide Gamut \ High Dynamic Range Panel" but thats clearly a mouthful. You can use them for both SDR and HDR grading. Some may say they're "technically" more correct but I would not venture to say "better". Personally, I adjust exposure using a DCTL (or HDR Panel) and creative adjustments using primary panel. Can't help but fall back on printer points frequently though...... Nope - not unless I get a QC note. If it looks good on my calibrated reference, it is good. Happy to apply soft clipping to a clip \ scene if needed 🤷♂️ Also, most finishing I use have some type of auto-limiter which you can set up in your template project as a "safety blanket". -
You may want to check out this recent PowerGrade collection. May even see a few familiar faces in there - with permission, of course.
-
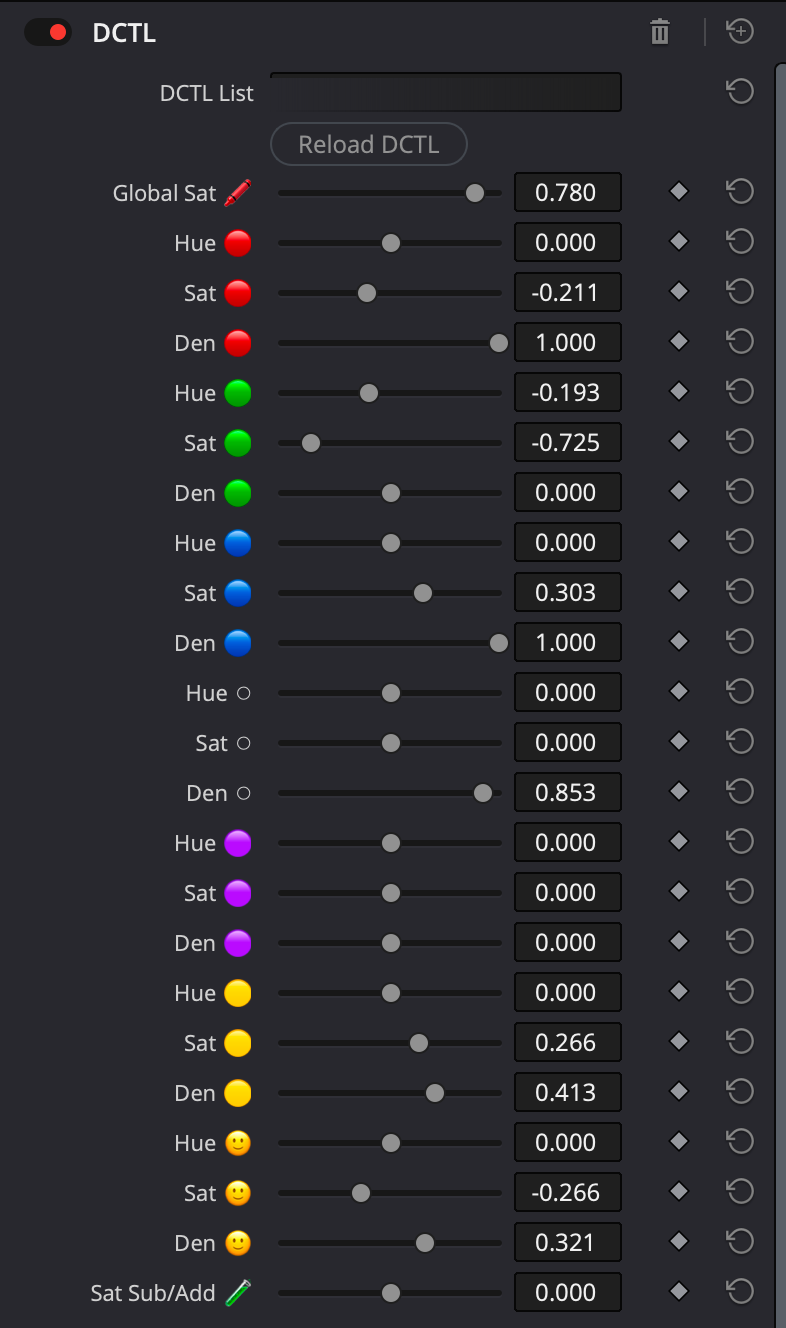
Hey Lowepost, If you work with DaVinci Resolve, you're familiar with the multitude of ways to adjust saturation. We have primary saturation control, hue vs. curves, and, of course, the color warper, just to name a few. I have a confession to make - I have a bit of an obsession with deep, dense, highly saturated colors, and I've never been completely satisfied with the primary saturation controls. They work "additively," causing an increase in luma/brightness alongside saturation. During my journey, I discovered various methods to achieve deeper and denser colors, such as working "subtractively" in cylindrical color space models. However, these methods often came with limitations, requiring complex node trees or intricate structures. I yearned for a better solution, one that allowed me to stay in my creative headspace. That's why we've developed a custom DCTL that simplifies the adjustment of hue, saturation, and density for 7 major vectors (red, green, blue, cyan, magenta, yellow, and skin). It's as easy as adjusting lift, gamma, and gain! If you're interested, you can learn more about it here. Plus, we're offering an automatic 25% discount for the first 50 orders during the preorder. The DCTL will be available on the PixelTools store on June 25th, 2023, at 11:30 pm PST. However, you have the opportunity to preorder today with a 25% discount for the first 50 orders. Thanks and keep up the awesome work!

-
Free Flexible Kodak \ Fuji FPE PowerGrade for Resolve 17
Jason Bowdach replied to Jason Bowdach's topic in DaVinci Resolve
Hey - we chatted but I thought I'd comment here as well so this question is answered for others. The color management of this PowerGrade is manual node-based DWG. It will work in RCM, aside from the halation compound node. Simply disable the halation compound node OR replace it with the built-in halation ResolveFX and set the effect to work in DWG / DaVinci Intermediate. The only thing you need to adjust the INPUT node, which you set to you input camera source gamma and gamut. Everything else should be all set-up for you. Hope that helps! -
Look Development & Workflow in DaVinci Resolve
Jason Bowdach commented on Lowepost's course in The Art of Color Grading
If I recall correctly, I applied the Bleach Bypass look still / PowerGrade created in the previous lesson to save a few steps. Hope that helps clarify! -
Look Development & Workflow in DaVinci Resolve
Jason Bowdach commented on Lowepost's course in The Art of Color Grading
I think you'll find that as training gets more advanced, its inevitably become a bit less "step-by-step" and more generalized thought process based but I'm always trying to make it consumable for a variety of skill levels. Is there anything specific you feel wasn't covered clearly? Feedback always helps for the next one! -
Free Flexible Kodak \ Fuji FPE PowerGrade for Resolve 17
Jason Bowdach replied to Jason Bowdach's topic in DaVinci Resolve
That before\after still is actually a different look from our Sample Collection (Teal & Orange 1). It designed to be quite strong at full strength, so it can easily be reduced in intensity using node opacity controls. A benefit of powergrades is they can be entirely adjusted, especially as I don't obfuscate anything. The look is mainly built using primaries and hue curves, so pretty easily to adjust.- 5 replies
-
- 1
-

-
- film emulation
- fpe
- (and 3 more)
-
Free Flexible Kodak \ Fuji FPE PowerGrade for Resolve 17
Jason Bowdach replied to Jason Bowdach's topic in DaVinci Resolve
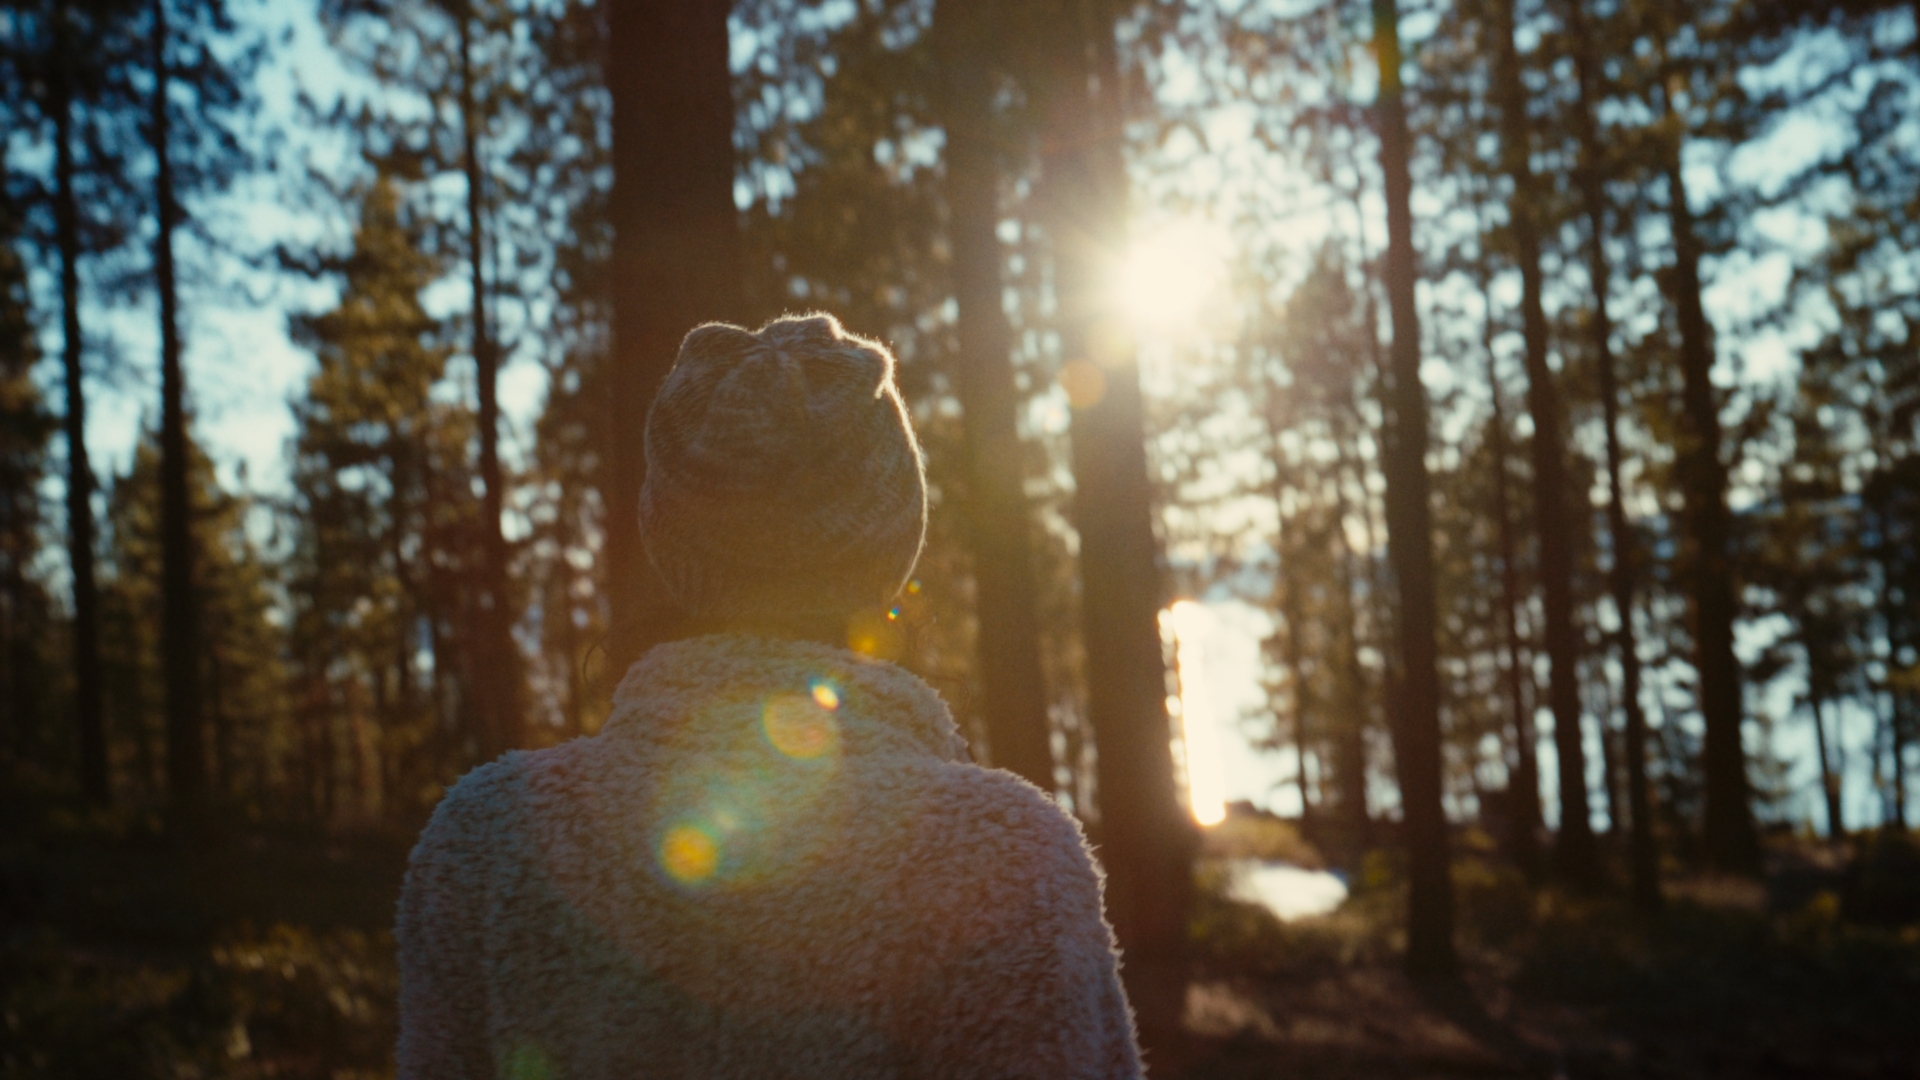
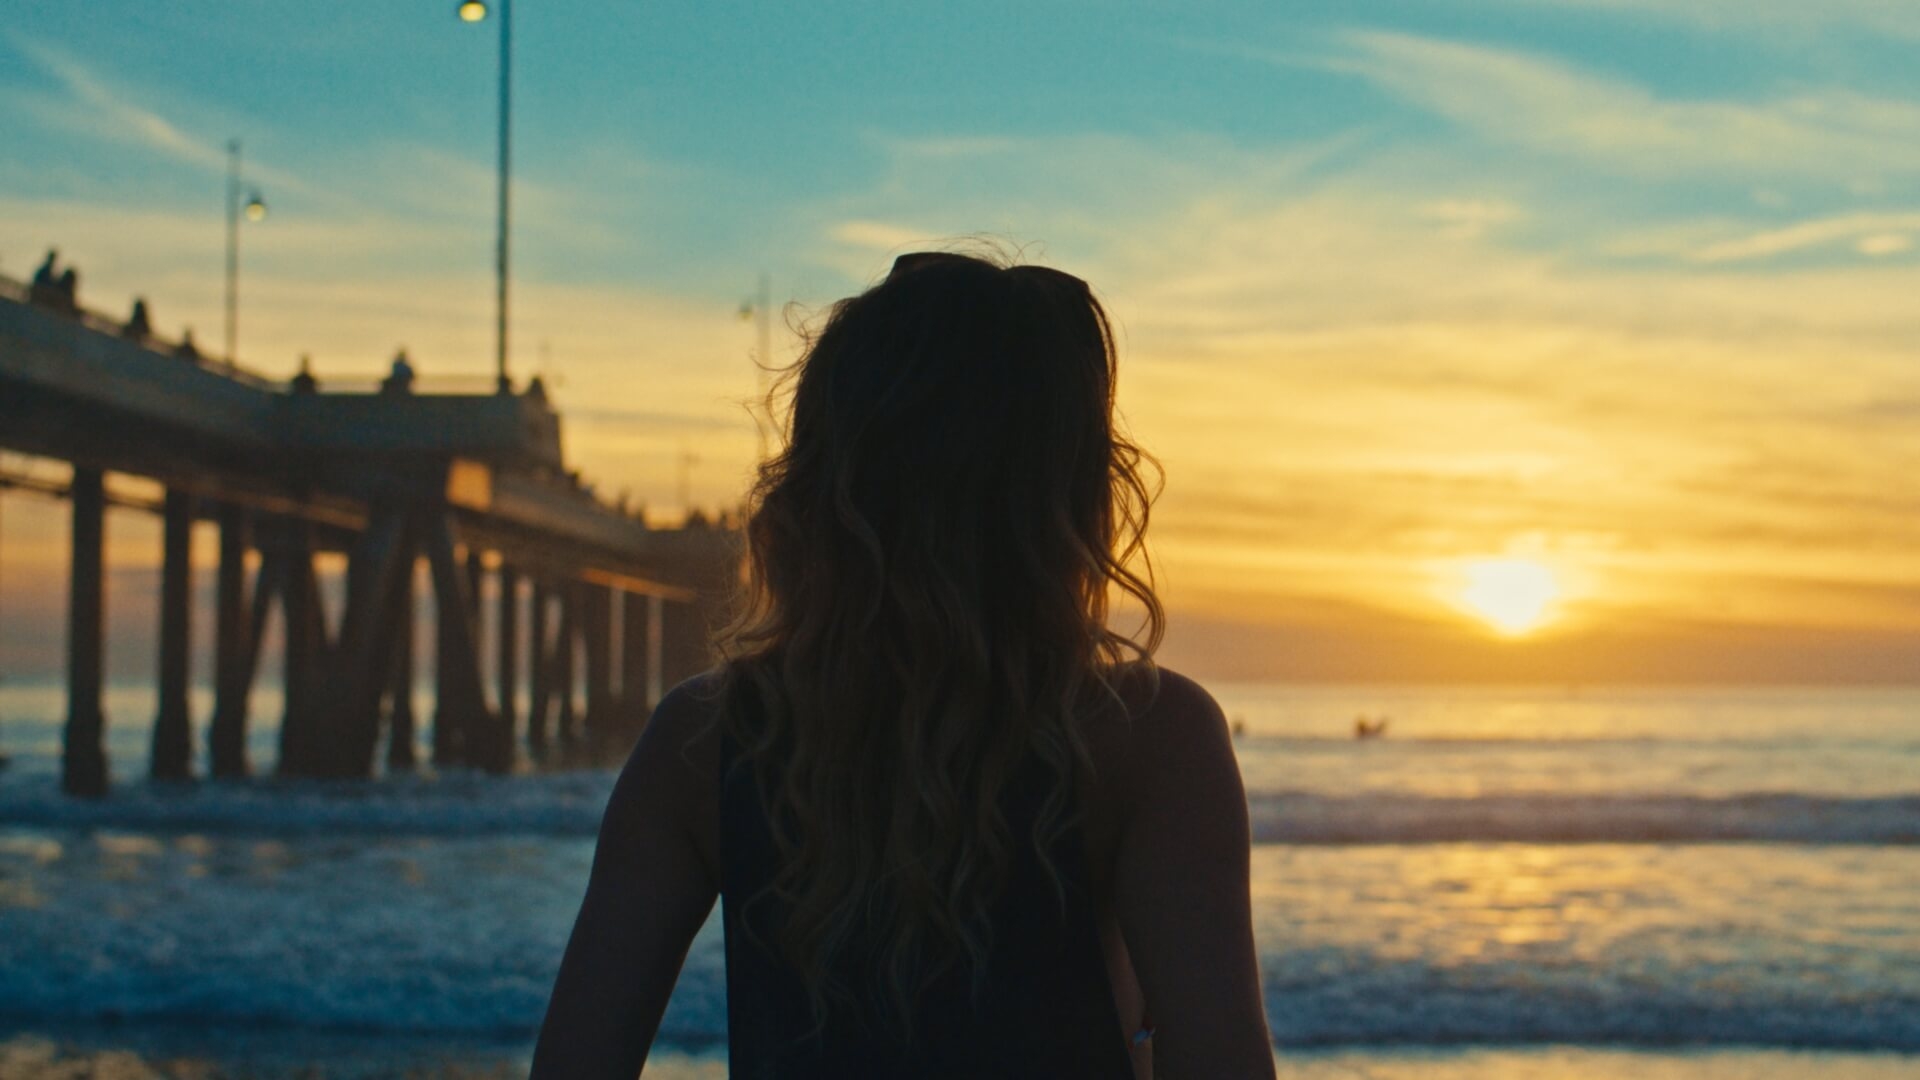
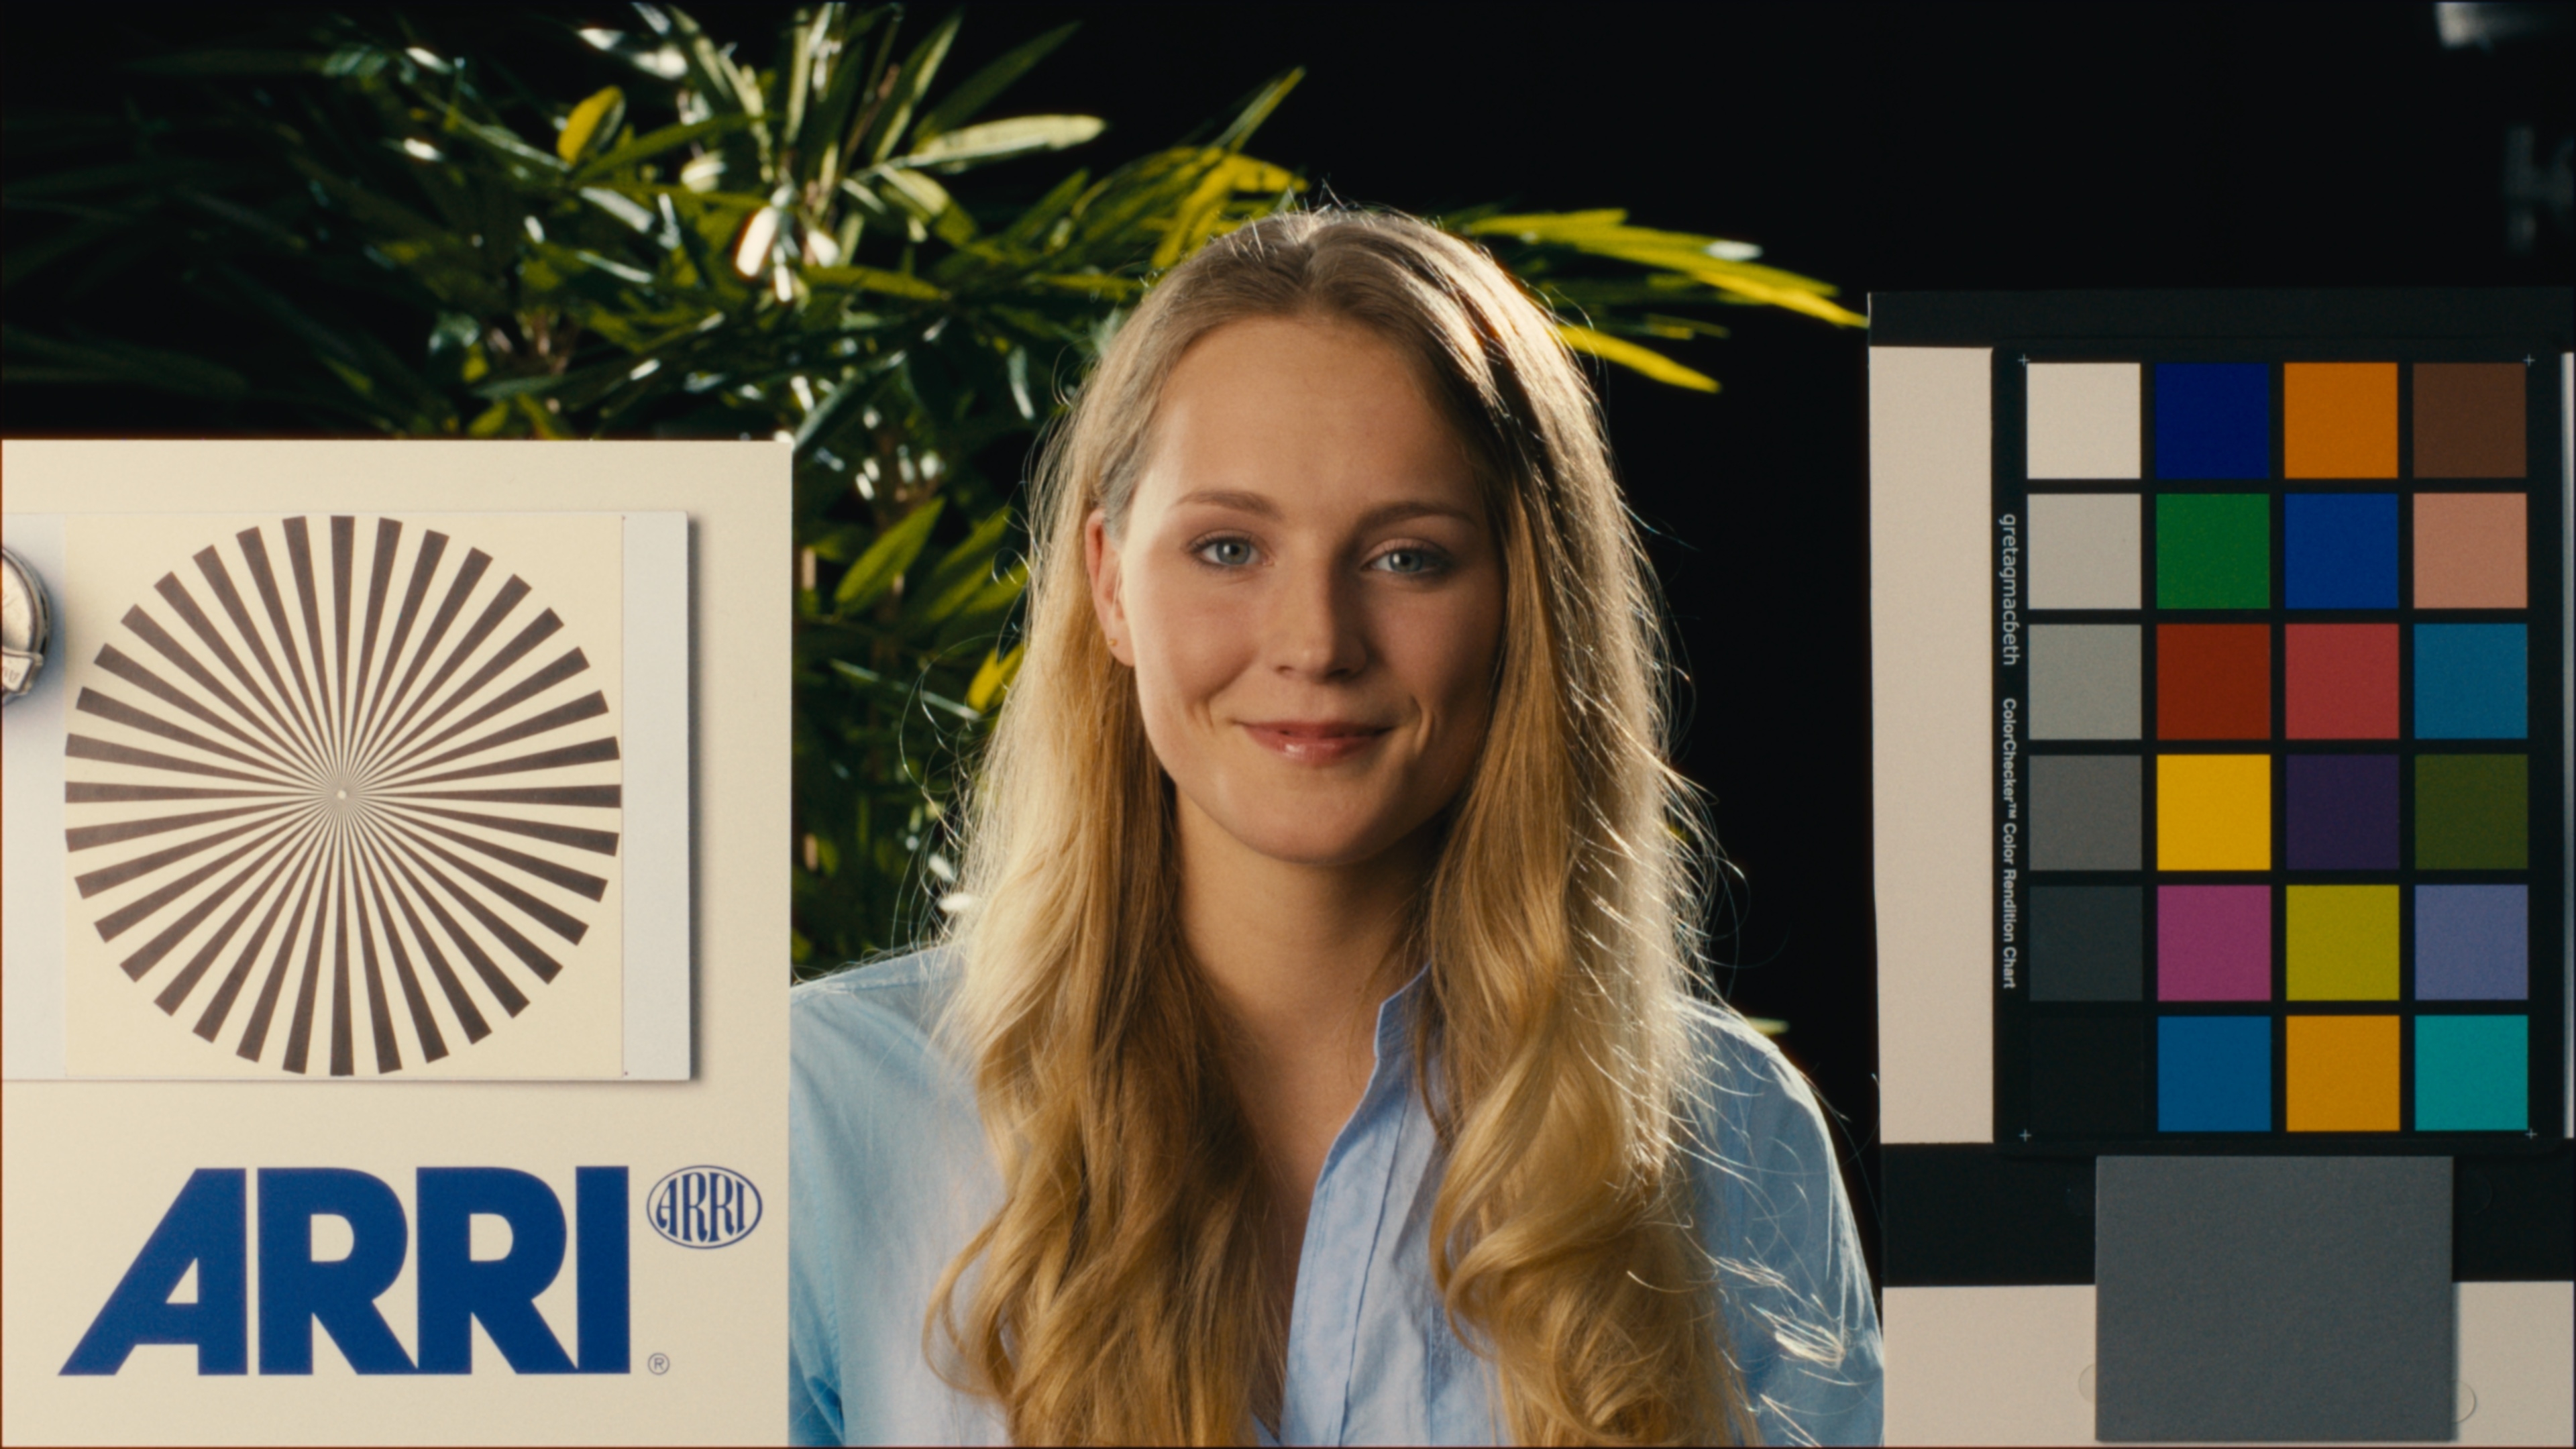
Sample Grade - Clips from Arri & Raw.Film
-
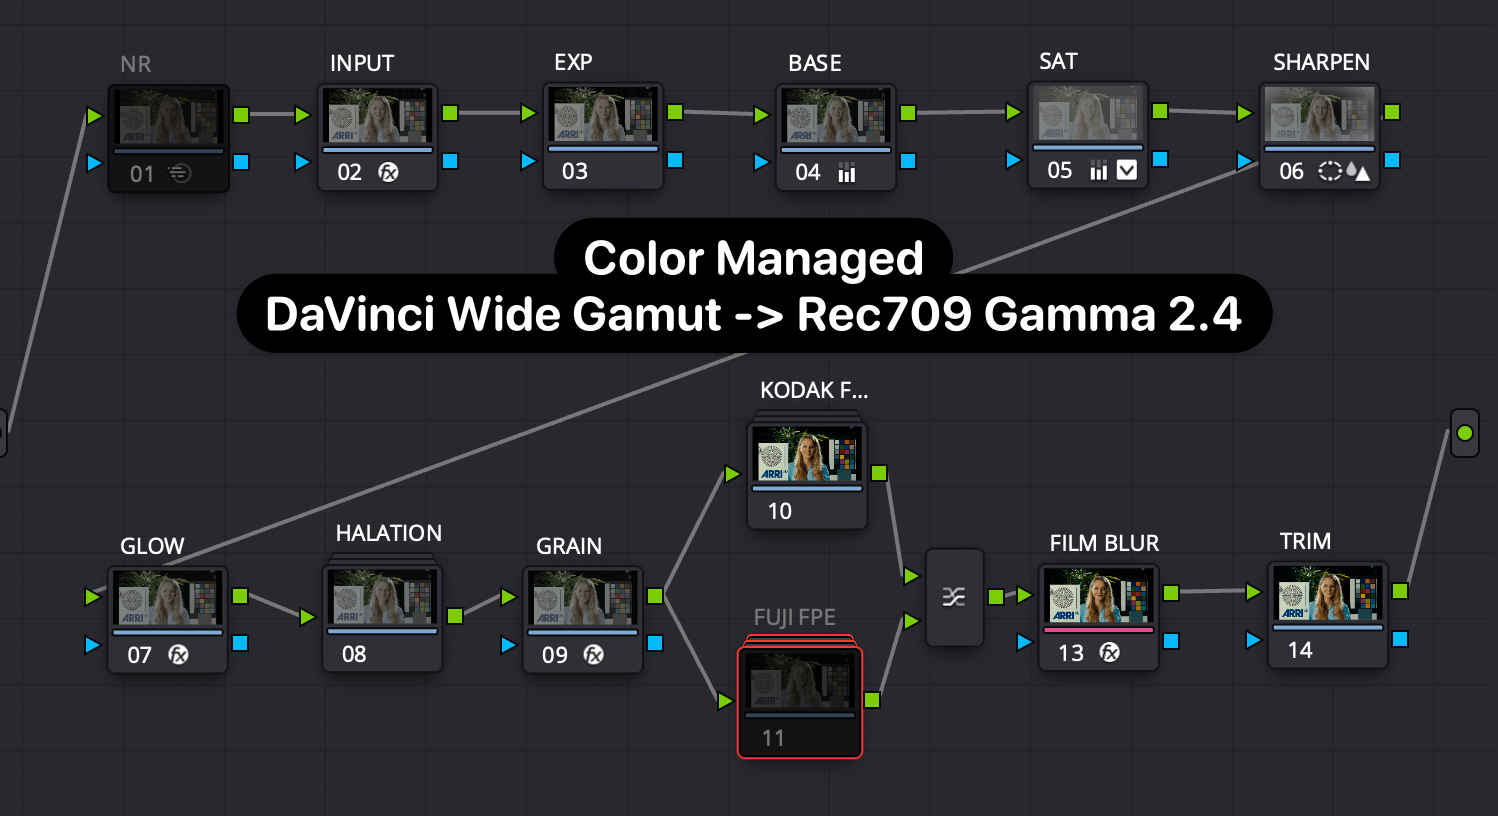
Hey Lowepost Community! Based on popular demand, we just released a brand new 100% FREE PowerGrade over at PixelTools The Kodak 2383 and Fuji 3513 FPE LUTs included with Resolve have been used in literally thousands of productions, but they require a bit of technical conversion before they work properly with modern high-end cinema cameras and workflows. The process is discussed in several courses on this site, including my own, but no need to set this up for EVERY project. This PG sets up a fairly simple node tree that handles everything needed to set-up and properly apply either legacy FPE look-up table to modern digital cinema cameras using modern color management on a node level, specifically DaVinci Wide Gamut (DWG) until output to Rec709 G2.4. Features: - Manual Node-Based Color Management - Just set your camera settings in Node 2 (INPUT) - Built-In Halation, Grain, Glow, and Film Blur - Multi LUT design - mix & match Kodak and Fuji FPEs using Layer Node - No Additional Plug-ins Required! Just DaVinci Resolve Studio 17.4+ (Free version works just w/o Film Grain Node) Free Download for Email Newsletter Sub (We respect your Inbox): https://pixeltoolspost.com/pages/free-powergrades Have questions, comments or feedback after using the PowerGrade? We'd love to hear your thoughts. Happy grading! Node Tree
- 5 replies
-
- 2
-
-
- film emulation
- fpe
- (and 3 more)
-
Fantastic!
-
Look Development & Workflow in DaVinci Resolve
Jason Bowdach commented on Lowepost's course in The Art of Color Grading
Are you talking about the curves? If so, there is a little lock icon next to the YRGB buttons that will gang and un-gang the channels together. In terms of methods, it all depends. I try to use the easiest method that gets me to my destination. Sometimes it requires nothing more than saturation, other times I may need to dig deeper with some of the tools \ techniques I demonstrated. All depends on what my final goals is. Thanks so much for your feedback. This course was intended for intermediate colorists, hence why we didn't cover some of the introductory topics like importing, organization on the media page etc. There are several other courses available on the site that go deeper in that area, but this was focusing more on grading techniques and mindset. Appreciate your feedback about the panel as well. I tried to provide some context whenever I did important tasks via the panel, but I can see some of it getting lost. I'll think about this for future training courses . -
Look Development & Workflow in DaVinci Resolve
Jason Bowdach commented on Lowepost's course in The Art of Color Grading
I suggest applying the HSV \ HSL deep color techniques I demonstrated while still on a scene referred (log) state, so before you convert to Rec709. If using an FPE, it depends what its output is. If it's still scene referred, you can do either before or after, but if we're talking the build-in one included with Resolve, you should do it before as it includes a transform conversion to Rec709. The main issue when using project level color management settings is the lack of control for techniques like halation and others that require sophisticated manual color management - one of the main reasons why I prefer using a "manual" node-based color management strategy as opposed to using project settings level color management. Unfortunately, the settings you provided for halation going between Log and Linear aren't working as intended as you're actually fighting against the built-in color management. For the halation technique to work as seamlessly as possible across a wide number os shots, we don't want ANY adjustment besides converting the signal from log to linear, applying the halation, and converting back to the exact signal we started. Ideally, we don't even want tonemapping, but sometimes certain signals (non-log to linear, etc) might require it. Same thing w ACES, project level can work, but it limits what "tricks" we can do, including the halation strategy I demoed - which is why many prefer using a "manual" ACES (sometimes called Fake ACES, or Pseudo ACES) set up within the node tree, as it allows the best of both worlds - great, industry-standard color management + full control over the color pipeline. -
Look Development & Workflow in DaVinci Resolve
Jason Bowdach commented on Lowepost's course in The Art of Color Grading
Ok - let's see if we can break this down one at a time. Just as a reminder - the majority of the course was presented using the DaVInci YRGB Unmanaged using the default Rec709 (scene) for the timeline color space. When you set change the timeline working space, most color grading tools (non-color space aware) will respond differently. It has zero effect on actual image quality, it simply changes how the tools respond when you adjust them. This should explains why your grades change when you change the timeline working colorspace between RWG\LOG3g10 and Rec709. Unfortunately, timeline color space needs to be decided at the start of the project and you can't really adjust without throwing out your grades. The issues you describe when using color management are very common, but I would suggest starting to "experiment" with using RCM2. Specifically, color space aware tools (like the curves and HDR Panel) will operate differently than what we're traditionally used to as Resolve is working "under the hood"to manage the color pipeline while we're grading. The initial feeling may be "strange" and unfamiliar at first, but after working with it for a while, you'll eventually adjust and it does start comfortable. The other alternative is to set-up a "manual" color management pipeline using CST nodes - I prefer this pipeline as I get the best of both worlds. It takes more time up front to set up my node structure and systems, but I like the extra control it gives me. I also have MUCH more visibility to my color pipeline than with typical "color management" system, as everything happens at a node level and not in project settings. Hope that helps answer a few of your questions. Feel free to follow up if I missed anything or if you have any additional follow-up questions. The built-in film emulation LUTS in Resolve are designed for SDR Rec709 \ P3 so they won't work correctly in HDR. If you need film emulation looks that work in both SDR \ HDR, I would recommend looking for scene-referred film emulation tools like Look Designer, PixelTools FilmLab, Cinegrain Pipeline, FilmBox, etc. These tools work in a scene-referred (or log) workflow so you simply convert to your "final" display format at the end of your pipeline, similar to what we did in the course. -
Look Development & Workflow in DaVinci Resolve
Jason Bowdach commented on Lowepost's course in The Art of Color Grading
I should have mentioned this in the course with a bit more detail - the temp and tint controls on the HDR Panel work in a far more technically accurate manner as we’re working in the correct color space /gamma. When you use the correct settings on the contextual menu for gamma and color space, it’s no different than working in a project-level color management in terms of how that specific tool functions. If you regularly work with log or raw media and prefer grading before the transform CST or LUT, a technically accurate saturation control can result in a more visually pleasing image with less fiddling. That said, It’s just another tool for you toolkit. It is pretty subtle and I totally understand the limitation w the small viewer. Next time, I’ll do a full screen playback. It’s so hard to do a proper grain demo over compressed media, but I hope the overall thought process came through over my VO - felt more than seen. Your comment also brings up a common issue with grain and I didn’t mention in the course but thought I should - your final compression can and will change how your grain looks. Be sure to test in your final environment (web, bluray, cinema) and using your exact compression method, if possible.