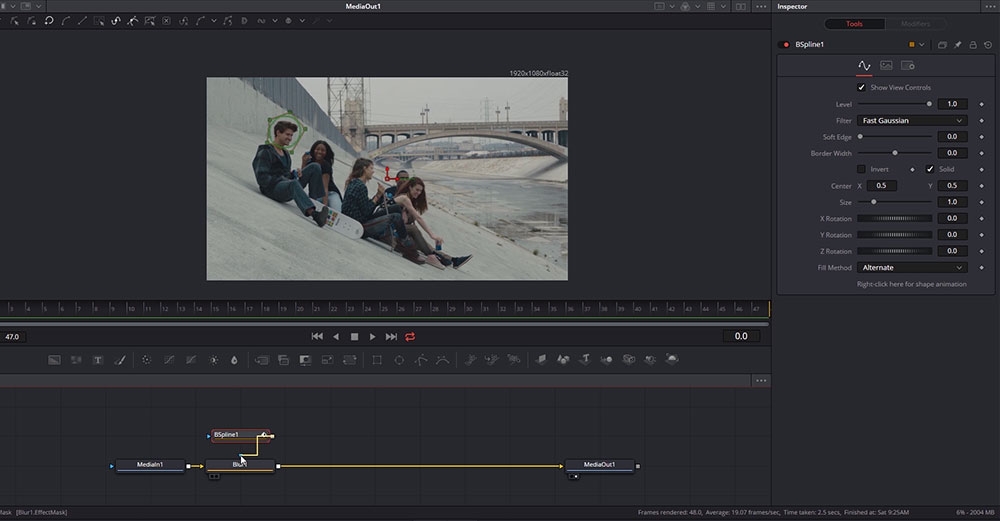
Introduction to visual effects in DaVinci Resolve Fusion

Introduction to Visual Effects in DaVinci Resolve Fusion

xap3.138.105.128

We are proud to introduce a new high-end DaVinci Resolve Fusion training series, designed for finishing artists with instructor Lee Lanier!

With 36 easy-to-follow video lessons, you will learn about everything you need to know to solve the most common finishing and visual effects tasks inside of DaVinci Resolve.

You will learn screen replacement, chroma keying, rotoscoping, masking for color grading, 3D, advanced 2D- and 3D-tracking, painting and cloning, warping, morphing, how to create light effects and much more. In addition, Lee will walk you through the basics so that even beginners that have never used DaVinci Resolve can follow.

The DaVinci Resolve project files and footage are available for download so that you can easily follow along.

About the instructor

Lee Lanier has created visual effects on numerous features films for Walt Disney Studios and PDI/DreamWorks. Lee is a world-renowned expert in the video effects field, and has written several popular high-end software books, and taught at the Gnomon School of Visual Effects in Hollywood.

Who is this course designed for?

  • Finishing artists
  • Visual effects artists
  • Colorists

Lessons overview

  • Lesson 01: Introduction
  • Lesson 02: Resolve Fusion integration
  • Lesson 03: Importing and interpreting footage
  • Lesson 04: Constructing tool networks
  • Lesson 05: Playing back
  • Lesson 06: Using multiple clips and rendering
  • Lesson 07: Adding and adjusting tools
  • Lesson 08: Overview of tool types
  • Lesson 09: Creating light effects
  • Lesson 10 Applying film and video effects
  • Lesson 11: Working with colorspace
  • Lesson 12: Merging inputs
  • Lesson 13: Domains and transforming
  • Lesson 14: Keyframing
  • Lesson 15: Editing animation curves
  • Lesson 16: Masking
  • Lesson 17: Rotoscoping
  • Lesson 18: Masking for color grading
  • Lesson 19: 2D motion tracking
  • Lesson 20: Stabilizing and tracking a mask
  • Lesson 21: Corner pin tracking
  • Lesson 22: 3D camera tracking
  • Lesson 23: Chroma keying
  • Lesson 24: Adjusting chroma keys
  • Lesson 25: Working with channels
  • Lesson 26: Creating luma masks
  • Lesson 27: Combining keying and rotoscoping
  • Lesson 28: Applying paint tools
  • Lesson 29: Paint fixing with clone brushes
  • Lesson 30: Animating paint strokes
  • Lesson 31: Warping and morping
  • Lesson 32: Introduction to 3D space
  • Lesson 33: Working with 3D materials and lights
  • Lesson 34: Grouping and adding macros
  • Lesson 35: Adding shortcuts and panels
  • Lesson 36: Wrap-up

Software required

A free version of DaVinci Resolve or DaVinci Resolve studio

Become a premium member and get instant access to all the courses and content on Lowepost.
 

Become a premium member


  • Like 13
  • Thanks 5

User Feedback

Recommended Comments


13 hours ago, Meagan said:

For any of the Resolve courses, is project media included?   Because without that, your courses are of much value, at least, to me.

Hi Meagan. You will get access to both the project files and footage. 

Link to comment
Share on other sites

Hello Lee, and all Lowepost members.
I'm really learning a lot from the course, but I have a question and I would like to better understand how Fusion works with brightness and contrast nodes.

Using lesson 19 (Stabilizing and tracking a mask) if I want to apply a color effect ONLY to the logo I create a color correction node and apply it after the logo node, correct? But if I apply it in the same way and work not with color, but with contrast or brightness the effect happens on the whole image, what is the reason for that?

001.png

002.png

003.png

Link to comment
Share on other sites
On 4/2/2020 at 8:46 AM, Marcelo Cosme said:

Using lesson 19 (Stabilizing and tracking a mask) if I want to apply a color effect ONLY to the logo I create a color correction node and apply it after the logo node, correct? But if I apply it in the same way and work not with color, but with contrast or brightness the effect happens on the whole image, what is the reason for that?

That should be an alpha issue. Disable the Alpha channel for the color tool (you can choose what channels a tool affects - check the Settings tab).

Something similar may happen if there is not proper alpha premultiplication (hence there is an Alpha Multiply tool).

  • Thanks 1
Link to comment
Share on other sites

Thank you for this course! For the life of me I cannot find the answer to this, is there a way to assign a viewing LUT to my reference monitor when working in fusion? I cannot find it in the manual or the UI anywhere!

Link to comment
Share on other sites
53 minutes ago, Dante Pasquinelli said:

Thank you for this course! For the life of me I cannot find the answer to this, is there a way to assign a viewing LUT to my reference monitor when working in fusion? I cannot find it in the manual or the UI anywhere!

If you use the version of Fusion that is built into Resolve, Resolve supports monitor LUTs, which you can create with external calibration hardware and software. Otherwise, Fusion only offers viewer LUTs which approximate various outputs. To assign a LUT to a reference monitor, you will have to go outside of Resolve of Fusion.

Edited by Lee Lanier
Link to comment
Share on other sites


Join the conversation

You can post now and register later. If you have an account, sign in now to post with your account.
Note: Your post will require moderator approval before it will be visible.

Guest
Add a comment...

×   Pasted as rich text.   Paste as plain text instead

  Only 75 emoji are allowed.

×   Your link has been automatically embedded.   Display as a link instead

×   Your previous content has been restored.   Clear editor

×   You cannot paste images directly. Upload or insert images from URL.