-
Posts
67 -
Joined
-
Last visited
Content Type
Profiles
Case studies - Free
Case studies - Premium
Resources
Insider
Courses
Forums
Store
Posts posted by Adéyẹmi
-
-
Corrections best done in log before transforming to rec 709 is the transformation itself. But how you transform it is the consideration. You can use a Log to Rec709 LUT, colour space transform or Davinci coulor space management. I personally dont think any is better than the other. But try experiencing all three.
-
Node trees are subjective. It's customized for user experience. Your taste. And that's if you really feel like having one. Probably how you would arrange ur apps on ur phone. Only you knows what u want and how u want it. Just go for it.
-
 1
1
-
-
30 minutes ago, Keidrych wasley said:
Try recreating Yedlins LUT, or Mitch’s 2383 with LGG, you’ll soon come up against a wall of complexity.Recreating a complex print film LUT using primaries is impossible. The maths available in LGG can’t get you even remotely close, because the underlying math in LGG is too simple / basic.
This is a good reason why studying color science and LUTs has value because it helps to understand the underlying math and what is happening ‘under the hood’.Learning to use LGG and learning about LUT building (along with the more complex color science that LUT building entails) are equally important and both of high value.
The sliders in Ravengrade from memory are mostly simple operations, eg adding gain in linear for exposure, changing tone curve for ‘volume’ etc. The complexity is in the data collection and the implementation of the data used to build the looks. For example Mitch supplied a print film emulation based upon a very large data set and implemented extremely smoothly. Take a look at some of those looks as a graphical 3D cube, there’s some very advanced color science on display such as extremely smooth outer gamut curvature etc that made me smile.
True that, but what I am simply putting out for someone new in colour is to start small. I have seen ppl two months into colour looking for tutorials on how to make their own DCTL. Its totally unnecessary to go complex when you dont understand the basics. Like any other artistic practice. You shouldn't jump to playing Chords if you dont know your basic Tonic Solfa. Ppl are too overwhelmed with the technology and tools. They want to start big rather than basic. The other day I had a conversation with a film student, she was quick to talk about kodak this and that, but didn't know what printer lights is. The look above can be achieved with a combination of colour curves and colour seperation if the photography lends its self. Whether scene or display referred.
-
If you are quite new to colour, my advice to you is to not bother at all about Plug-ins and LUTs. Stick to your LGG, sat and colour curves. Knowing how to tweak things manually, colour seperation, tonal range gradient. Thats where real practice lies. You need to train your eyes and grow your taste. These are the things that makes you become an actual colourist. And then later, you can experiment. Believe u me, as far as grading is concerned, what matters is the photography, your monitor and computer speed. Everything else is very minor. This look can be created with 2 to 3 nodes using LGG primaries, and colour curves only.
-
 1
1
-
-
On 10/9/2021 at 11:13 AM, lewis jacobs said:
Would someone be able to explain to me how in colour grading you can create "density" in an image or give the image "weight"???
I think what u r trying to say is texture/rich contrast. A punchy looking image. Play with your luminance tools. Lift gamma gain. That's the best there is. Always lower your highlights. Keep them soft. Play with the mid tone to keep the image bulky, by lowering it too. You will start to see the difference. Keep a good reference. It's all in your lift gamma gain. Sat VS Lum is another good tool to play with.
-
Hi guys, is there someway to make my LUT batch export from Davinci get labeled according to the timeline TC in of the respective shots, as opposed to shot number. Can I change the label attributes? Thanks
-
Lucidlink is the best I know. Very efficient. https://www.lucidlink.com/download/
Its a virtual server basically.
-
 1
1
-
-
Davinci WG. I hope this is as beautiful as Tlog. Super excited
HDR wheels, now I dont have to miss BL Basegrade.
Texture pop. Always wanted a texture equaliser tool at the top of the layer, or appended to the end of my node structure.
The magic mask thingy is a game changer.
And I am stoked.
-
8 hours ago, Thomas Singh said:
How to remove empty space on the timeline in DaVinci Resolve? I have more than two hours of blank space after the last clip on the timeline that I want to remove, and I have tried to set in+out point and delete it but it doesn't work.
Use the delete button. When u use the backspace to delete it deletes only the clio, but delete deletes both the clip and space.
-
On 10/1/2020 at 7:42 AM, Dmitry Lobaskov said:
Hello! check this video. Our plugin provides the precisely measured Color head/printer lights process representation in Davinci. In a real world this tools works in unlinear manner - color changes unevenly and contrast is changing as well.
Is it now on Windows
-
I did. They came up with stories, like, we are sorry, its due to the holidays... WTF.
-
Hi guys, does any one have experience purchasing from B&H. I ordered 2 items 11 days ago...at first they said they were going on an holiday but did not announce it until after billing me for my two items. They claimed they would be back on the twelve of Oct, 9am, which was yesterday. Even after paying for my item and checking out since the 2nd, my card has been billed an extra three times, $17, $1 and another $1. Is this a scam site? The status of my order still says processing, even though on the 2nd they claimed I would receive it in 4 to 7 working days.
https://www.consumeraffairs.com/cameras/bh_photo.html?#sort=top_reviews&filter=none
-
On 6/11/2020 at 6:02 AM, Rachel C. said:
Its on da vinci 16.1 bruv so goodluck there. Just came across it today. Thank god forums exist
On the top left corner in the media page, where the drives are seen... Right click to add - (drive). Cos if the drive is not added yet, you cant drag and drop
-
On 3/2/2018 at 5:11 PM, Paul Dore said:
Peter Doyle used simple math expressions to achieve channel suppression, much like a despill operation (which Jussi was referring to). You can do this in Resolve with LUTs (good) or DCTLs (better). One of my first plugins was called BlueBox, which was based on the process Peter Doyle described in an fxphd interview he did several years ago. An extended version of the plugin, called ChannelBox, is described here:
Links to the source files and complied plugin can be found there too.
Any thoughts on dealing with DR's harsh highlights technically? I am trying to imitate the baselights carefully compressed very soft and soothing highlight roll off. Either by DCTL, or anything. Any tricks, at all? Thanks in advance.
-
Hi guys, Both BL and DR users, any thoughts on dealing with DR's harsh highlights technically? I am trying to imitate the baselights carefully compressed very soft and soothing highlight roll off. Either by DCTL, or anything. Any tricks, at all? Thanks in advance.
-
Hi guys, Both BL and DR users, any thoughts on dealing with DR's harsh highlights technically? I am trying to imitate the baselights carefully compressed very soft and soothing highlight roll off. Either by DCTL, or anything. Any tricks, at all? Thanks in advance.
-
On 3/16/2018 at 4:09 PM, Luca Enrico said:
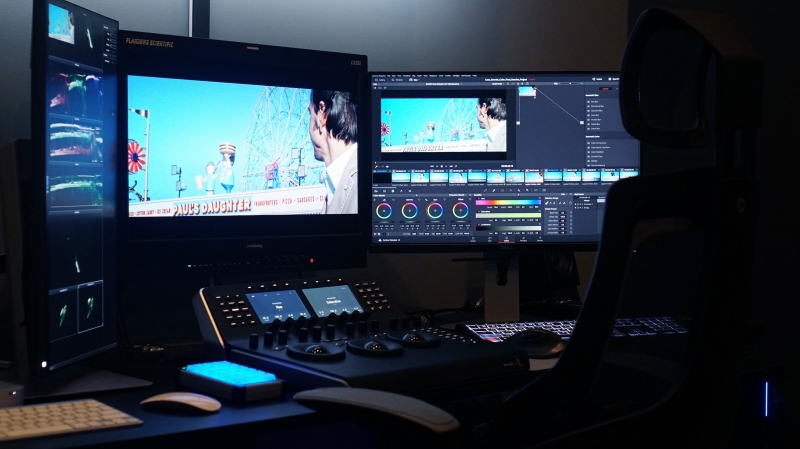
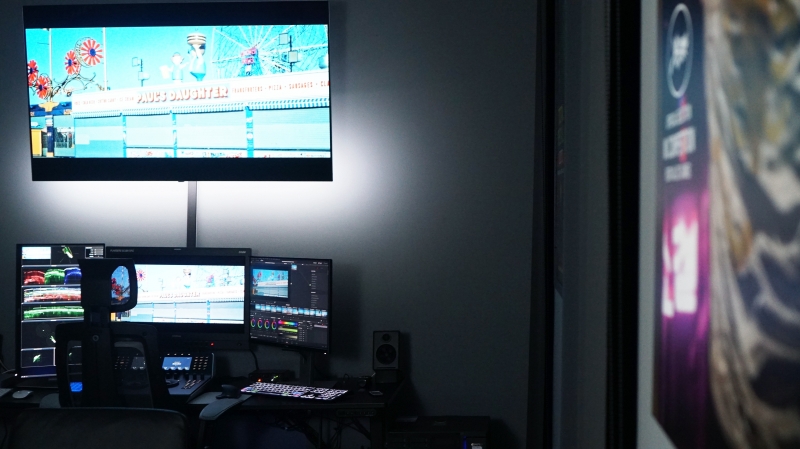
Here my main suite in Brooklyn.
- .FSI CM250 connected to an Oled Eb7 Lg 4k tv via box I/O (with calibration Lut) and Aja sdi to hdmi 4k converter.
- .The machine is a beast PC custom made by B&H connected to a Qnap NAS 48T via Thunderbolt 3.
- .A mini mac runs scope box software for monitoring external scopes.
- .DR mini panel + X-Keys24 and a DR keyboard made by Editorskeys
Best,
Luca Enrico Canessa
What backlight r u using?
-
On 2/18/2019 at 1:37 PM, Davi Silva said:
Hi there,
Does anyone would be kind and share our Avid Artist Color settings?
Mine stopped working and stupidly I restored the file and now I cannot redo the file and reassign to my taste.
Cheers
This might be a bit challenging, but it helped me.
-
On 10/15/2018 at 1:24 AM, Anton Meleshkevich said:
@Adéyẹmi Oh, I know what you talking about. Half reddish and half yellowish face. A powder which has a different color from the concealer. I met this on a couple of projects. As far as I remember, I exported stills to 3D LUT Creator, then made AB grid correction to fix this. Then I applied the LUT using power window tracked to the face with smooth edges or with additional subtractive power windows to preserve lips and ears natural redness.
But that was not even close to fixing yellowish teeth on singer's CU shots. A LOT of roto.Better still, call it a day.
-
24 minutes ago, Anton Meleshkevich said:
It's a compound node.
Import (still) - jpg file type - open skin_retouch.jpgThanks
-
5 hours ago, Marc Wielage said:
On Baselight, no. It's a powerful system, and I'm sure there's an equivalent of it there.
Thanks.
-
On 11/21/2017 at 11:37 PM, Anton Meleshkevich said:
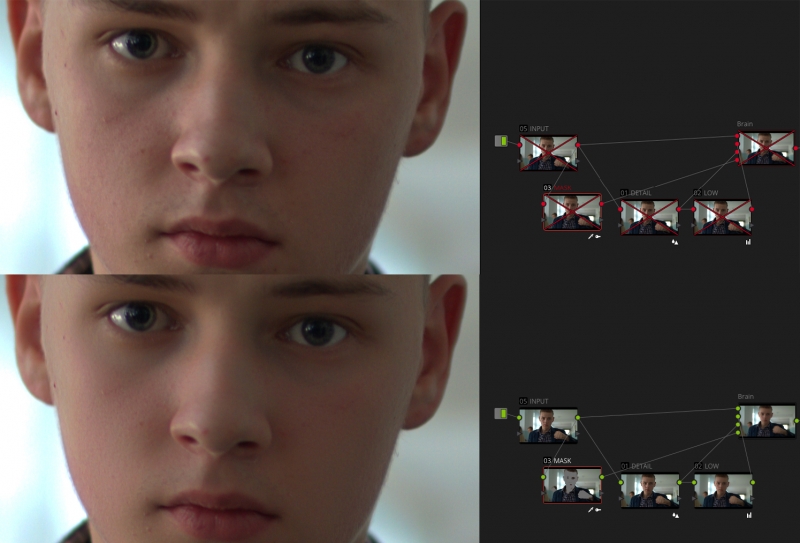
I made a frequency separation tree in Davinci.
Here is a .drx with the node tree (and some how-to-use pics)
https://drive.google.com/open?id=1lp2FQFX4NaPFv9NHtD-dOwLdqzbVmcxZ- Select Skintone on MASK node (mask is inverted)
- Adjust Blur on DETAIL node to keep detail (More blur to keep more high freq detail)
- Adjust Blur or MD (works better than Blur) on LOW node to adjust low freq.
The brain node...is it a parallel, layer, or key mixer? Or kindly export me a dpx file, the drx wont import, thanks.
-
On 11/10/2016 at 12:17 AM, Abby Bader said:
It's a great tool. The different color channels can be used to add and subtract nuances and shape an image to be something really different. Just be careful that it could introduce some unwanted noise. I often find that I have to add some subtle grain before rendering to help match the noise levels.
by any chance do you know how this monochrome mode on the RGB mixer is achieved using either colour crosstalk or colour matrix on BL?
-
On 9/29/2018 at 8:06 PM, Anton Meleshkevich said:
@AdéyẹmiDoes it bypass grading even for render as Nicolas interesting?
Sorry it only mutes all nodes on your colour page. For rendering, on the export page, under video, go to advanced settings, you will find Enable flat pass, choose the Always on option.
-
 1
1
-


CDL
in DaVinci Resolve
Trying to learn more about CDL's specifically related to post production, when is an ideal time to use it while colour grading. And how do I create one in Davinci. Thanks!