Craig Melville
-
Posts
10 -
Joined
-
Last visited
Recent Profile Visitors
2,055 profile views

-
I did report it to the tech support at Black Magic back in 2021. I never heard back on that specific issue unfortunately. I'm pretty sure I suppled them with example clips and the project. I just had to manually assign the clips. You can group select similar clips and select their channels in a batch. But that's a stupid process to have to do on a complex edit and a complete waste of time - especially if the clips are scattered across the timeline in random spots as sometimes happens. It makes me wonder how anyone could actually import an XML into Fairlight/Resolve properly to do a sound mix. It kinda kills the whole process if that is a consistent issue. I'd suggest reporting the issue too. I did try AAFs as well as XMLs but I don't think that improved anything. Not sure how it works from other editing apps - but I have a feeling it will be a similar issue when there's larger multitrack files.
-
Timeline Rendering in Resolve - what's the deal?
Craig Melville replied to Craig Melville's topic in DaVinci Resolve
Hey Ryan, I feel your pain. I've done a lot of experimenting on this in the last few days and I think I have a few workable clues I can share: • If you are using Neat Video it causes problems. Even in a 2k Timeline is causes weird rendering behaviour. And I assume if Neat Video can cause this issue, perhaps other OFX plugins can do this too. To work around this I tried a bunch of things - playing around with optimized media, changing the GPU setting in Neat etc. None of those worked. I optimized R3d files onto an external SSD which gets about 800MB/sec and was using a 2k timeline. Original material was 8K r3ds. What did finally work was making sure all the media and cache files were on an extermely fast SSD drive (I bought a Thunderblade 8TB drive which gets 2400MB/sec). When the original R3d file were on a slower RAID, and even when the Media was optimized onto an SSD it still caused issue of cache disappearing like the above clip. So even though you'd assume the system is reading from the SSD it is somehow seems like its calling on the original media. Which seems totally stupid (if that indeed is what's happening). Surely once it's cached to a fast drive it should not need to do anything with the original media. But clearly something else is going on under the hood. - Once everything was on SSD drive that weird disappearing blue line issue also resolved itself. It began caching correctly and overall the performance of the system felt a lot less buggy / crashy. HOWEVER. even though the blue line would stay put and render nicely, I'd get playback issue after that caching had happened. The blue cached timeline area would play at 10-20 FPS. HOWEVER #2: When I restarted Resolve it would play fine. So something bad happens when Resolve caches complex plug-ins - that breaks the playback system temporarily. - Also you are correct - when the problem clips are "rendered in place" the playback would work fine and that would work straight away without restarting Resolve. I could even get 8K timelines to render in place and playback on my iMac at 23.976. But if I tried to cache those in the timeline (as opposed to Render in Place) it would often crash the software and the OS. - I did notice that upgrading to Big Sur seemed to fix the worst of the major crashes. In Catalina these complex Neat Video processing would freeze the whole computer and the iMac would restart. But on Big Sur the worst it would do would be to beach ball. With the above issue all forms of caching in the timeline did not really have any noticeable effect on stopping the disappearing render and playback issues (prior to the SSD fix) . I had many examples where the node was cached and blue but the timeline would not cache. Again this issue seems to be fixed by using the SSD. I really wish I understood what the heck is goin on here. It's super counter intuitive. Surly if the timeline is blue and the cache is on a fast SSD it should play. But this is not the case unless you know all these above tricks. Even when I tried optimizing the material to tiny resolution and they trying to playback it would not cache and playback would still give less than realtime playback. However - as mentioned, after restarting Resolve, the cached area would play back fine. And then even when I rendered things further down the timeline they would work - which is very inconsistent behavior. My best theory is that Neat Video breaks something in the timeline render process. And I'm not convinced this is a purely hardware related issue. The fact I can actually get the system to render in place an 8K Neat video clip and get it to work and playback fine indicates that the system I have is capable of rendering something x4 bigger. Yet when I try to do the same task but in 2k timeline (not Render in Place) I can not get realtime playback after that task has completed - that to me feels like a failure in the timeline rendering system to manage the process. I'm ruining on a iMac 10 core i9 with 128 GB of RAM and a 16 GB GPU. And I was still getting these issues when I switch the Neat Video plugin to only render using CPU. I've used Neat video in Premiere on the same timeline settings on computers that have 1/4 of the performance of this systems. So something is definitely wrong here. • Separate but related issue, I know early versions of Look Designer OFX plug-in have issues because each clip as it would play would do a security check for licensing. So that cause weird playback - the solution was to create a LUT and just use that to regain realtime playback. This is no longer an issue - but that would drive me crazy too. • The caching system in general is very odd in Resolve. So in summary: 1) Beware of Neat Video and other plugins. And remember that caching them with user /smart or Node Caching is no guarantee they will playback or not cause weird issues in the timeline rendering system AND the could cause temporary non-realtime playback issues. 2) Put everything on SSDs - HDD Raids seem to cause issues even if the cache drive / optimized media is on an SSD. 3) Once timeline clips are blue you may still need to restart Resolve to regain realtime playback. 4) "Render in Place" is a much more stable way of making sure the timeline plays back. Render in Place will render far more complex plugins without crashing and at higher resolutions. Also it is much less susceptible to being lost due to a crash. And I guess you can even drag in the actual files if you got desperate. One note on that - If you do select a bunch of files to Render in place and the system crashes you will lose all the renders. Even if Live save is one and the system is autosaving. That is a stupid design. Imagine leaving a 30 minute episode to render and you come back hours later to find the whole thing has failed. The you'll have to baby sit individual batches of smaller "Render in Place". 5) One other thing I learnt is some of the caching modes (I think Smart mode does this) will render all the version you have of grades on clips. So if you have 20 grade versions on a clip the system will render all of those. That could really cause a massive delay to rendering and increase the likelihood of a crash or cause the system to seem like it is crashing. You can delete the unused grades in the color page. 6) one other thing I found was Turing "Render Colour output" to off sometimes seemed to stop the weird disappearing cache behavior. No idea why that would make a difference but toggling that did seem to fix it. I've been in touch with Blackmagic and reported this issue and I've sent them videos. But you should also submit your experience to make sure the system is improved and the bugs are figured out. Some of these things don't matter so much when you're just focused on color but for finishing they can be a real deal breaker. -
I find on long complex timelines, Resolve's timeline rendering behaves in unpredictable and weird ways. I've experimented with both Smart and User modes and caching individual node, and using the Cache colour output methods. I find on big projects timeline turns blue in parts, then those blue patches become red again. So unlike other editing software, I can't assume that the rendered areas are fully rendered and I can't trust that they will stay rendered. That becomes a major issue when I'm relying on the timeline's rendered cache to speed up exports. It's not a big deal on a 2 minute edit but when it's a 30 minute program with 8K raw footage inside it, it's the difference between exporting a timeline in 5 minutes vs several hours. I've noticed this behavior for years, but I've never got to the bottom of what's going on. I assume the timeline is doing multiple passes at different node layers. But hard to tell. And it's then hard to tell when it will decide that everything will need to be re-rendered. Any clues as to what's going on here? I've got lots of RAM 127 GB, 10 core 3.2 GBZ i9 iMac and lots of SSD Cache. And I've deleted the cache. etc. https://vimeo.com/561671441
-
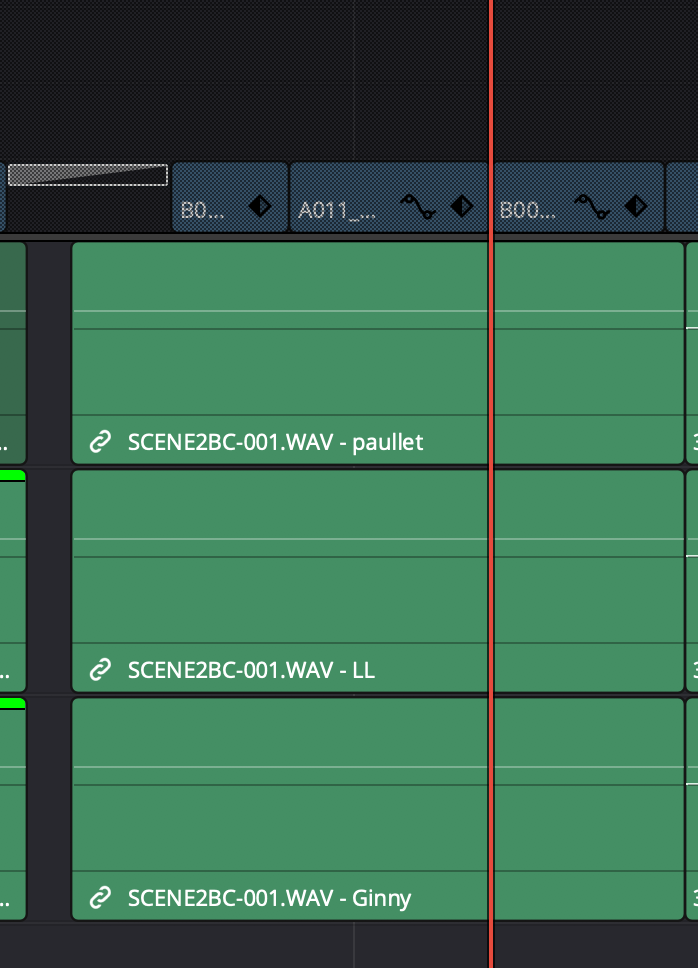
I've come across this issue many times coming when exporting and edit from Premiere via XML or AAF to Resolve 15-16 and 17. Audio clips from the field audio recorder come in correctly placed in the timeline - but the audio clips 'source channel' defaults to 'mute'. I can manually fix each clip by individually setting the clips 'source channel' using 'clip attributes'. But it's a pain and it's not a workable solution on a complex job. You can apply those changes to multiple clips at a time, however on a timeline that has hundreds of carefully placed and manipulated audio clips, it's a time consuming process and prone to causing errors. Interestingly, if I go to the audio file in the media pool and view its attributes there (rather than via the clip attributes in the timeline), the channels are mapped correctly and not muted. So the source clips play as you'd expect in the media pool. It's only the instances in the timeline that get imported with muted audio channel settings. I'm assuming the issues is the XML can't handle the multitrack audio clip and can't pass the channel patching information through. Which does seem weird - because on each timeline clip, I can see the label of the channel appended to the clips file name. i.e. in the timeline I'll see the filename plus the "boom" or "Lav 1" appended. That's metadata coming through - not a file or clip name. So the clip is indicating what track it's supposed to be but the system is just not patching it correctly. Is there some way to solve this? This issue appears when I'm using multichannel field audio files from Sound Devices recorders. Music tracks and other audio comes in fine. One other note: If I open the Premier XML in FCPX, the audio clips are not muted - but they are also not correct either. FCPX basically switches on all of the multitrack clips. So that's not ideal either. My guess here is these multichannel field audio grouped tracks are causing the issue. Surely for Resolve and Fairlight to be a viable solution to finishing audio there must be a way to do this in an automated way. Or should I prepare the audio files in a different way. AAF from Premiere can be read by ProTools and other apps without these issues - so I assume it must be possible to translate the information. Thanks for any thoughts to solve this. Or ideas on how to better set this up in future.

-
Thanks Bruno, I had another look at it today. I managed to solve the issue in Resolve by "Exporting metadata to" in the edit page. Opening the csv file in Numbers then creating a new field for Scene and pasting the data from the Desc field into the new Scene field. I then used "Import Metadata to" to update the metadata in resolve. (And yes I think I incorrectly pasted the wrong screenshot above.)
-
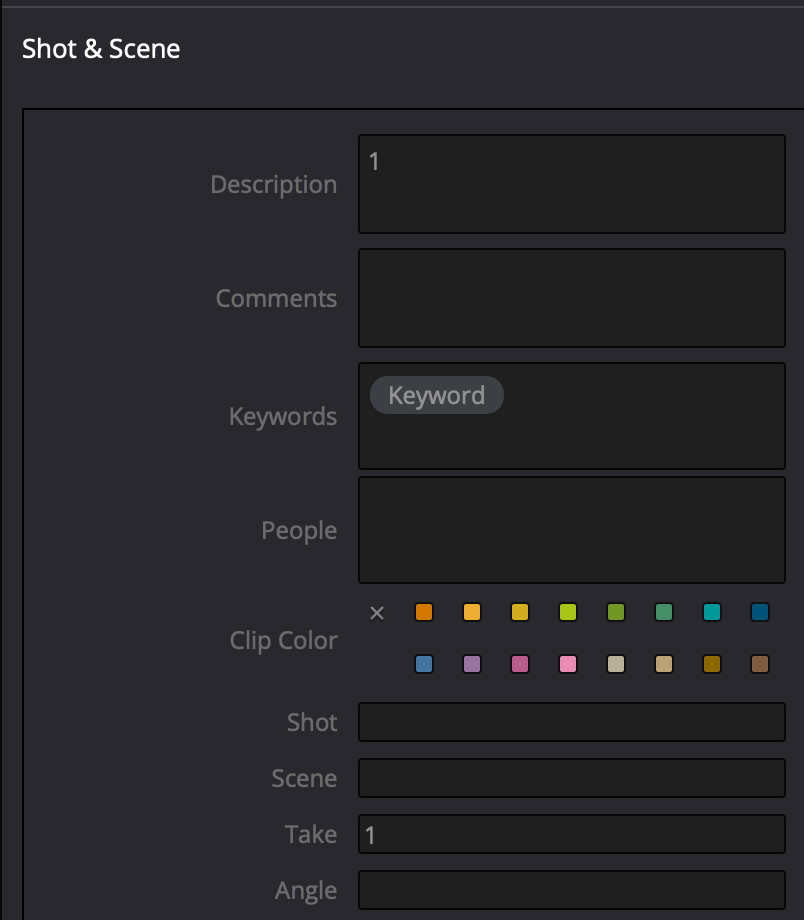
Hi folks, I'm having trouble with Premiere and Resolve not understanding the scene and take metadata contained inside r3d files. On a shoot I diligently logged the takes and scenes into the camera metadata on the red. Red cine X shows the correct information as shot. This was simply the Scene and Take numbers we created as we shot the material. (see below) Resolve sees the Scene as description and the Take as the Take. Which is good enough to make it somewhat useful. However, by default Premiere sees neither of these bits of metadata information. People have suggested exporting an XML from Redcine X. That only imports the scene number but not the take. Surely this information is super useful. So why the heck is it so hard to actually get an editing system to actually read it? Also Premier and resolve don't seem to understand the metadata when I move between the apps in XML. Also when I export an XML out of Redcine X it mangles the embedded audio tracks. They appear off-line and want to reconnect to non-existent files. So the only way I can get any Scene metadata into Premiere causes the timeline to become essentially corrupted. Any clues here? I'm trying to find a way to make this process streamlined and organised but it's proving to be very messy. Love to hear any theories. REDCINE X: Resolve sees the info in a slightly wrong way but at least it's there. Scene is mapped to description and take appears as take:
-
So perhaps that step was missing. Sounds like we should add reel numbers to the proxy media to help them link up. I used to use an app called qtchange to do that to qt files. It was handy on DSLR files as they’d often have the same file name. Don’t think that app works on the new macs. If I recall correctly, changing the reel numbers in the editor didn’t change the reel numbers on the files. But I assume premiere would at least take that info into the xml if it was in the project. If the files have the reel numbers embedded then the whole system would work much more reliably. I’ll play around with that too. Thanks again for you advice.
-
Thanks Jamie. Appreciate your prompt response and thanks for sharing your thoughts on this. I’ll definitely test your approach out. One thing I notice is the .R3d files do not have reel numbers nor do the proxy files - so I assume that is what always causes incorrect shots to be conformed if the file names don’t match 100%. This happens a lot when we’ve got timelines that use material from multiple days. The likelihood of having a multiple incorrect timecode match is high. (And super annoying to fix on a big job.)I’ll read up more in that syntax you mention for the search and match criteria. Sounds like I need to force it to consider the file name minus the last three digits (which occur because if the spanned files), exclude the extension and match on timecodes. I swear I’ve tried to do that before using the dialogue box in the relink to media in bin with loose file names and .r3d extension forced but I’ll try your way using your approach.
-
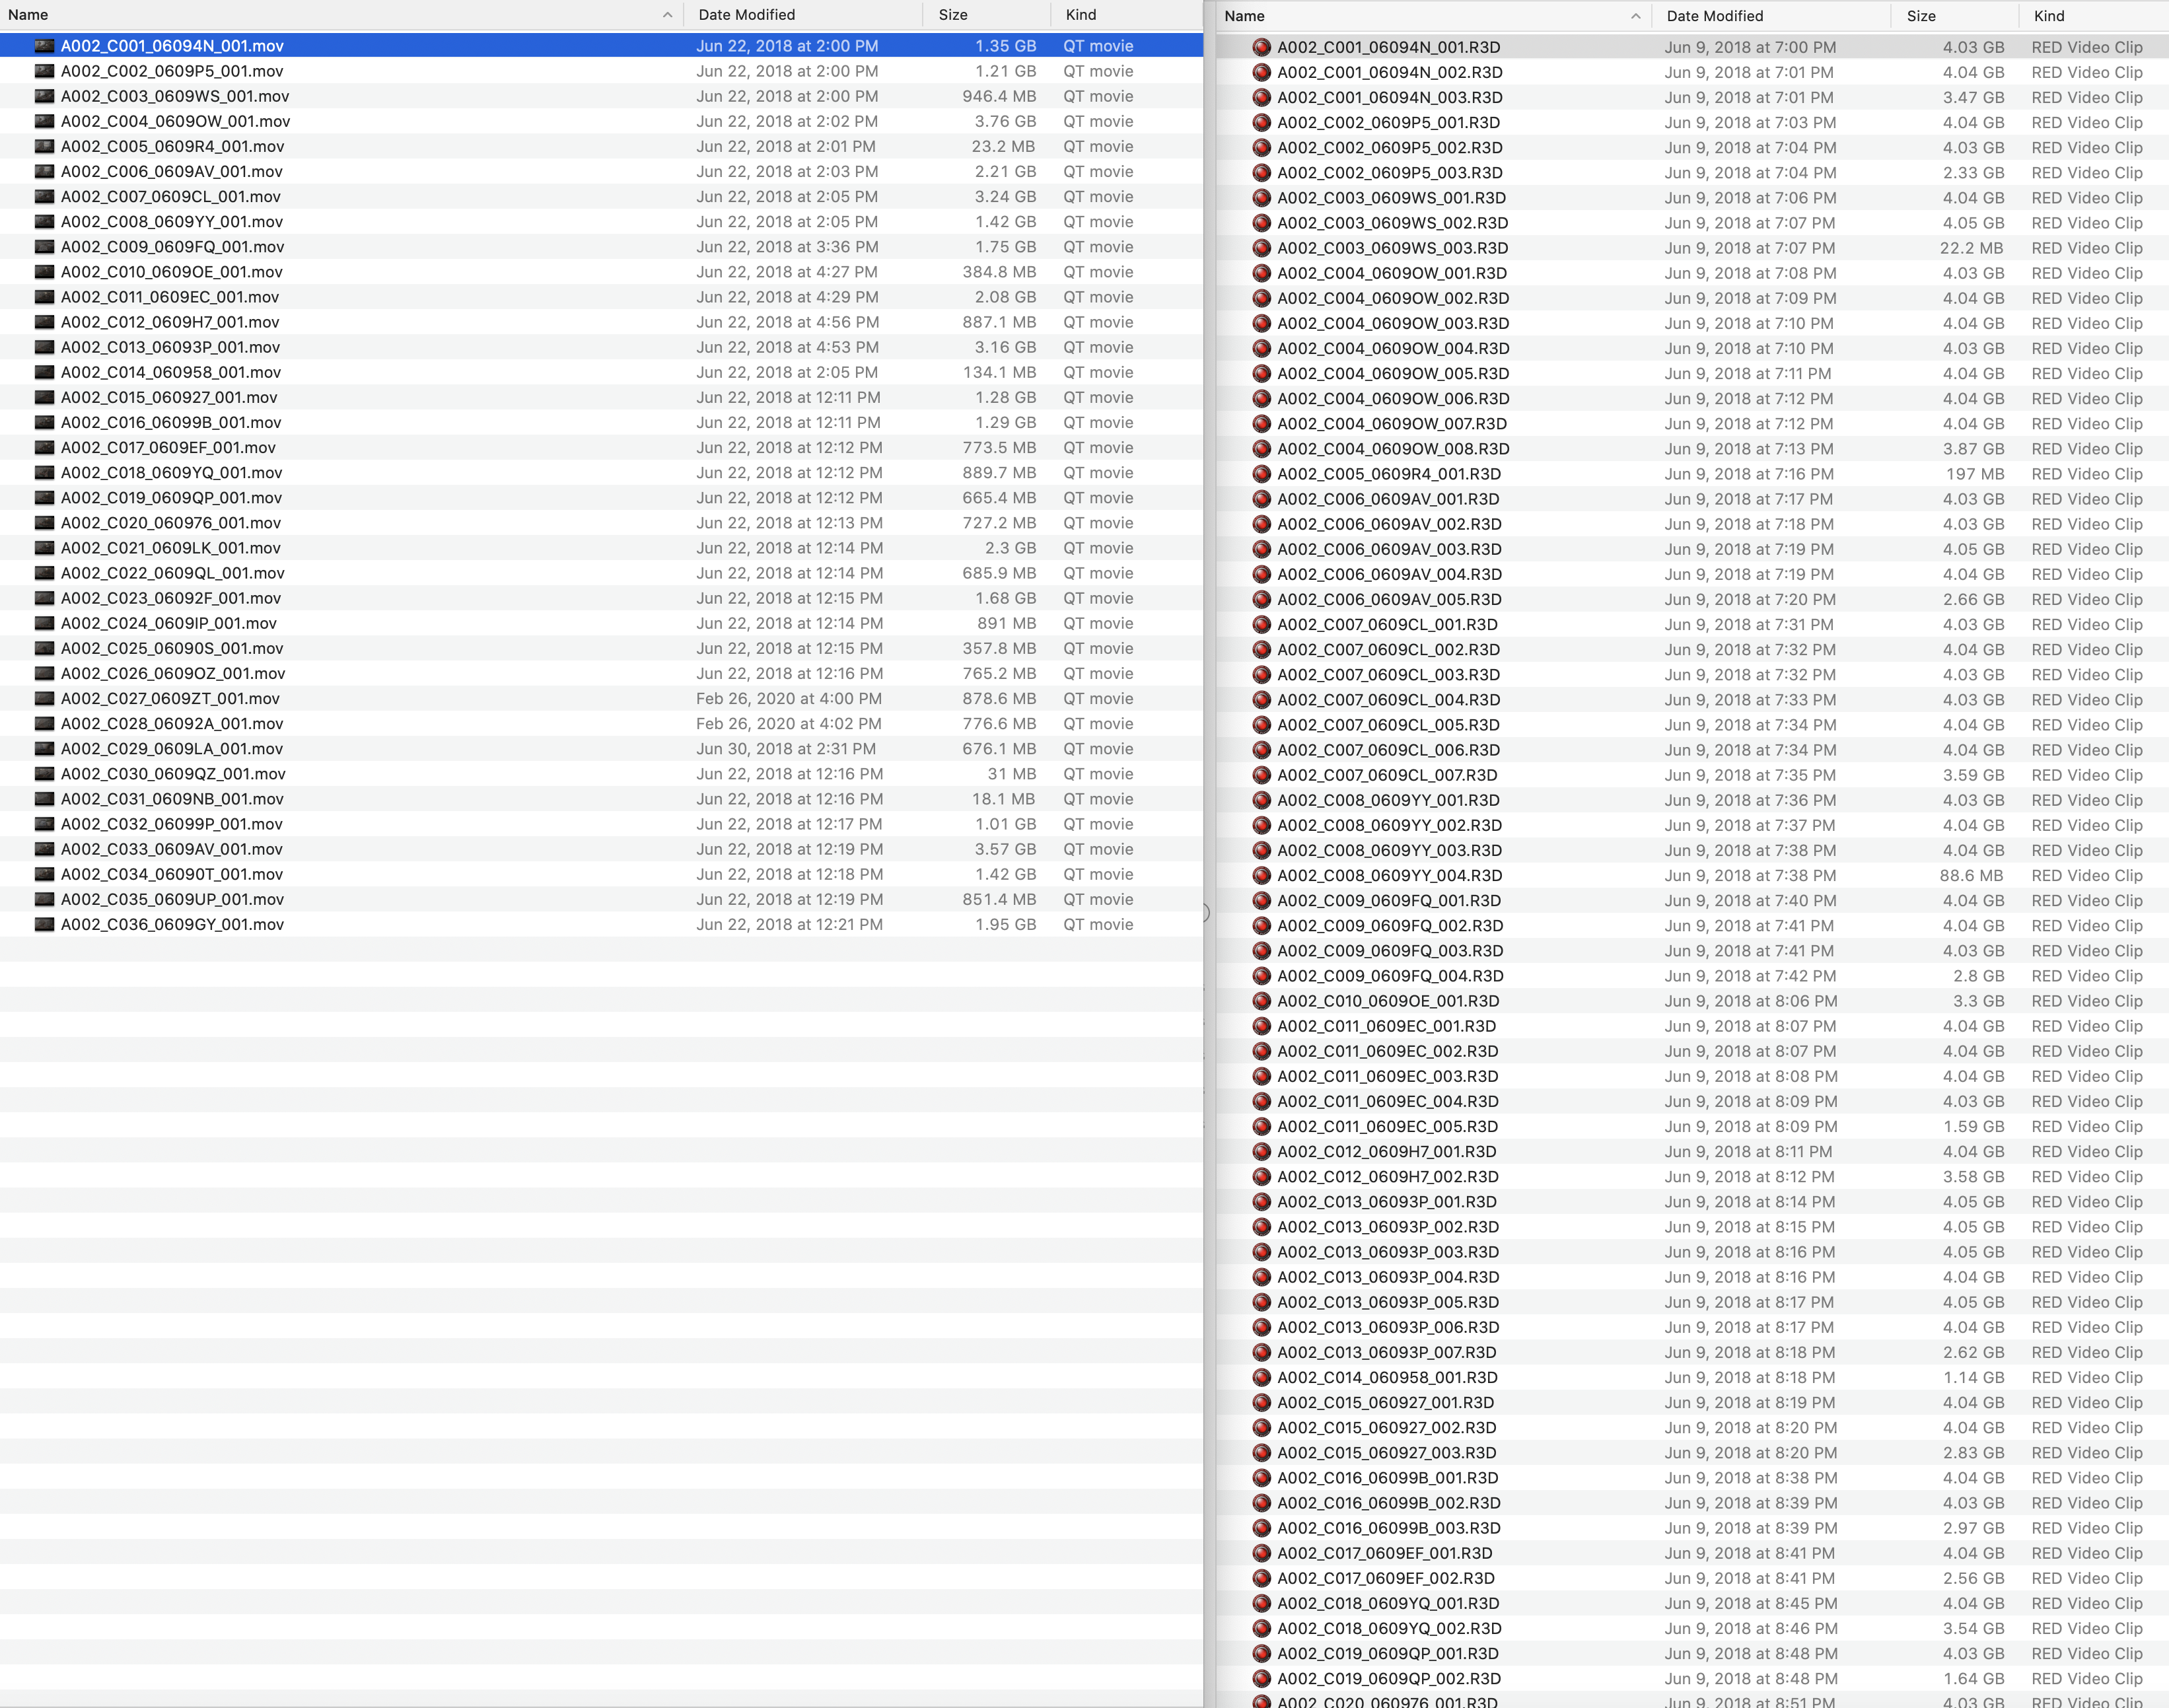
I tried the change folder method for an edit that was created in Premier using Proxy media brought into Resolve. That worked fine. The low res media came across. However when I try to "change source folder" to the folder which contains the original r3d files it doesn't allow me to relink the files. I've been told this might be because the Red .r3d folder has a different amount of files to the proxy folder. Problem is it has to have a different amount of files because those clips are spanned across multiple files because of the way r3ds are stored and the way that the proxy were generated (to represent the spanned clips). Is there something I can do to get around this? When I try other methods like importing the media first the results are pretty unpredictable on more complex projects. I can do it manually clip by clip but that's annoying if there's thousands of clips to deal with. Below are four files I tried this method on as a test. And the matching Proxy and R3d files in their respective folders. The only way I can do this easily is to relink the r3d folders in Premier then create an XML to import into Resolve. That worked fine. So it's not the files or naming - at least as far as Premiere is concerned.. Any clues would be greatly appreciated on ways to do this same process in Resolve.