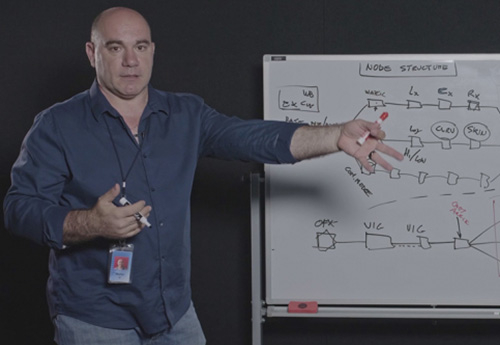
Hollywood Colorist Walter (CSI) about his color grading process

Hollywood Colorist Walter (CSI) about his color grading process

xap3.144.4.50


W alter Volpatto (CSI) is one of Hollywood's most successful colorist and some of his movies include Green Book, Dunkirk, Star Wars: The Last Jedi and The Hateful Eight. He primarily works in DaVinci Resolve and uses a fixed node structure that he has developed over the years. 

Lowepost visited Walter at Company 3 LA with our camera team to learn in detail about how he builds his grades.

Get access

Become a premium member to access the full video and Walters node tree (*.drx).

Become a Premium Member


  • Like 58
  • Thanks 24

User Feedback

Recommended Comments


2 hours ago, Victor Riley said:

I really like the  offset-focused approach for its simplicity and easy transfer using different grading spaces, and I'll be surely playing around with your node tree for a while.

I'd love to see a full master class with you – I think all of us here could learn a lot watching you grade. 

it will be boring like hell!!!!

keep in mind that when you work with excellent DoP, colorist have nothing much to do..... I work with excellent photography...


  • Like 1
Link to comment
Share on other sites
Just now, Walter Volpatto said:

it will be boring like hell!!!!

keep in mind that when you work with excellent DoP, colorist have nothing much to do..... I work with excellent photography...


2021 is 13 days old, and you've just won understatement of the year.

Link to comment
Share on other sites
15 minutes ago, Valentin Gstöttenmayr said:


Ciao Walter,

so che non puoi rivelare a tutti il grande segreto della compressione della luminanza, ma quando scriviamo in italiano nessuno lo capisce con ayayayay per favore per favore per favore

There is no secret in “compressing the luminance” the idea is to build a tonal curve that has a goos “S” curve, you want to preserve in a linear fashion the 7(ish) stops around the 18%gray, then gently put toe and shoulder to flatten the extra black and whites, the more gently you do it, the softer the image is, the harder you do it, th more contrast the final image is.


  • Like 2
  • Thanks 1
Link to comment
Share on other sites
1 hour ago, Walter Volpatto said:

There is no secret in “compressing the luminance” the idea is to build a tonal curve that has a goos “S” curve, you want to preserve in a linear fashion the 7(ish) stops around the 18%gray, then gently put toe and shoulder to flatten the extra black and whites, the more gently you do it, the softer the image is, the harder you do it, th more contrast the final image is.


Thank you!

Link to comment
Share on other sites

Are you often using the standard luts in Resolve like Kodak or I heard you guys making your own luts.

I was wondering how you do your own luts, is it in resolve or another program?

//Jesper

Link to comment
Share on other sites
7 hours ago, Jesper Hammarbäck said:

Are you often using the standard luts in Resolve like Kodak or I heard you guys making your own luts.

I was wondering how you do your own luts, is it in resolve or another program?

//Jesper

I used resolve luts in the past as well as we do our luts from analytic data from film. 

At Co3 we have a proprietary system for film profiling,  in the past at fotokem i used truelight profiling system. 


"Hustler" look was initially modeled to a resolve film lut (modified to taste).

  • Like 2
  • Thanks 1
Link to comment
Share on other sites
1 hour ago, Sander Ges said:

Hi Walter,

Amazing insight!

When using the build-in grain, do you put it on the 'OFX' place or before / after the LUT or look on the timeline level?

There is the philosophical approach and the practical one.

if I want to emulate negative film grain that modify with the color, it should be before the balance node. Nobody does that really, but it is a though.
if I want to emulate as if the negative was perfectly exposed, then it will go before the LUT/Look/main tonal mapping, usually for me that is in the Timeline node before the “look”

if you want to emulate print grain, it should go after the main look.

But, all of this is purely academical: ALL of your material will pass thru a compression pass to be able to be seein: from theatrical (low) to streaming (technical term is “shit-ton of it”). So, the compression will attack the hi frequency of your signal first, if you have light grain it will be gone, if you have a lot, it might reduce the efficiency of the compression algorithm.

it is a losing battle.

I still like to see grain, resolve OFX is good for me, and it is mainly before the main LOOK in the timeline, if a shot or a scene need more, It will be in the shots.

for a movie where two different worlds LOOK where created (Bliss, amazon, this coming February) the look and grain was moved at the group/scene level, so each set of scene had its appropriate look. But it was a bot of an odd ball... the fact that I did not use the group for anything (not corner yourself if you dont have to) allow me to do that.

  • Like 3
Link to comment
Share on other sites
1 minute ago, Walter Volpatto said:

There is the philosophical approach and the practical one.

if I want to emulate negative film grain that modify with the color, it should be before the balance node. Nobody does that really, but it is a though.
if I want to emulate as if the negative was perfectly exposed, then it will go before the LUT/Look/main tonal mapping, usually for me that is in the Timeline node before the “look”

if you want to emulate print grain, it should go after the main look.

But, all of this is purely academical: ALL of your material will pass thru a compression pass to be able to be seein: from theatrical (low) to streaming (technical term is “shit-ton of it”). So, the compression will attack the hi frequency of your signal first, if you have light grain it will be gone, if you have a lot, it might reduce the efficiency of the compression algorithm.

it is a losing battle.

I still like to see grain, resolve OFX is good for me, and it is mainly before the main LOOK in the timeline, if a shot or a scene need more, It will be in the shots.

for a movie where two different worlds LOOK where created (Bliss, amazon, this coming February) the look and grain was moved at the group/scene level, so each set of scene had its appropriate look. But it was a bot of an odd ball... the fact that I did not use the group for anything (not corner yourself if you dont have to) allow me to do that.

Thanks for the insight Walter. As most of my stuff goes to the web, I realise I need to add LOTS more grain to be able to even see it.

Link to comment
Share on other sites


Join the conversation

You can post now and register later. If you have an account, sign in now to post with your account.
Note: Your post will require moderator approval before it will be visible.

Guest
Add a comment...

×   Pasted as rich text.   Paste as plain text instead

  Only 75 emoji are allowed.

×   Your link has been automatically embedded.   Display as a link instead

×   Your previous content has been restored.   Clear editor

×   You cannot paste images directly. Upload or insert images from URL.