Andy Minuth
-
Posts
150 -
Joined
-
Last visited
Content Type
Profiles
Case studies - Free
Case studies - Premium
Resources
Insider
Courses
Forums
Store
Everything posted by Andy Minuth
-
In Baselight You would build this with the 'Reference' strip or with layer blend modes. It's a bit different logic, but spontaneously I can't think of a grade that You could not rebuild like that.
-
Film scans are not in a RGB color space but defined in printing densities. The conversion between those worlds was handled by the print emulation lut. But when You want to convert film scans into an RGB space to apply a DRT You need a formula representation of film - which is ADX. So basically You can put Cineon scans in the timeline and tag them as ADX. You don't need to change Your scanner settings. Also please note that information from the Baselight release notes: FilmLight: Printing Density Log / ~ADX Colour Space --------------------------------------------------- This colour space is similar to the Academy "ADX" colour space but with more focus on robustness and invertibility. It is designed as connection space for the Truelight Film 1 DRT, and should not be used as grading colour space for digital content. However if your footage is primarily camera negative log scans you can use this space as Input and Working Colour Space in combination with the Truelight Film 1 DRT.
-
DNG works for sure.
-
Good work, Margus.
-
The first teaser of Housewife got released. Probably my favourite work on a feature this year. It was shot on Alexa with ARRI / Zeiss Master Anamorphics and lots of haze on the set. A handful of shots were done with a Blackmagic Cinema Camera. Graded on Baselight. The director Can Evrenol asked me for a vintage look for that film. So I diffused the highlights, selected a soft scaling algorithm and created a custom Show-LUT based on several film print emulations. Additonally to counter the flatness caused by the haze, we added lots of grain and some dirt to the picture, especially in the highlights. Director: Can Evrenol / DP: Tayman Tekin / Gaffer: Mehmet Cemal Toz / Starring: Clémentine Poidatz, David Sakurai https://vimeo.com/230499166 BTW: Better watched in fullscreen instead of with the white background of the forum.
-
Gamma correction
Andy Minuth replied to Nicolas Lossec's topic in Editing , Color grading & Finishing
That was my point, that a gamma correction might not be necessary. If it becomes necessary it can still be done in the playback path or the display. For example by calibrating a display to Rec.1886 or sRGB depending on the surround. -
I think the Lego Batman movie was done with Baselight. (http://filmlight.ltd.uk/customers/case-studies/legobatman.php) DigitalVision has a list of feature film credits on their webpage.
-
Gamma correction
Andy Minuth replied to Nicolas Lossec's topic in Editing , Color grading & Finishing
I don't do different passes for sRGB. Client gets just one Master in Rec.1886. One reason You already mentioned: because the surround is part of a color-space (bright vs dim in this case). The other point is: How do You know that the client will not upload his "Video ProRes" to YouTube? And when it is on YouTube, what if someone watches it on their Television, etc. You can go on like that... From my point of view, the player should do the correct gamma correction for the display. So I try to just give proper Rec.1886 masters with correct metadata. -
Macro blocking on dark images
Andy Minuth replied to Thomas Singh's topic in Editing , Color grading & Finishing
Hi Thomas, sometimes keying the shadows and adding a skin-soften tool and some noise helps. -
Yes that behaviour is correct, Emily. FilmGrade is intended to be used with a DRT / LUT in the output path which takes care of the shadow/highlight roll-off. I explained the origins of the different grading tools in the first half of my BaseGrade article. If You are looking for an Exposure / Contrast tool with built in highlight / shadow roll-off within Baselight, You should try out 'Technical Grade'. But please be aware that 'Technical Grade' clips the signal at 0 and 1 without the possibility to recover it in a downstream layer. So if You add too much contrast before, You might loose some part of Your signal.
-
Filmlight released a video about new color management features in V5
-
3D Lut attributes
Andy Minuth replied to Thomas Singh's topic in Editing , Color grading & Finishing
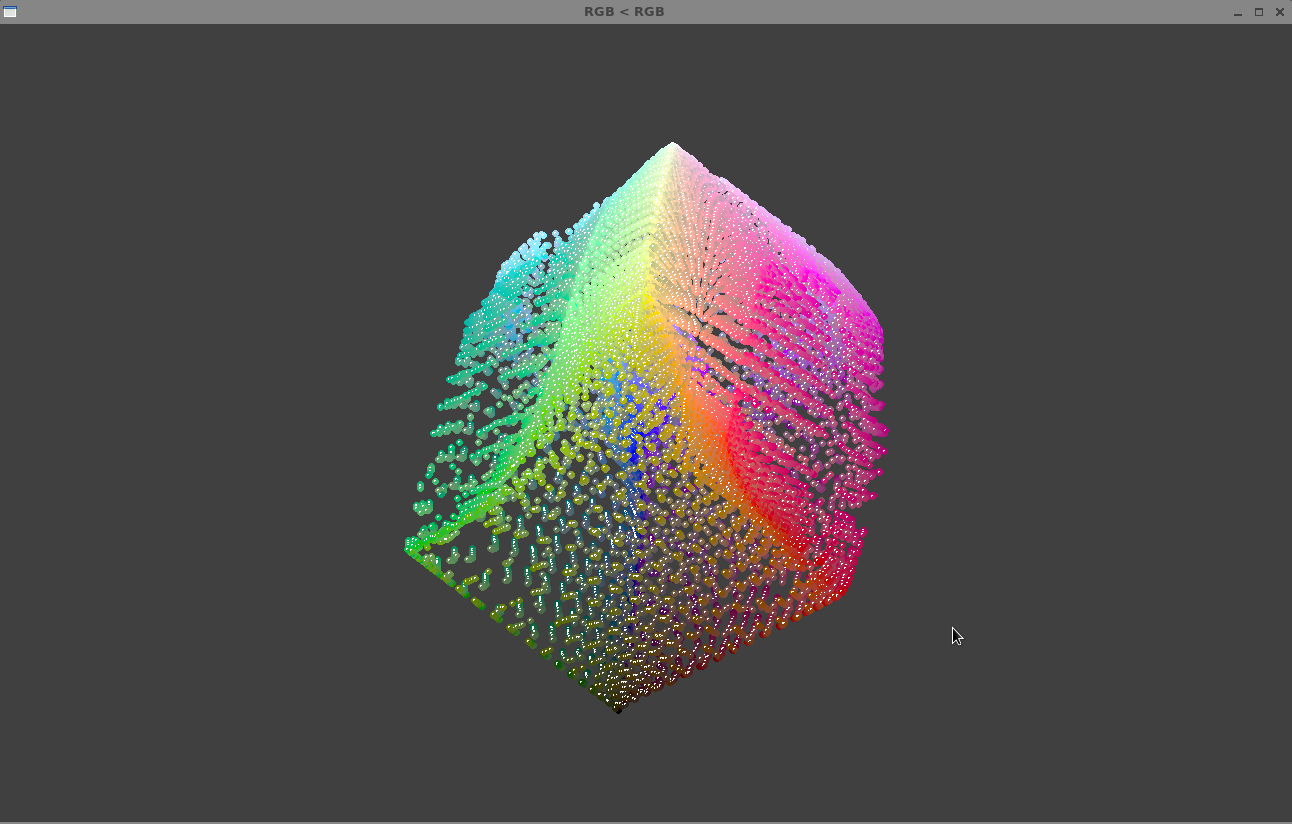
Abby, its more for debugging. I use zview rarely to check out a LUT. You can see if it was made with a formula or with measured data, for example. And if there are 'weird things' happening, you might find the reason while examining the cube. But for daily grading work I see no benefits, more if You are building LUTs yourself. -
3D Lut attributes
Andy Minuth replied to Thomas Singh's topic in Editing , Color grading & Finishing
With the Truelight zview tool you can visualise a LUT. You can move around in 3D space, pick individual points, see In-Out vectors of the points, etc. But you cannot change it.
-
You can use the 'Temporal Degrain' operator for it. For heavy noise use the extended ranges. When motion artefacts get too nasty you should try to increase the 'Flow Radius', but this will also make it much slower. Additionally there is also a spatial DeNoiser hidden in the advanced parameters. Also check the channel weights, because sometimes the noise is concentrated in one channel (blue or red). Usually it is best to DeNoise early in the stack. In some occasions I use the 'soften' tool for it, but only in specific areas e.g. keyed shadows. I use 'Median' to clean up mattes, but if it works in Your case then its okay. If I just want to tackle chroma noise, I apply the spatial tool of the 'Temporal Degrain' in 'RLab' color space. And last but not least: In Baselight 5 there will be a completely new and more powerful DeNoise tool, that is optimised for the noise of digital cameras.
-
Kill Bill B/W fight scene
Andy Minuth replied to Nicolas Hanson's topic in Editing , Color grading & Finishing
I also think it was to achieve the R-rating. In the Japanese version of the film, the scene is in color. http://www.movie-censorship.com/report.php?ID=1588 -
Grading a car commercial
Andy Minuth replied to Virgil Edward's topic in Editing , Color grading & Finishing
I coloured that one about a year ago: Our approach was to boost the reflexions on the car, which gives a nice texture and attracts the eye. So on many shots I boosted the contrast on specific regions of the car with tracked shapes. And always have an eye for the tires, so that they are not melting with a dark background. -
New Color Reel - Send Your Feedback//Critique//Thoughts
Andy Minuth replied to Monica Escalante's topic in Showroom
Welcome, Monica -
Hey there, some time ago I put together a new reel that presents my work on commercials during the last two years at 1000 Volt in Istanbul. All work was done with Baselight and a Dolby PRM display.
- 2 replies
-
- 4
-

-
- baselight
- commercial
- (and 3 more)
-
Meet the Colourist interview with me: https://www.filmlight.ltd.uk/customers/meet-the-colourist/andy_minuth.php
-
-
5
-
- Report
-
First You have to find out, if the controller is defect (1) or the disks themselves having data corruption (2). 1: In this case the disk is not visible to the computer at all. You should check with several computers/OS. Like Frank recommended, replacing the controller chips is easy and helped me as well a couple of times. 2: In this case You can see at least the chipset of the disk in Your operating system. My recommendation is to rescue the data with the free software 'TestDisk'. I used it successfully several times (with OS X and Linux). At times 100% of the data got rescued. Please google the correct usage of it. First You should make an image of Your defect drive for example. Disclaimer: Complete data loss might occur. For very important data please consult an expert.
-
Restoration tools
Andy Minuth replied to Thomas Singh's topic in Editing , Color grading & Finishing
Most people use dedicated restoration software. Digital Vision Phoenix PFClean MTI DRS NOVA HS-ART DIAMANT These are the main players as far as I know. Some people use compositing tools like Nuke. -
Base Grade and the evolution of grading tools
Andy Minuth commented on Admin's insider article in Color Grading
I really appreciate all of Your nice feedback. -
I also think that going with Flanders is a good idea with these specs.
-
High-pass filters\ edge detection sharpening
Andy Minuth replied to Mark Mulcaster's topic in Baselight
Ah shame on me, seems like I forgot to put the link to my last post. It's been quite a while, I don't remember which tutorial I meant, but probably it's this one from the official Filmlight page: https://www.filmlight.ltd.uk/training/resources/baselight/FLT-BL-0032-Baselight-16.php -
It's difficult to point out the differences between RLab and Base Grade, because these are two completely different things. RLab is a colour space in Baselight, which You can use for special processing. And Base Grade is a colour grading operator. About Exposure: It depends on the working colour space, the source colour space is irrelevant in that case. I am not a colour scientist but AFAIK: For ACEScc it should work linear, but for the other usual log transfer functions like Cineon, LogC, S-LogX, etc. it will not.