Anton Meleshkevich
-
Posts
169 -
Joined
-
Last visited
Content Type
Profiles
Case studies - Free
Case studies - Premium
Resources
Insider
Courses
Forums
Store
Everything posted by Anton Meleshkevich
-
Why default Resolve timeline colorspace gamma curve is 'gamma 2.4'? But all the Resolve Log to Rec709 LUTs, ACES Rec709 and so on are look like 'Rec709 (SCENE)' gamma curve. What's the point of 'gamma 2.4' curve as a default gamma curve? Well, I know what gamma 2.4 is. But Resolve also has 'gamma 2.2' curve and 'Rec709 (Scene)' curve. So we have 3 curves for rec709 delivery. And the last one is look like regular, typical and familiar rec709 curve. So why 'gamma 2.4' is the default? What am I missing?
-
 The best camera is the most lightweight 😃 For a cameraman, I mean. Definitely not for a steady handheld shot.
 -
Sky Replacement in DaVinci Resolve Fusion
Anton Meleshkevich commented on Lowepost's course in Compositing
Thank you! Anybody know how to add expressions to "center" and "angle" linking to lower the strength of moving the background for more realistic parallax effect? -
3D LUT Creator OFX Plugin is out!
Anton Meleshkevich replied to Anton Meleshkevich's topic in Others
It's slower than using a LUT loaded directly to Resolve, but it has GPU acceleration. I tested it on a PC with one nVidia GTX 770 installed and I got real time playback in 1080p 25fps timeline with 9 OFX plugins loaded into 9 serial nodes at one clip. Also, it's a wrapper, that send a still from Resolve playback cursor position to 3D LUT Creator and when pressing apply button at the 3D LUT Creator interface, it sends the LUT (and all the 3D LUT Creator settings) back to the wrapper. -
Just informing you Probably it's a good idea to set modal plugin mode in expert settings. Or may be it is the default now.
-
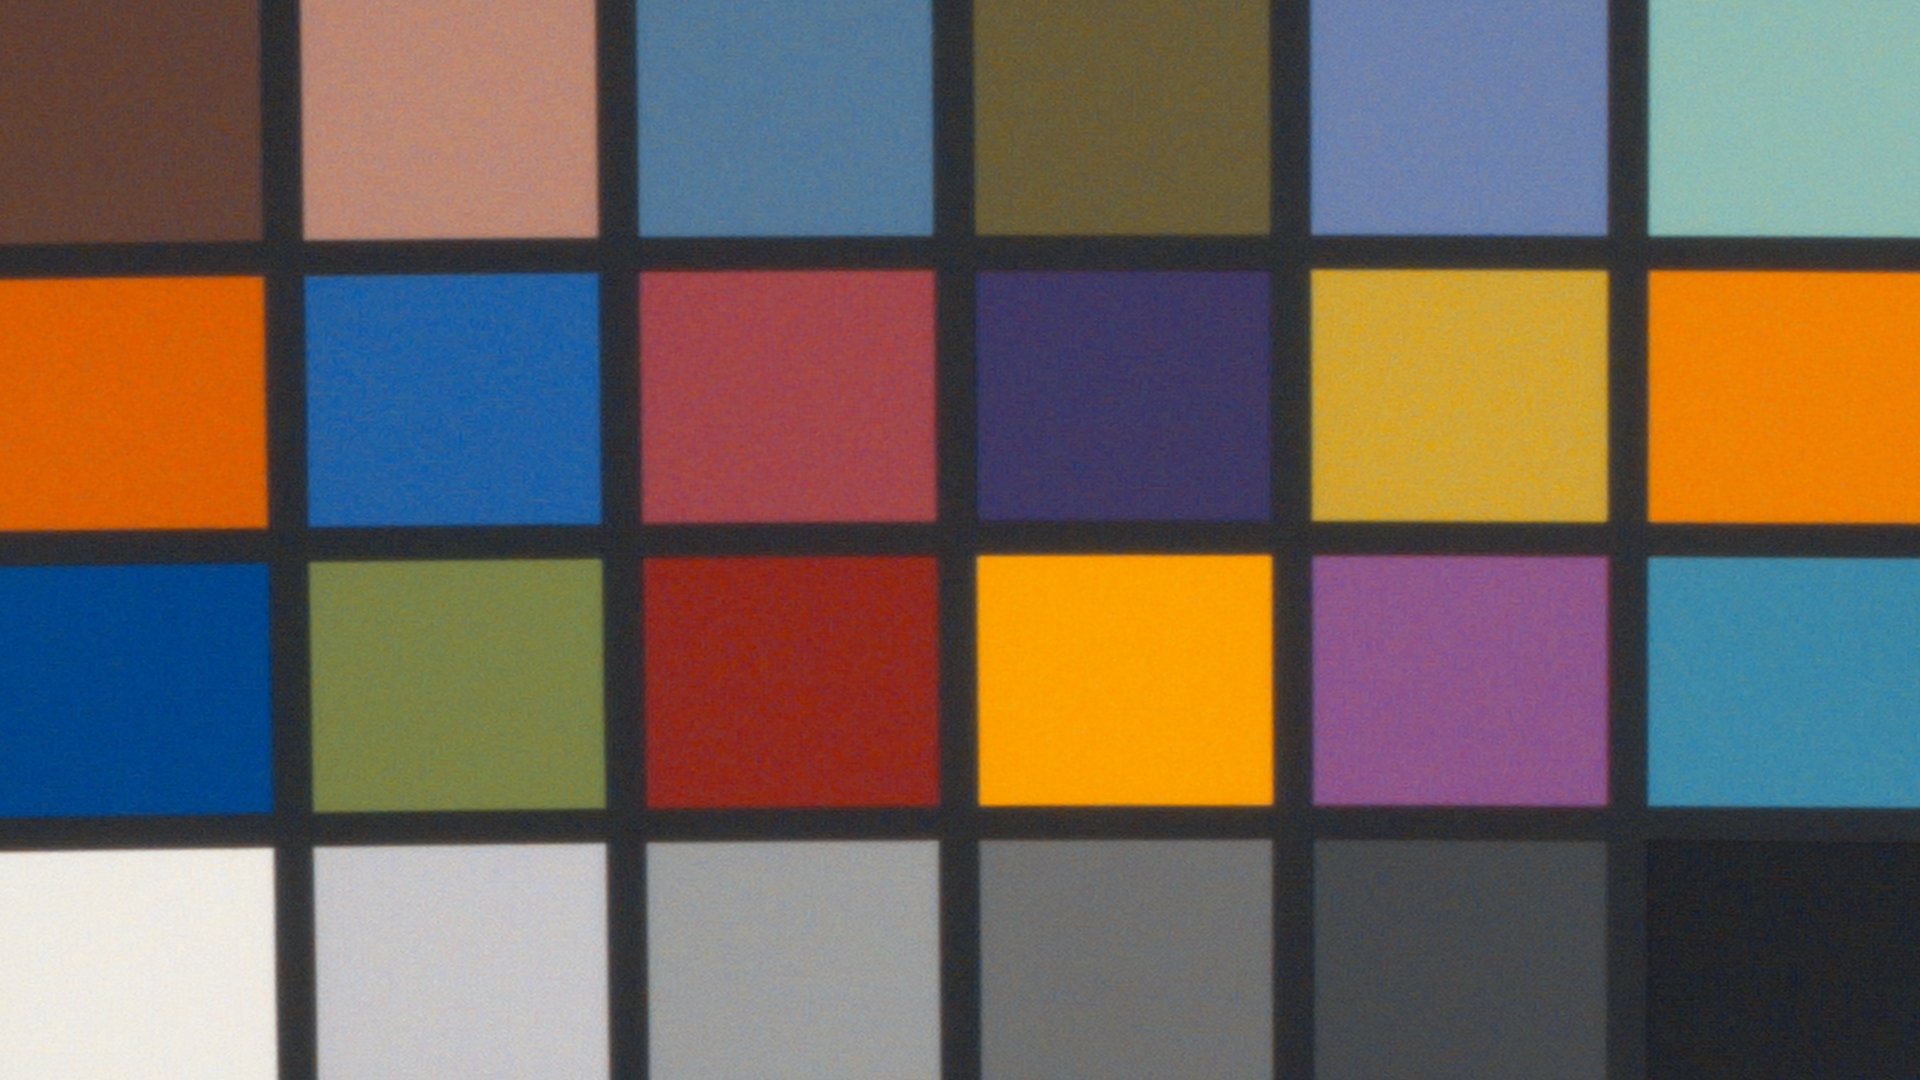
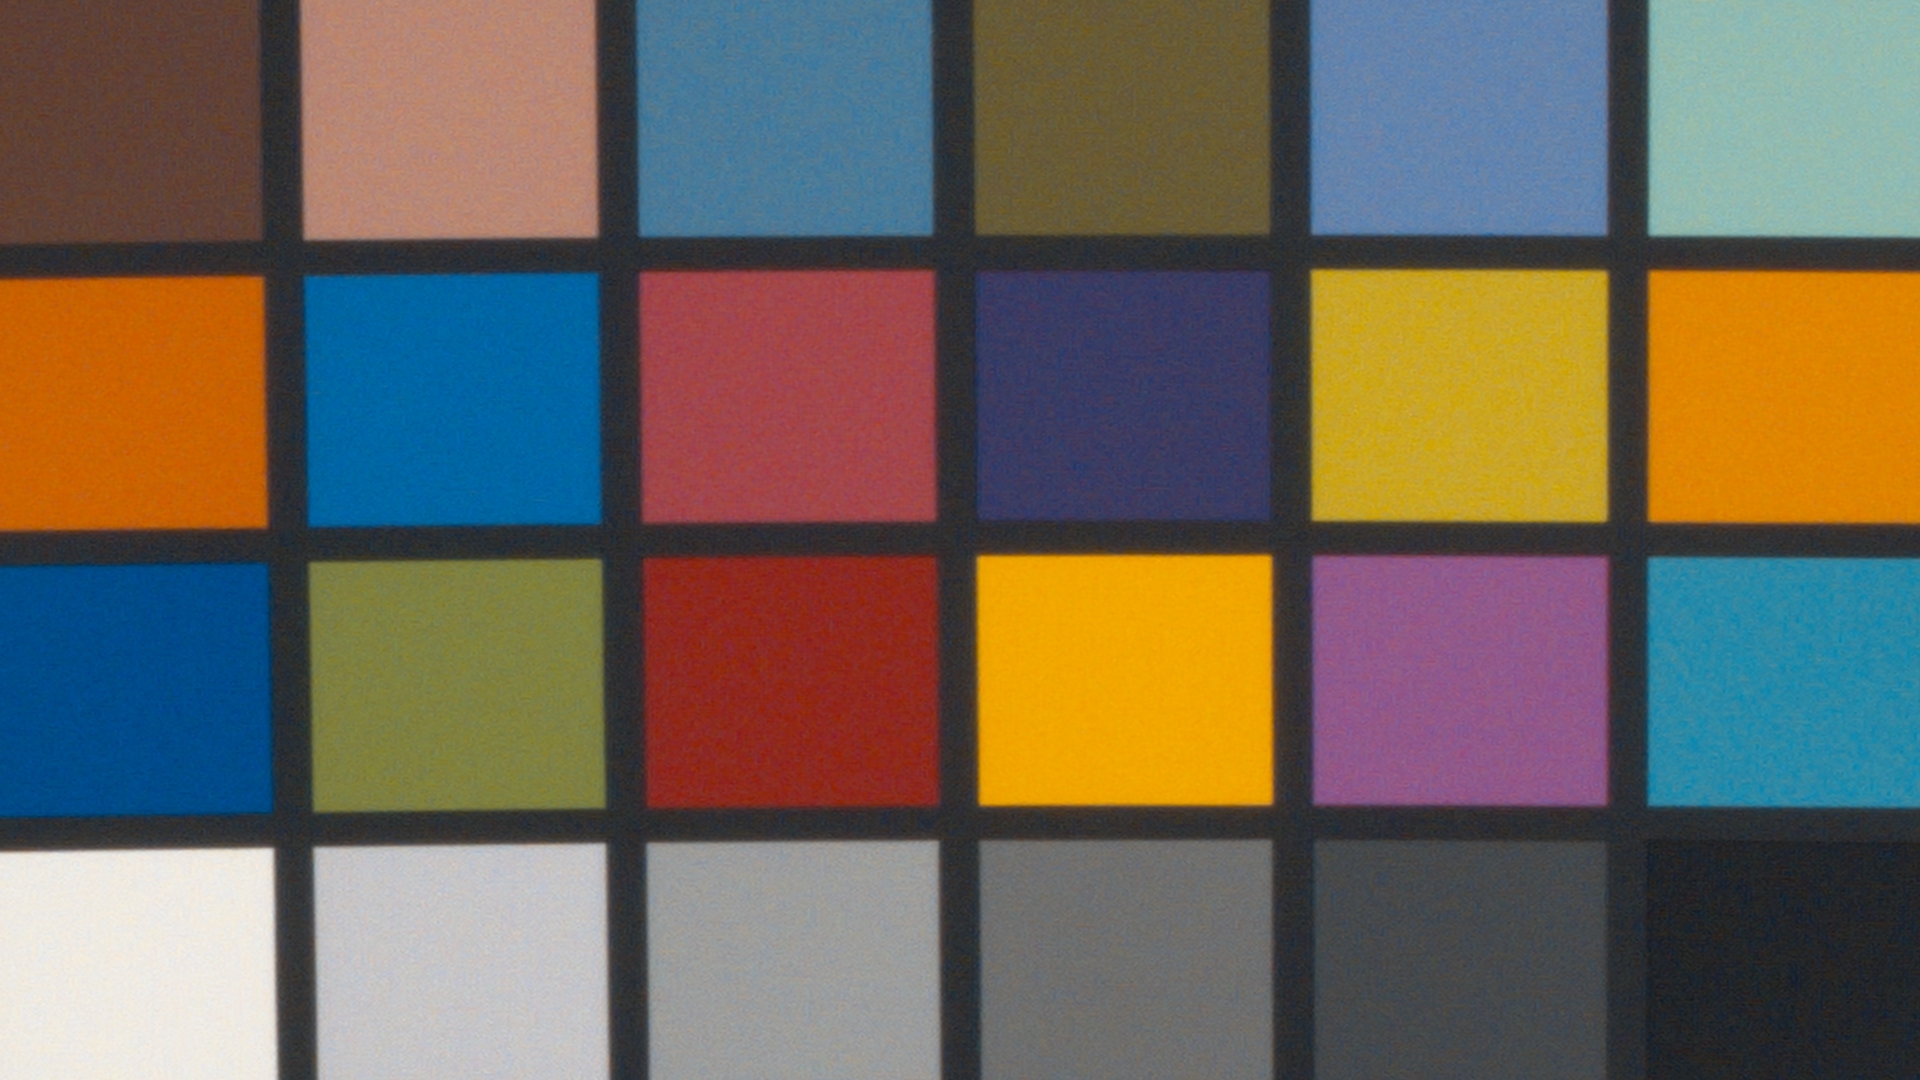
Sometimes I use RGB mixer with node gamma set to linear. Especially for teal orange thing, when I add green channel to red channel and subtract blue channel from red channel. When set to linear, separation to complimentary colors is a little bit different. It can help if you don't want to shift greenery to yellow when you make teal orange things by RGB mixer. It will shift. But not so much. Of course timeline color space should be set to footage color space. And your footage should be log. Otherwise it will be difficult to notice the differences. Here is a colorchecker shot on URSA Mini 4.6K in CinemaDNG, then cropped and zoomed. A Log to Rec709 LUT is applied after RGB mixer in the next node. First image - RGB mixer applied to log gamma footage. First image - RGB mixer applied to linear gamma footage. I adjusted RGB mixer slightly different in terms of effect strength, because it acts different when applied in different gamma. So it's easier to compare the difference now.

-
Is it possible to create a lightbox smart filter which shows clips depending on multicam angle or at least on a name part of a source clip of a multicam clip?
-
3D LUT Creator ACES support
Anton Meleshkevich posted a topic in Editing , Color grading & Finishing
I'm an alpha tester of 3D LUT Creator and 3D LUT Creator OFX plugin. It's about to support ACES (alpha or may be also beta versions). Could you tell a bit about workflow you'd like to be possible while creating LUTs for ACES color space? This is not an official request from the app creator. I'm just trying to make the app better regularly providing useful insights to him. For those who are new to ACES: Typically grаding in ACES means that your timeline space (in davinci resolve) is ACEScc(t) (which is LOG!!! not linear) gamma and AP1 primaries. After all the corrections made, using all the tools available, RRT (so called film look curve and (afaik) saturation remapping) and ODT (so called ACES to rec709 or whatever transform) are applied. You can't modify RRT and ODT. -
Fixing makeup in grading session.
Anton Meleshkevich replied to Adéyẹmi's topic in Editing , Color grading & Finishing
@Adéyẹmi Oh, I know what you talking about. Half reddish and half yellowish face. A powder which has a different color from the concealer. I met this on a couple of projects. As far as I remember, I exported stills to 3D LUT Creator, then made AB grid correction to fix this. Then I applied the LUT using power window tracked to the face with smooth edges or with additional subtractive power windows to preserve lips and ears natural redness. But that was not even close to fixing yellowish teeth on singer's CU shots. A LOT of roto. -
Beauty retouching
Anton Meleshkevich replied to Thomas Singh's topic in Editing , Color grading & Finishing
It's a compound node. Import (right click on stills window empty area) - jpg file type - open skin_retouch.jpg -
@John Parker do you plan to release a version without print film emulation or with ability to disable it? Also do you still don't know, what exactly print film was used? Filmconvert support says me, they only know the lab name, but not the name of print film you have used. Seems like it is definitely not 2383. However blue color doesn't look like on 2383.
-
Yes, they work
-
Disable nodes on all clips in Davinci Resolve
Anton Meleshkevich replied to Nicolas Hanson's topic in DaVinci Resolve
@AdéyẹmiDoes it bypass grading even for render as Nicolas interesting? -
I think, free 2383 LUTs from light illusion and davinci resolve LUTs are more than enough for that purpose. But Steve Shaw (from light illusion) says, Koji LUTs are may be most accurate print emulation LUTs on the market. But you still may want to fix yellowish green color.
-
Music Video Cut Entirely in Resolve 15
Anton Meleshkevich replied to Alex Winker's topic in Showroom
I use Premiere Pro for editing because it can add multicam clips into another multicam clips. 'Vocalist Steadicam' multicam clip goes into 'all vocalist' multicam clip and then goes into 'all band' multicam clip and so on. As far as I know Resolve can't do this. -
Color Space Transform OFX works differently in Resolve 14 and Resolve 15. Is it normal? Load some alexa footage with colorchecker. Add Color Space Transform OFX. Set input to alexa and output to rec709. Set luminance mapping and saturation mapping. Everything is ok. But looks a little bit different in resolve 14 vs resolve 15. In Resolve 15 add serial node before the OFX. Add gain until blue square in colorchecker become clipped and saturated blue. Do the same in Resolve 14. blue square becomes just lighter (as arri lut does), but not crazy saturated blue as in Resolve 15. Is it a bug of Resolve 15?
-
Is this normal to have 10-15 frames (25 fps) delay between my GUI monitor and my external monitor? I tested my decklink mini monitor on different machines, different operating systems, HDMI and SDI, consumer TV and SDI monitors, tried different settings in davinci resolve. I get this delay in Resolve (12,5 and 15b8), in premiere pro, in avid media composer. I have latest drivers and software versions. But if I just connect my TV to HDMI port of my nvidia card, I have almost no delay. But when I use device made for exactly that purpose I got this delay. I know, I can to match it to GUI monitor. But problem is the actual delay. Ok. For premiere pro i can just use nvidia HDMI and edit that way. But when I grade in Resolve, I have to move color wheel. Wait 0,5 second. See result. Move color wheel again. Is this a typical and normal thing? I read different opinions. Somebody says that it is ok, somebody says, he/she doesn't have this delay at all.
-
@Jeremy Dulac I contacted to FilmConvert and and they said me this: "FilmConvert applies a combined emulation for print, negative and a viewing simulation for projected film. The result is an sRGB projected film simulation."
-
Here was some incorrect info from me about resolve color math. But since I found some of the conclusions I made about it wrong, I decided to edit this post in order to not misinforming others
-
More (mathematically) correct way is to adjust gain knob in linear gamma. It's almost similar to adjusting exposure in RAW. Long way - convert from log to linear (not rec709 which is sometimes called linear). Then adjust gain. Then from linear convert to log again. Or you can just set node gamma to linear and set timeline colorspace to the colorspace of your footage.
-
OFX plugins
Anton Meleshkevich replied to Nicolas Hanson's topic in Editing , Color grading & Finishing
@Paul Dore What about recompiling windows version? Also about a half of DCTLs doesn't work on DR15 Win10. And I get errors when I try to go to DCTLs folder at new LUTs tab. Also thank you for macbeth chart DCTL! Very handy for some tasks upd: Just read a lot of your posts. Seems like I download from an old location. You post screenshots where everything works and you update plugins and DCTLs for DR15. So the reason is in my particular system for sure. -
Matching A7S and Alexa
Anton Meleshkevich replied to Virgil Edward's topic in Editing , Color grading & Finishing
Alexa limits saturation in highlights. More saturated highlights become lighter, but not more saturated at some point. But I can be wrong. Try to google "Art Adams LC709A". You'll find a couple of articles about matching sony cams to alexa. -
I think, you should try to change brightness and saturation, but not hue.
-
@Juan Melara Thank you! I used ARRI film matrix numbers on one project. It brings back saturation. But also it makes skin too yellowish. Sounds interesting! I'll try it. Also I'm going to create custom 3x3 matrix to compensate important colors' shifting.
-
I was wrong. Not 100% identical. But still it is much closer to raw (almost the same thing) compared to usual printer lights which isn't close, especially when exposure is far away from correct.