Color Management Workflow in DaVinci Resolve 16

Color Management Workflow in DaVinci Resolve 16

xap18.117.152.69


We continue our DaVinci Resolve 17 training with a new high-end course in Color Management Workflow. This is an intermediate course for colorists and visual effects artists taught by our instructor Lee Lanier.

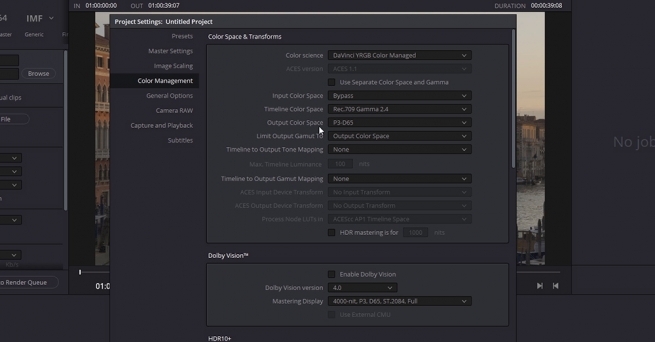
In this training series you will learn to work with both display-referred and scene-referred management including ACES, matching camera profiles with color space transforms and DCTLs, how to set up your projects for multiple color space outputs, everything about RED IPP2 and RAW workflow, how to use the Gamut tool, LUTs, CSTs and OpenColorIO in Fusion, and much more. 

The DaVinci Resolve project files and footage are available for download so that you can easily follow along.

About the instructor

Lee Lanier has created visual effects on numerous features films for Walt Disney Studios and PDI/DreamWorks. Lee is a world-renowned expert in the video effects field, and has written several popular high-end software books, and taught at the Gnomon School of Visual Effects in Hollywood.

Who is this course designed for?

  • Colorists
  • Visual effects artists

Lessons overview

  • Lesson 01: Introduction and terminology
  • Lesson 02: Display vs scene referred
  • Lesson 03: Display referred space and LUTS
  • Lesson 04: Mixing Camera footage in display referred
  • Lesson 05: Matching cameras with an OFX plugin
  • Lesson 06: Color management in Fusion
  • Lesson 07: Using RCM Resolve color management
  • Lesson 08: Working with ACES
  • Lesson 09: RCM and ACES inside fusion
  • Lesson 10: Adding color transforms in resolve
  • Lesson 11: Adding LUTS and using opencolorIO
  • Lesson 12: Switching to RCM wide gamut
  • Lesson 13: New color space aware tools and HDR palette
  • Lesson 14: RCM input and and output DRTS

Software required

A free version of DaVinci Resolve or DaVinci Resolve studio

Become a premium member and get instant access to all the courses and content on Lowepost.


Become a Premium Member


  • Like 1

User Feedback

Recommended Comments


I deal with this in one of two ways:


1.  Create a Group for each unique RAW needed, then use Pre-Clip Group suit.  Can use different LUTs on Group basis, but Pre-Clip RAW parameters don't affect Pre-Clip group and there is not a Pre-Clip option among Project, Clip, Camera Metadata


2.  Use Versions, which do encapsulate RAW parameters.  If you have multiple clips from same camera using same RAW interpretation, this is a winner.

Link to comment
Share on other sites

OK, I think I might have a better way to ask the question:

Do the Project Settings -> Camera Raw -> Raw Profile profiles reflect the default interpretation values of DaVinci Resolve for all supported RAW file types?

If so, I would assume you would then be able to customize each one within a project and save them for any/all listed RAW formats or is only one type active at a time?

If you did this upfront, would this take care of automatically applying CTLs to any defined RAW footage?


Link to comment
Share on other sites
4 minutes ago, Frank Wylie said:

OK, I think I might have a better way to ask the question:

Do the Project Settings -> Camera Raw -> Raw Profile profiles reflect the default interpretation values of DaVinci Resolve for all supported RAW file types?

If so, I would assume you would then be able to customize each one within a project and save them for any/all listed RAW formats or is only one type active at a time?

If you did this upfront, would this take care of automatically applying CTLs to any defined RAW footage?


What you set in the project RAW settings  will work for multiple cameras. So you can set for example ARRI Raw, RED r3ds, and Blackmagic RAW setting and it will work throughout the project. 

By default the Camera metadata setting are off at the bottom of RAW settings, I would make sure these are on, until you need to tweak and individual clip.

Edited by Sean Henderson
Link to comment
Share on other sites

Thank you, Sean. 

I don't really work with RAW footage, typically only DPX or TIFF files from scans, so I am trying to wrap my head around the wilderness of camera origination formats.

Link to comment
Share on other sites
1 minute ago, Frank Wylie said:

Thank you, Sean. 

I don't really work with RAW footage, typically only DPX or TIFF files from scans, so I am trying to wrap my head around the wilderness of camera origination formats.

No problem, if you want to stick with what the DPs setting were on set you can keep camera metadata. But depending on the needs of your grade, you will most likely want to change the setting to the advised profile for each camera type, to take full advantage of the RAW profile. 


Once you change the RAW settings to Project, set your color management, you will also want to scroll to the bottom and check all the boxes for camera metadata. This will keep all the ISO, Temp, Exposure settings the DP set. These are typically only changes you will want to make clip to clip. Which you can access in the color tab.

Link to comment
Share on other sites
4 hours ago, Jesper Hammarbäck said:

Lee, what type of workflow do you recommend?

Im often work with Arri & Blackmagic Cameras.

//Jesper

ACES offers a simplified workflow. RCM gives you a bit more control by allowing you to apply the camera LUTs. I would test both ACES and RCM and see which one suits your footage the best. There are so many permutations with color management, it is hard to predict which one might give you the best result.

Link to comment
Share on other sites


Guest
This is now closed for further comments