

Lowepost
-
Posts
776 -
Joined
-
Last visited
Content Type
Profiles
Case studies - Free
Case studies - Premium
Resources
Insider
Courses
Forums
Store
Everything posted by Lowepost
-
The first lesson in the Conforming in DaVinci Resolve series is just posted!
- 1 reply
-
- 2
-

-

-
We just published a master study about printer points in DaVinci Resolve! Thanks to John Daro, Douglas Delaney, Dan Muscarella, Martin Utsi, Tyler Roth, David Cole, Walter Volpatto, Adam Inglis, and Paul Ensby for contributing to this article. https://lowepost.com/colorgrading/insights/printer-lights-r33/
-
Thanks! If tracking data is connected to the Ellipse tool, Fusion won't allow it to connect to an Effect Mask input. And, if the Ellipse is already connected to the Effect Mask input, the tracking data option disappears from the menu.
-
Thanks for your kind words and feedback! Glad you enjoy our courses, we have a very exciting new one coming up for Fusion users very soon. The FCP X forum is up now.
-
Hi Jeremy. We are a bit behind on this as we have been wrapping up two new full courses the last weeks. But I promise that we will post it in January.
-
Thanks Craig! Lee will cover planar tracking masks and matte paintings in several of the upcoming lessons.
-
Hi Virgil. Click on the button and it will automatically download. We have sent you an email with the files in case it still doesn't work for you.
-
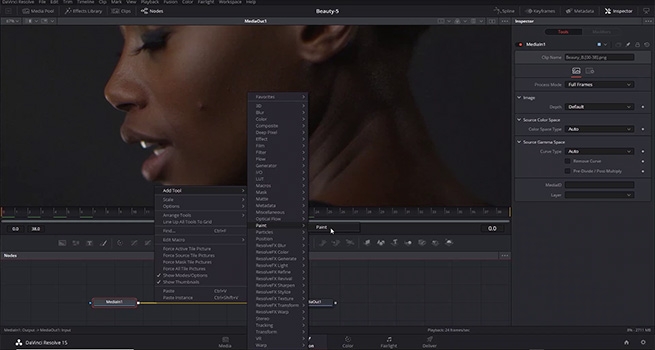 In the DaVinci Resolve Beauty Retouching series you will learn everything you need to know about digital retouching and techniques which are useful on almost every single project you are working on. Learn how to clean up blemishes around areas that dramatically shifts and changes, build your own frequency separation from scratch, deal with flyaway hair, dark pupils, symmetry, teeths, dark shadows around eyes and much more. The techniques in this series will range from beginner to intermediate and advanced, but they are all easy-to-follow.. The project files and footage are available for download so that you can easily follow along. Download project files About the instructor Lee Lanier has created visual effects on numerous features films for Walt Disney Studios and PDI/DreamWorks. Lee is a world-renowned expert in the video effects field, and has written several popular high-end software books, and taught at the Gnomon School of Visual Effects in Hollywood. Who is this course designed for? DaVinci Resolve users and other finishing artists Some of the topics Clean up blemishes Build custom Frequency Separation Texture pop OFX in DaVinci Resolve 17 Remove Flyaway hair Body Stretch and Symmetry Lighten pupils Teeth enhancement Remove eye circles Skin improvement Software required BlackMagic Design DaVinci Resolve Enjoy!
- 59 comments
-
- 21
-
-
-

-
Hi Kat. Thank you for your kind words! The Fusion Essentials series has been very well-received by our members so we have started to record a full "DaVinci Resolve Fusion for Finishing Artists"-series that will follow up where Kevin left. We can't wait to tell you more about it. And... We just wrapped up a new course about beauty retouching that will be available soon!
-
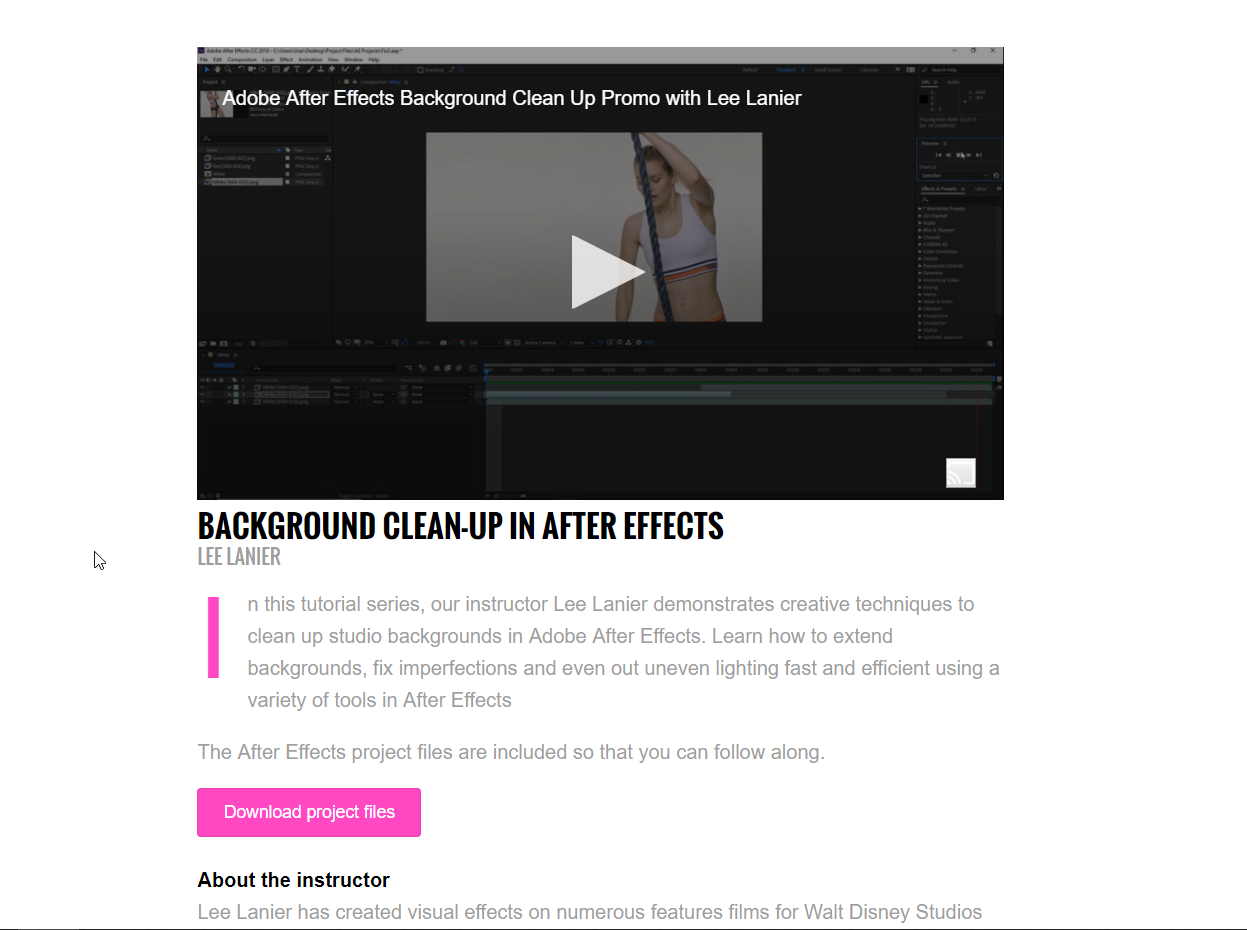 In this tutorial series, our instructor Lee Lanier demonstrates creative techniques to clean up studio backgrounds in Adobe After Effects. Learn how to extend backgrounds, fix imperfections and even out uneven lighting fast and efficient using a variety of tools in After Effects The After Effects project files and footage are included so that you can follow along. Download project files About the instructor Lee Lanier has created visual effects on numerous features films for Walt Disney Studios and PDI/DreamWorks. Lee is a world-renowned expert in the video effects field, and has written several popular high-end software books, and taught at the Gnomon School of Visual Effects in Hollywood. Who is this course designed for? After Effects users Some of the topics Set extension Averaging backgrounds Advanced keying techniques Creating shadows Masking Tracking shapes Software required Adobe After Effects Enjoy the training!
 -
Hi Karl, we are still working on it but it will be out next month.
-
Unfortunately, that's not possible inside of Fusion.
-
We just posted a new 6 lesson course about sky replacement in DaVinci Resolve. Learn tracking, luma keying and much more. Footage and projects files included. Enjoy
-
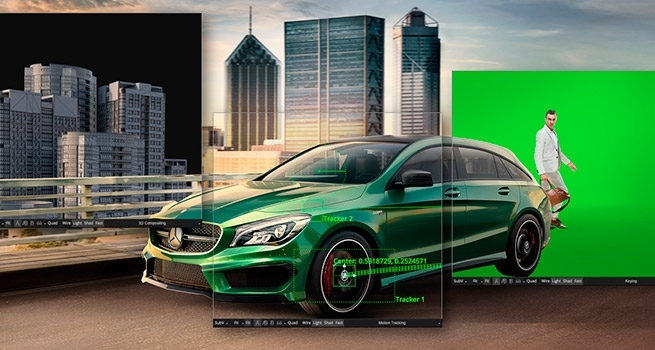
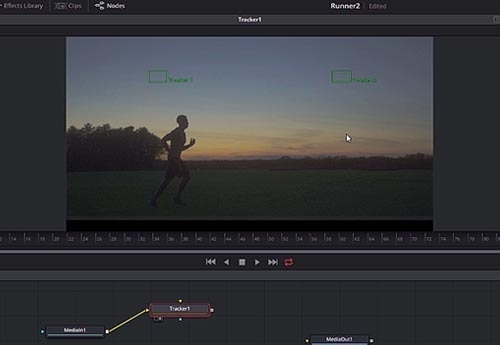 We are proud to introduce a Fusion masterclass in sky replacement with instructor Lee Lanier! With 6 easy-to-follow video lessons, you will learn advanced techniques that can be used to replace a sky inside of DaVinci Resolve Fusion or with the standalone version of BlackMagic Design Fusion. The DaVinci Resolve project files and footage are available for download so that you can easily follow along. Download project files About the instructor Lee Lanier has created visual effects on numerous features films for Walt Disney Studios and PDI/DreamWorks. Lee is a world-renowned expert in the video effects field, and has written several popular high-end software books, and taught at the Gnomon School of Visual Effects in Hollywood. Who is this course designed for? Editors, Colorists, Compositors and other finishing artists Some of the topics Motion tracking Keying techniques Inserting sky in the background Adding grain Simple color correction Software required A free version of DaVinci Resolve or the free standalone version of Fusion Enjoy the course! Project_Files.zip
 -
Thanks for the input! Many new classes are one its way, and we will have those things covered.
-
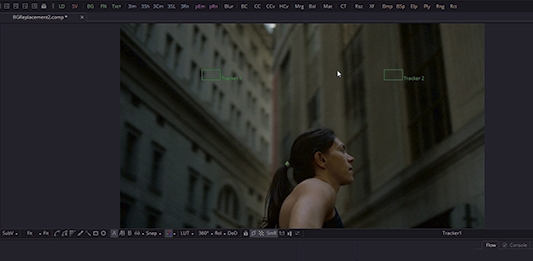 We are proud to introduce a Fusion masterclass in background replacements with instructor Lee Lanier! With 7 easy-to-follow video lessons, you will learn advanced techniques that can be used to create complex and stunning effects inside of DaVinci Resolve Fusion or with the standalone version of BlackMagic Design Fusion. The project files and footage are available for download so that you can easily follow along. Download project files About the instructor Lee Lanier has created visual effects on numerous features films for Walt Disney Studios and PDI/DreamWorks. Lee is a world-renowned expert in the video effects field, and has written several popular high-end software books, and taught at the Gnomon School of Visual Effects in Hollywood. Who is this course designed for? Editors, Colorists, Compositors and other finishing artists Some of the topics Motion tracking Stabilization Rotoscoping building-elements and face Fine-tuning roto shapes Inserting sky in the background Adding grain Simple color correction Software required A free version of DaVinci Resolve or the free standalone version of Fusion Enjoy the course! Project_Files.zip
- 20 comments
-
- 11
-
-
-
Thank you for the kind words and great inputs! We have a separate course about sky replacement and the "Introduction to Visual Effects in DaVinci Resolve" course will cover most of the topics you mention. The digital retouching class also covers some of the topics.
-
You will get access to download all the footage and assets used in the course.
-
Fusion has been used on feature films like The Hunger Games, Dr Strange and Guardians of the Galaxy, as well as hit television shows like Empire, NCIS and American Horror Story. The Fusion Fundamentals Training is a perfect start for anyone who is interested in learning visual effects and compositing, and when you are ready to learn more advanced techniques we got it covered.
-
Hi everyone! We are proud to introduce The Fusion Essentials Training with instructor Kevin P McAuliffe. With more than 100 minutes of in-depth fundamental training, you will get up to speed with Fusion inside of DaVinci Resolve and gain the knowledge you need to start creating your own effects. I promise easy-to-follow tutorials and that this is worth your time. The first lesson is now available on the link below for free! New lessons will be posted every week starting from this week, and those will be available for premium members only. We guarantee that we will publish new video tutorials every week the rest of the year so this is a good time to join us if you haven't already. More to come, this is just the beginning. Enjoy! Click here to find it. Lowepost
-
 We are proud to introduce The Fusion Essentials Training with instructor Kevin P McAuliffe! With 3 hours of in-depth fundamentals, you will get up to speed with the powerful BlackMagic Design Fusion inside of DaVinci Resolve and gain the knowledge you need to start creating your own effects. The matte clip that is used in the course can be downloaded below Download project files About the instructor Kevin is an award winning editor and visual effects creator based in Toronto with over 15 years of teaching and training experience. Over the past years Kevin has delivered world-class work for clients such as Warner Bros, Walt Disney Company, 20th Century Fox, Universal and Elevation Pictures. Who is this course designed for? Editors, Colorists, Finishing Artists, DITs Some of the topics Understanding the Resolve/Fusion workflow Working with the Fusion Interface How do nodes work? Working with the inspector Animating with Keyframes Understanding masks Adding additional footage to animations Working with the merge tool Creating texts and titles Creating basic effects Mastering the transform node Basic 3D Software required A free version of DaVinci Resolve or the free standalone version of Fusion Enjoy the training!
- 34 comments
-
- 29
-
-
-
Challenge accepted.
-
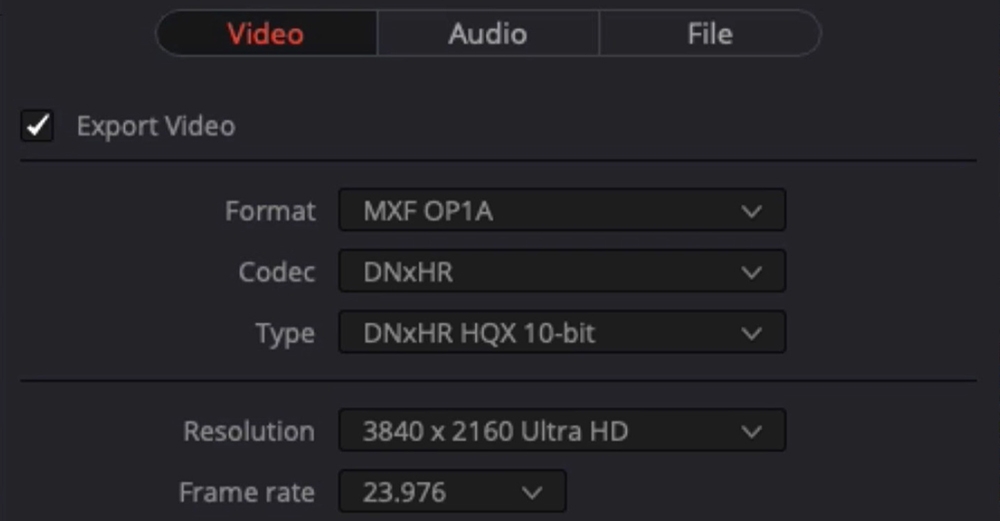 T he Avid DNxHR and Apple Prores codec families are designed to meet the needs of modern, streamlined post-production workflows. These days we capture source material on a variety of cameras- action cams, smart phones, drones and high-resolution cameras, and codecs makes it easy to work with any formats. With the growing demand for 4K deliveries, we need fast and reliable codecs that ensure reel-time playback while maintaining superior image quality. Both the DNxHR and ProRes families offer a variety of codecs for different compressions, data rates and file sizes. Some with just enough image information needed for editing, others for high-quality color grading and finishing, and lossless ones for mastering and archiving. Below are the full list of codecs from both families. #customers { border-collapse: collapse; width: 100%; font-family: Nunito; } #customers td, #customers th { border: 1px solid #ddd; padding: 8px; font-family: Nunito; } #customers tr:nth-child(even){background-color: #f2f2f2;} #customers tr:hover {background-color: #ddd;} #customers th { padding-top: 12px; padding-bottom: 12px; text-align: left; background-color: #ad00ff; font-family: Nunito; color: white; } Codec Color sampling Usage DNxHR 444 4:4:4 Finishing DNxHR HQX 4:2:2 Finishing DNxHR HQ 4:2:2 Mezzanine* DNxHR SQ 4:2:2 SQ Editorial DNxHR LB 4:2:2 LQ Editorial ProRes 4444 XQ 4:4:4 Finishing ProRes 4444 4:4:4 Finishing ProRes 422 HQ 4:2:2 Mezzanine* ProRes 422 4:2:2 Mezzanine* ProRes 422 LT 4:2:2 SQ Editorial ProRes 422 Proxy 4:2:2 LQ Editorial * In this case, Mezzanine means a compressed file that can be used to produce additional compressed files, but it is not necessarily useful for finishing work. Codec facts: DNxHR 444, ProRes 4444 and ProRes 4444 QC are the only codecs with embedded alpha channels. DNxHR 444 and ProRes 4444 XQ are the only codecs that fully preserve the details needed in HDR- (high-dynamic-range) imagery. Both codec families are resolution independent, but bitrate will vary depending on if you output a proxy file or a higher resolution file. Both codec families can be wrapped inside MXF or MOV containers. For more detailed specifications: Full DNxHR codec list Full ProRes codec list Codec differences DNxHR and ProRes was optimized to be visually lossless through many generations of decoding and re-encoding. Some claim to have noticed performance differences, but studies have shown that the quality and speed differences are negligible. An important difference, however, is that some of the major editing and finishing systems available lacks support for ProRes encoding for Windows. This means Windows users can read a ProRes encoded file, but in some cases cannot export one. For this reason, many post-production facilites have abandoned ProRes and implemented a full DNxHR workflow. There are systems that Apple fully supports such as the Adobe programs, Nuke and Scratch, but DNxHR is accessible universally. Another important reason for the success of DNxHR is that Avid can read the files natively from its own MXF file structure. This eliminates the need to import clips and timeline rendering. Lowepost
 -
The popular duotone-look was re-introduced with the new colorful brand identity of Spotify. In our new look tutorial we walk you through how to create it in DaVinci Resolve. The RGB-mixer plays a powerful role to highlight important parts in the image. Watch it here!