Lowepost
-
Posts
776 -
Joined
-
Last visited
Content Type
Profiles
Case studies - Free
Case studies - Premium
Resources
Insider
Courses
Forums
Store
Everything posted by Lowepost
-
We just posted a new in-depth course about Look Development and Workflow in DaVinci Resolve 17 with Jason Bowdach. This is an intermediate course and you will learn complex saturation workflows, how to evaluate and recreate film emulations, analyze and create film halation, create custom black and white look, film grain methodology, the teal and orange look and much more. It's a solid course that every colorist should watch, and even the most experienced can learn useful strategies, techniques and color theory that helps stay on top of the game. Read more about the course here.
-
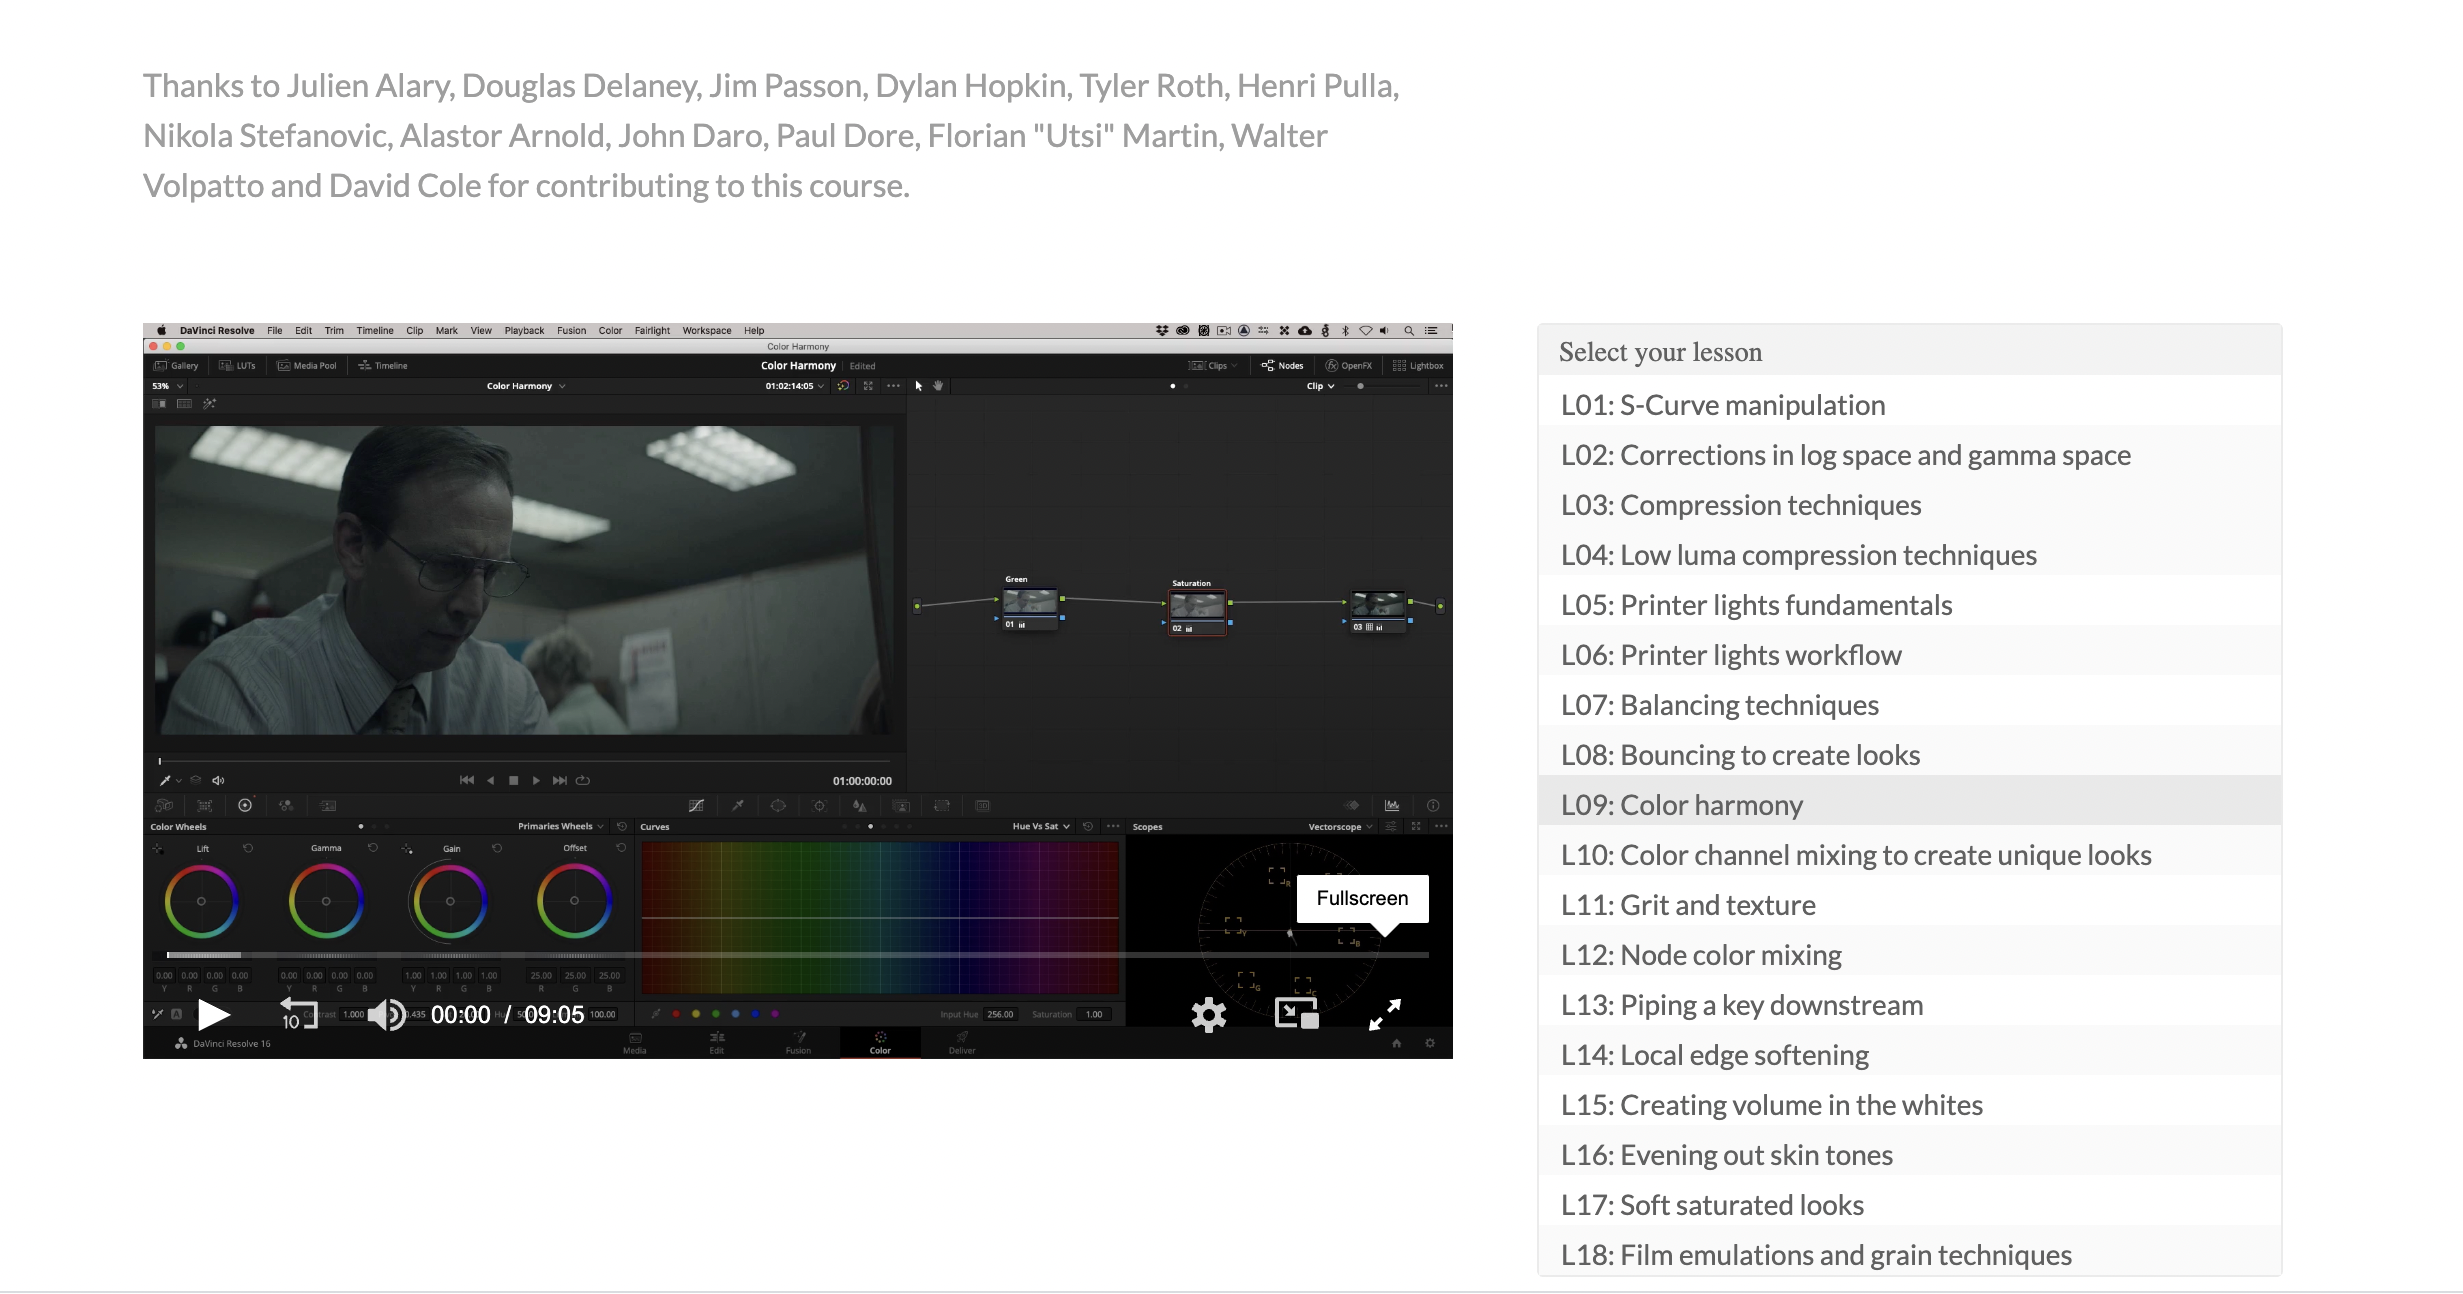
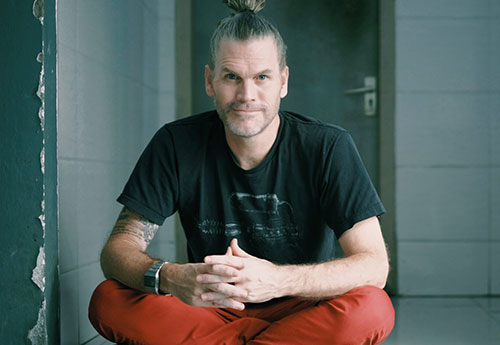
 Welcome to an in-depth course in Look Development and Workflow in DaVinci Resolve. This is an intermediate course for colorists that want to gain a solid understanding of look development workflows, color management, and color theory. You will learn complex saturation workflows, how to evaluate and recreate film emulations, analyze and create film halation, create custom black and white look, film grain methodology, the teal and orange look and much more. At the end of the course, we challenge you to use what you have learned, to color grade your own version of an award-winning commercial. The footage used in this course and a free sample of 35mm film grain is available for download so that you can easily follow along. Download project files About the instructor Jason Bowdach is a colorist and finishing artist based in Los Angeles, California. He's a Blackmagic Design certified instructor specializing in color and finishing, and he has an extensive background in film\tv post-production with large-scale international distribution at studios like Disney and Fox. He is also the founder of PixelTools, a company that creates color grading tools and presets for DaVinci Resolve. Who is this course designed for? Intermediate colorists COURSE OVERVIEW LESSON 01: HERO SHOTS Going through methods for evaluating which shots to include as hero shots. LESSON 02: COLOR MANAGEMENT & BASE GRADE Preparing the project by setting up the color management and color space aware tools. Looking at how to work with exposure and balance to preserve details while keeping the integrity of the cinematography and the context of the story. Also going through some image-analyzing tools that helps make better decisions in the base grade process. LESSON 03: LOOK WORKFLOW AND FILM PRINT EMULATION LUTS In this lesson, we're diving deep into workflow for look development and node organisation with node hierarchy. Then, looking at film print emulation characteristics and setting up a workflow to get the best result out of them. LESSON 04: WORKING WITH FILM PRINT EMULATION LUTS Using printer lights and film print emulation on a commercial using the established workflow. Also, discussing order of operations, ways to kill off saturation, whether to apply noise reduction before or after the grade and general color theory. LESSON 05: SILVER HIGLIGHTED LOOK Demonstrating three different methods to create the Silver Highlighted Look (Bleach Bypass) on a color chart. The methods include midtone detail work to add micro contrast, shaping luma only curves and primary controls. LESSON 06: LOOK ADJUSTMENT Now it's time to implement the look into the established workflow, on top of the base grade. Explaining how to adjust for best possible result and consistency. Then, experimenting by mixing silver looks. LESSON 07: EVALUATING & RECREATING FILM EMULATIONS Diving into the characteristics and behaviours of film emulations, and recreating the essence with curves. LESSON 08: CUSTOM BLACK & WHITE LOOKS The RGB mixer and the Splitter & Combiner node is used to gain better control over black & white images. LESSON 09: ANALYZING & CREATING HALATION Analyzing halation on images shot on film, and creating halation that can be used in a variety of looks from scratch. Talking about the benefits of working in linear light and converting between color spaces. LESSON 10: FILM GRAIN METHOLOGY Using charts and scopes to evaluate grain, and continue to emulating both negative and positive film grain. Looking at the best ways to integrate grain for most visually pleasing result, and setting up a real film-scan-grain workflow. LESSON 11: TEAL & ORANGE LOOK Building the classic teal & warm look with curves on a test image and charts. LESSON 12: TEAL & ORANGE CONTINUES Going through two more methods to create the teal & orange look, using both primaries and the color warper. LESSON 13: COMPLEX SATURATION WORKFLOWS Going through different saturation tools, and looking at color management to create technical accurate saturation response in non-managed workflows. Then, using the LAB model to adjust saturation and using HSV and HSL to create deep filmic colors. LESSON 14: COLOR MODELS EXPLAINED Looking at some color models to better explain what happens with saturation when converting between different color spaces. LESSON 15: HARDWARE & 3RD PARTY SCOPES Jason walks you through his hardware recommendations and looks at Nobe Omniscope. LESSON 16: CHALLENGE In the last lesson, we're challenging you to re-create the original grade of a commercial using the techniques and strategies from this course.
- 71 comments
-
- 28
-

-

-
We, Lowepost have challenged a selection of the worlds best colorists and color scientists out there to create a collection of "looks" for DaVinci Resolve. That will result in a product called Ravengrade.com with official release in Q1 2022. Go to ravengrade.com to pre-order the product.
-
Happy to hear it works now
-
Hi Kevin. Is the Fullscreen button bottom right not visible?

-
 The Color Couch is a podcast hosted by Vincent Taylor, who works as a Senior Colorist and is based in Los Angeles. In this podcast Vincent chats with industry professionals including Colorists, Cinematographers, Directors and more. You will get a glimpse into their roles in the industry and how they got there. The conversations include some exclusive behind the scene stories and a few bad jokes from Vincent as well. Make sure to check back regularly for the latest episode. Enjoy the podcast!
 -
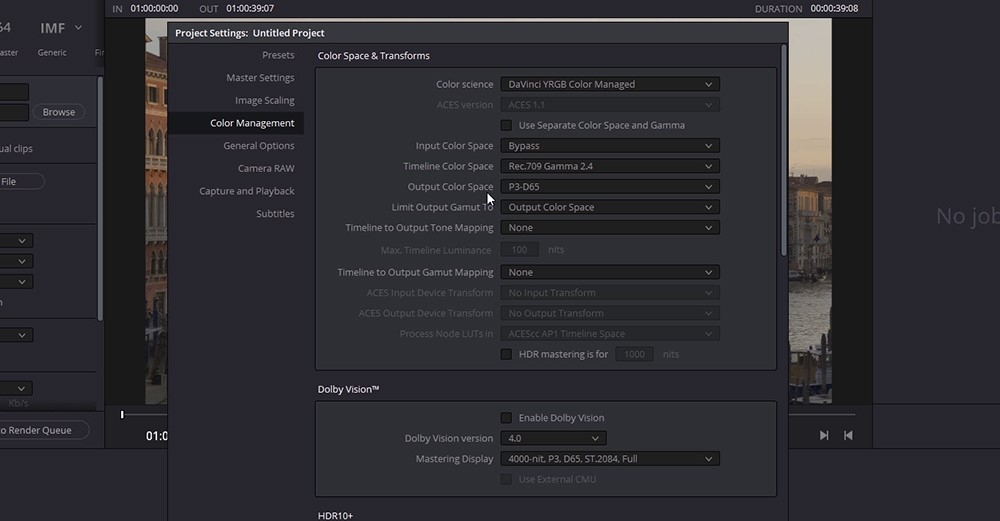
 Where to get access to the LUT? The old ARRI K1S1 LUT is now renamed to ALEXA Classic 709 and the new one is called ARRI 709 inside all ARRI cameras on the market. It can be downloaded here on Lowepost or be generated in ARRIs LUT generator. The new LUT is the default Rec709 choice in all the ARRI cameras available (AMIRA, SXT, Mini, LF and MiniLF) and colorists should have access to it to be able to recreate the exact same image that was displayed on set. Unfortunately, BlackMagic Design have not updated their LUT folder inside of Resolve so the LUT needs to be downloaded and placed in the folder manually or extracted from the metadata of a recent recorded clip. How to install the new LUT in DaVinci Resolve 1. Open DaVinci Resolve Project Settings 2. Click Color Management 3. Scroll down and click Open LUT Folder 4. Copy the LUT and click Update Lists The shots used in this post can be downloaded here.
 -
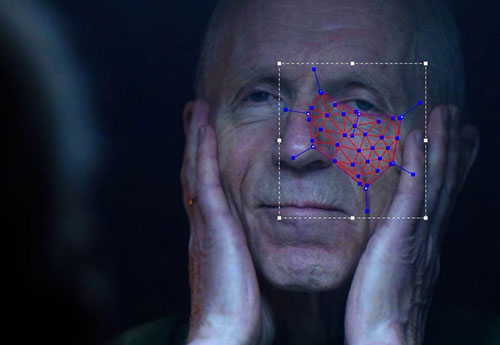 I n this guide, world-renowned visual effects expert Lee Lanier from the learning platform Lowepost will walk you through the most common tracking types available in modern compositing applications. No single tracking type works with all shots, and as a compositor it’s important to learn which tracker works the best in each situation. 1. Transform Tracking Transform Tracking is the simples tracker available in most applications and occurs in 2D. It's able to track the X (left/right) and Y (up/down) motion of a pattern over time. This type of tracking is often called Matchmoving, as you can use it to impart motion to a new element as if it was shot with the original real-world camera. For example, if you want to add a moon to a sky of a shot where the camera has minimal movement (say a short pan, dolly, or handheld tilt), Transform Tracking is a good choice. In this shot from the Tracking Complex Surfaces in Nuke and Mocha Pro course, Transform Tracking is used to track reflections onto the visor of the helmet. Although it's often only necessary to use one track point to track one feature, you can use two track points to track two features and thus detect simple rotation and scale changes. The rotation must stay “flat” to the camera (a rotation along the camera's Z axis) and the scale changes are limited to those created when the camera zooms or changes its distance from the tracked feature. 2. Corner Pin Tracking This tracking builds upon Transform Tracking by adding three more track points for a total of four. In other words, it tracks four separate patterns over time. It's ideal for tracking anything rectangular. For example, you might track a door, window, poster, billboard, or Ipad screen. Learn more about screen replacement with corner pins in these courses for DaVinci Resolve Fusion and After Effects & Mocha Pro. Although each track point operates in 2D (in the XY directions), having a total of four points allows the tracker to detect perspective or rotational changes to the rectangular object. In the example below from the Tracking Complex Surfaces in Nuke and Mocha Pro course, Corner-pin Tracking is used to replace a logo on a jacket that rotates. Instead of imparting the tracked motion to a new element, a corner-pin tracker distorts a new element to fit the tracked rectangular object. Each corner of the new element is moved to the matching corner of the tracked rectangular object. 3. Stabilization Stabilization uses Transform Tracking to analyze camera movement, and you can use the inverted motion to stabilize the original footage. For example, if you have a hand-held shot with some minor motion, you can use stabilization to make the shot appear static. The shot above is from a course about building replacement in DaVinci Resolve Fusion, and the stabilization is used to make the rotoscoping process of the building in the background easier because it stands still. When the rotoscoping is finished, the motion is added back in. This technique is called Reverse Stabilization. 4. 3D Camera Tracking 3D Camera Tracking is the most technically complex form of tracking, although it can be easy to apply. It's designed to detect camera motion within a shot and reconstruct the camera's basic properties in 3D space. This is a suited method for any shot where the real-world camera is moving along all three axes (X, Y, and Z). For example, if you have a hand-held shot where the cameraman is walking forward, you can use this tracking method to add a new element into the shot, so that the element picks up all the complex movement created by the original camera. The new element might be a piece of 3D geometry imported from a 3D program such as Maya or 3ds Max, or a “card,” which is a 2D layer placed within 3D space. In this example from the Introduction to Visual Effects in After Effects course on Lowepost, 3D camera tracking is used to track two arrows to a tree. 5. Planar Tracking Although Planar Tracking appears similar to Corner-pin Tracking, it's much more powerful and sometimes easier to use. Planar Tracking can be done in Nuke and Mocha Pro and tracks a planar feature through space over time. Because the tracker is not concerned with corners or edges, but instead tracks the entire established feature as if it were fixed to a plane, it can accurately detect perspective and parallax changes. In fact, the corners of the feature can leave the frame or become temporarily occluded and the tracker will continue to work. For example, you might use Planar Tracking to track the road as a camera drone moves by, and then use the tracking data to distort a new road marking as seen in the Tracking Complex Surfaces in Nuke and Mocha Pro course on Lowepost. Planar Tracking also allow you to define the tracked feature by drawing one or more closed spline shapes with an arbitrary number of spline vertices for detailed control. 6. Mesh Tracking Mesh Tracking is a new style of planar tracking available in Mocha Pro. It’s an advanced Planar Tracker able to track complex organic surfaces, and it works by sub-dividing the surface to detect small motions for much more detailed control as you can see in the image below. Mesh Tracking can for example be used to detect the surface deformation of undulating clothes or rippling skin and in this particluar example to add a lip-piercing and a tattoo that moves naturally with the face expressions. It can also be used to add a logo to a flapping flag, digital makeup, help out with rotoscoping or to add a matte painting of scars and bruises as in the example above from the Tracking Complex Surfaces in Nuke and Mocha Pro training on Lowepost.
 -
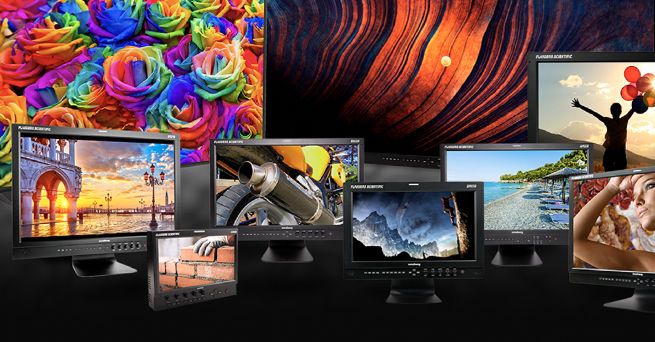 A color grading monitor is the heart of any color grading suite, and there are many options on the market. A true reference monitor with precise color reproduction is a big investment, and we will guide you through the most common models used in post-production facilities around the world. Professional color grading monitors let you evaluate the image with extreme accuracy, which is required when you have to make guarantees about the delivery. They are reliable over time and ideally equipped with useful features that make your job easier, such as advanced real-time scopes, split-screen viewing, anamorphic de-squeeze, and pixel zoom functions. 1. Flanders Scientific DM242 (24") The most acclaimed color grading monitor in the professional range is the 24-inch DM242 ($4295) from Flanders Scientific, Inc. (FSI). FSI is trusted by the colorist community for the quality of their products and are known for their excellent service and support. The 1920x1200 (HD) resolution display comes with a specialized toolset tailored for colorists. It includes a variety of video and audio analysis tools like Real-Time Customizable Multi-Color Waveform, Parade, Vector, Histogram, and multi-channel audio. It also supports advanced features such as ScopeStream, Image Flip, Second Screen Output, and many other features that can’t be found in more affordable models. In addition, it has a ton of on-set features like LiveGrade integration, zero delay mode, and DIT Look LUT functionality, which makes it shine on set as well as in the suite. The DM242 comes pre-calibrated from the factory and FSI offers free lifetime re-calibration for customers that would like to send the units to one of their service departments. It also supports AutoCal, an internal auto-calibration solution that lets you perform a fast and accurate calibration. Simply plug a supported probe directly into the monitor and the calibration is performed in one simple, fast, and unified operation without the need of any software. The probes supported for this solution are the affordable x-Rite i1d3 OEM Probe, Colorimetry Research CR100, Klein Instruments K10A, and Minolta CA310. The more affordable x-Rite is accurate enough for professional use, but the others will provide extremely accurate results. This is definitely one of the most dependable, accurate, and trustworthy reference monitors available on the market for 1920x1080 delivery. 2. EIZO ColorEdge CG3100X (31") An alternative to the DM242 is the 31-inch EIZO ColorEdge CG3100X ($5739) from Eizo’s CG-professional line. This is a popular model that is widely used by professional colorists working in smaller studios, and the screen is a bit larger. It displays 4096 x 2160, which is ideal when delivering projects in 4K and provides superb color accuracy. Eizo is generally known to create great monitors, but you need to be aware of their limitations. The built-in calibration capabilities can offer users an affordable way to get you started, but a 3rd party calibration solution like, ColourSpace or Calman, would be needed for more accurate calibrations. The feature set is limited and popular analysis tools available on professional monitors from FSI and Sony are missing. It has basic functions, such as safe area and aspects markers for checking how text, graphics, and compositions of a scene will appear in other viewing environments, and a useful zoom function that lets you confirm small details and check focus accuracy. While most professional monitors have SDI connections, it's worth nothing that the Eizo monitors have HDMI only, so make sure your output device supports HDMI. The EIZO ColorEdge CG3100X is a reliable color-accurate 4K monitor that is widely used in professional environments, but you need to be aware of the limitations and weigh up the pros and cons. 2. Sony BVM- E251 (24") Sony has always been a significant player in the color grading monitor market, and their only alternative in this segment is the 24-inch BVM- E251 ($10,595). They have always offered highly accurate displays, consistency, and for many facilities a certain amount of brand awareness that can make some clients more comfortable. The monitor comes with limited external calibration possibilities and claims that 3D calibration is not needed. This is a debated topic, but most reports show they rarely drift and small adjustments to white and back points are all that is required. Many of the high-end color grading facilities already own one of the top of the line mastering monitors from Sony, and it can make sense to add this to their arsenal as it will offer a better perceptional match to the other models. While it offers a very limited feature set, the viewing angle for picture evaluation is exceptionally good and allows several people to sit around the monitor and evaluate the image at the same time. PROFESSIONAL HDR MONITORS The color grading monitors mentioned above are all capable of displaying standard dynamic range images, which is the current standard for video and cinema monitors. If the plan is to deliver work in HDR, you are looking at a significantly higher price range. For real HDR, you will have to invest in a monitor, like FSI’s flagship's XMP 270 or XMP 310C with 1000 nits. EIZO’s ColorEdge PROMINENCE CG3146 and Sony’s BVM-HX310 both operate in the same 1000-nit reference HDR class, The most popular model in the high-end facilities today is undoubtedly Sony’s discontinued model X300. OTHER ALTERNATIVES? To be fair, there are other professional reference monitors and brands that could be on this list, but we have narrowed it down to the most common ones. There are definitely colorists successfully working on smaller 17-inch color grading monitors in the professional range and 8-bits production monitors, but we have deliberately excluded those from the list. Many have also great success working on Asus Pro Art, LG C5 / C6 55, and other consumer alternatives. Just bear in mind that the signal processing on those screens is not necessarily at the same level as on professional monitors, functions are missing and they often have underlying issues such as noise, banding, poor screen uniformity, etc. If you go this route, be prepared to participate in the panel lottery. As the budget and scale of distribution for a project go up, there could be financial risks involved and certain requirements for the delivery, so you need to rely on your reference monitor. Good luck with your choice! By Steve Hanson Thanks to @Jason Myres for contributing to this article This post might include affiliate agreements, for full information click here.
 -
Red Color Workflow in Redcine-X & DaVinci Resolve
Lowepost commented on Lowepost's course in Color Grading
No worries -
Red Color Workflow in Redcine-X & DaVinci Resolve
Lowepost commented on Lowepost's course in Color Grading
You need to download it from the site Kevin visits, we're not allowed to provide it from our own download link - https://www.arri.com/en/learn-help/learn-help-camera-system/camera-sample-footage -
Masterclass in Color Grading with Douglas Delaney
Lowepost posted a course in Color Grading Masterclasses
 Douglas Delaney works as a senior colorist at Technicolor in Los Angeles, and has color graded many of the most known features and drama series in the world. In his masterclass you are invited into his color suite to watch how built his grades, discuss color grade techniques, workflows and strategies that will help you become a better colorist. The course is about the art and craft of color grading and is not designed to teach the operations of a specific software. About the instructor Douglas Delaney is a world-renowned senior colorist working at Technicolor in Los Angeles. He has crafted images for many top directors and worked on blockbusters and dramas such as Captain Marvel, The Equalizer, Jumanji, The Loudest Voice, and the The Hot Zone. Who is this course designed for? Colorists COURSE OVERVIEW LESSON 01: INTRO Meet Douglas LESSON 02: COLOR SPACE JOURNEY AND FAMILY DRT Douglas talks about the color space journey in his color corrector and about the family DRT used on this show. LESSON 03: THE GRADE OF THE SHOW In this lesson Douglas talks about how he approached the color grade on this show, and the order of grade operations. LESSON 04: TIME & RIPPLING In this lesson Douglas demonstrates an effective ripple function in Baselight and discuss time management. LESSON 05: LOOK CREATION & COLOR ROOM Now it’s time to be more creative, and Douglas discuss different look creation techniques. He also share some thoughts about how to prepare for color grading sessions and to deal with conflicting interests in the color room. LESSON 06: SCOPES Douglas discuss when and why he uses the scopes. LESSON 07: INSPIRATION Thoughts on how to get inspired and keep staying on top of your game
- 19 comments
-
- 29
-
-
-
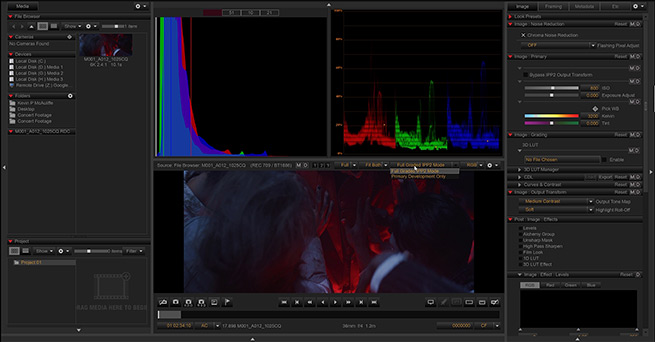 Learn the post-production workflow necessary to get the most out of your Red camera footage. Take advantage of the incredible dynamic range in the camera and achieve superior image quality only possible with the right post-production process. This training series is designed for beginners and no post-production experience is necessary. It’s perfect for everyone involved in production or post-production including DITs, Cinematographers, Editors and Colorists. You will also get acess to the Red footage used in this course, so that you can easily follow along. Download project files About the instructor Kevin P McAuliffe is an award winning editor and visual effects creator with over 20 years of teaching and training experience. Over the past years Kevin has delivered world-class work for clients such as Warner Bros, Walt Disney Company, 20th Century Fox, Universal and Elevation Pictures. Who is this course designed for? Editors Colorists DITs Cinematographers COURSE OVERVIEW LESSON 01: RED PLAYER AND METADATA In this first lesson, we'll analyze and read metadata from a Red shot in Red Player. LESSON 02: COLOR SPACE AND REDCINE-X BASICS We'll look at metadata in Redcine-X. LESSON 03: PROJECT CREATION AND DECODE OPTIONS In this lesson, we'll open a project in DaVinci Resolve and set the decode options. LESSON 04: IMPORTING, BIN VIEWS AND CLIP METADATA More metadata in DaVinci Resolve. LESSON 05: NON-COLOR MANAGED RED WORKFLOW We'll go though the IPP2 non-color managed workflow in DaVinci Resolve. LESSON 06: LUT MANAGEMENT In this lesson we'll create camera LUTs and LUTs for post production with the IPP2 LUT creator in Redcine-X and look at how to optimize it for a post workflow. LESSON 07: COLOR MANAGED RED WORKFLOW Now we'll look at a color managed Red workflow in DaVinci Resolve. LESSON 08: CONVERTING THE COLOR SPACE OF DIFFERENT CAMERAS In this lesson we'll look at how to match the color space of Alexa and Red footage which is required on projects shot on different cameras. LESSON 09: BASIC COLOR GRADING We'll look at basic primary color corrections and secondary corrections such as hue shifts of specific colors, vignetting and other useful techniques. LESSON 10: WORKING WITH DATA BURN-IN In this this, we'll add data burn-in and metadata to prepare the footage for exporting. LESSON 11: EXPORTING STRINGOUT SEQUENCES Now, we'll look at the best settings for exporting clips and sequences for directors or clients. LESSON 12: EXPORTING DAILIES We'll go through a dailies workflow in DaVinci Resolve.
 -
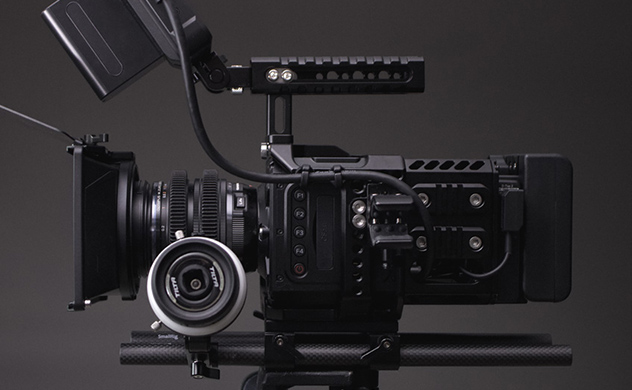 You have probably heard about the newcomer in the world of high-end cameras, the Z CAM? The high-quality professional camera has quickly become a real competitor to the more expensive cameras because of its up-to-8K resolution, high frame rates, modular design, and cinematic look. In this guide, we will show you how to build the Ultimate Z CAM rig! THE STARTING POINT When you buy the camera, it comes with a square camera body only and you will have to rig it out to fit your needs. The modular camera system can be customized to fit the needs of small run-and-gun productions, gimbal and drone work, or large-scale-productions with tons of accessories. Let’s look at what you need to build this little square camera module into a production-ready high-end camera! CAGE AND Z-BACK The first thing to look for is a custom-fitted camera cage. There are many reasons to add a cage such as ergonomics and protection, but the main reason is to add mounting points to customize the camera to your needs. Tilta, Kondor Blue, Nitze, 8Sinn, and several others produce cages for Z CAM, but we went for the Smallrig cage because of its versatility, mounting options, and industrial look. Smallrig also have a dedicated back module called the “Z-back,” that can be attached to the back of the main camera cage to add even more mounting holes, and nato rails to attach accessories. In addition, it's an excellent module to protect and hide cables going into the back of the camera body. MONITOR All modular cameras need an external monitor, and most users go for a 5” or a 7” size. The most popular one for the Z CAM is the Ninja V 5.2” from Atomos because it can control the key functions of the camera from the touchscreen, and acts like a Prores RAW recorder for those who don’t want to deal with a ZRAW workflow in post. For this particular rig, we went for a cheaper alternative, the Shinobi from Atomos. It lacks support for camera control, but for our use we don't find it necessary because the camera body has programmable buttons easily accessible. There are some other alternatives on the market, and two of the most popular are the SmallHD Pro Focus and Portkeys BM series. The first one is the industry standard but lacks HDMI input, so you’ll need an HDMI to SDI converter on the back of the Z CAM to make it work. The latter comes with HDMI and can control the camera, but has a noisy fan like the Atomos. It’s also worth noting that the Z CAM community is a bit annoyed by Portkeys’ absent customer support. In the 7-inch monitor range, have a look at the Swit/Osee 7, and for an even larger screen, the 9” BM090 from Flanders Scientific (FSI) is definitely worth looking into. It’s a miniaturized version of FSI's high-quality large-format monitors and is packed with useful features. HANDLES There are many handles on the market that can be attached to the camera cage, and we went for Smallrigs top handle grip with locating point for Arri because of its ergonomic and industrial design. This top handle also has mounting holes for a tilt monitor mount in front, which is important for center aligning the monitor for better balance. You can even slide it in both directions or swap the handle 180 degrees for situations that require a different grip. For additional grip, the camera cage comes with an Arri Rosette mount that can be used to attach a side handle. BATTERY SYSTEM The Z CAM body can take a small Sony NP-F series battery, but for more power, consider adding a V-mount battery. For lightweight rigs, a Micro V-mount solution such as the IDX P-Vmicro, paired with micro-batteries, e.g., the Mini V-LOK batteries from reputable Hawk-Woods is a good choice. It looks good and adds weight to the back of the camera, which is good for balancing. Hawk-Woods also have Sony-compatible batteries that are just as good and cheaper than the originals if you prefer the original NP-F built-in battery mount. Additionally, all the monitors mentioned above come with NP-F mounts, so make sure to grab a lightweight but powerful battery for your monitor too. AUDIO Even though the internal audio can be good enough in some situations, it can’t beat external audio. Internal audio often comes with excessive amounts of hiss when gained up, and the only way to get a clean audio signal from the camera is to use an external audio adapter. We choose DXA-RED from Beachtek, which comes with two phantom-powered XLR-inputs, and we connected it to our MKH 8060 Sennheiser condenser microphone. By using an adapter, the preamps in the camera can stay on low gain for best performance while the adapter does all the heavy lifting. That way we can push the gain and get high-quality audio. The DXA-RED also integrates nicely because of its industrial design, and can be mounted directly on the rods with rail blocks or installed on the side with the click-release plate it’s delivered with. The MKH 8060 from Sennheiser is the state-of-the-art shotgun microphone for cinema cameras and is an improved version of the legendary MKH 416. Even though they are quite similar in sound and reach, the MKH 8060 is a modular and shorter shotgun microphone, and therefore ideal for small camera systems like this. Its off-axis sound is not affected by any coloring and it has a lower end, which is often required by filmmakers. It can be mounted directly on the cage with a 1/4”-20 screws microphone holder or a cold shoe microphone mount. LENS AND LENS EQUIPMENT The Z CAM models come with various sensor sizes, and we have mounted an Olympus 12-40 zoom lens on the E2-M4 Micro Four Third (MFT) mount. That’s an affordable lens with incredible image quality that’s difficult to match in the same price range. The mounting system is interchangeable so that EF, M, and PL-mount lenses can be used. The lens is also equipped with a Tiltaing Mini Follow Focus attached to 15mm carbon rods from Smallrig. Remember, most non-cine lenses do not have built-in 0.8 module gearing for use with follow focus systems, so follow focus gear rings will be required. We went for cinema gears from Outlast, provided by Couto Camera for both the focus and aperture barrels, and they sit nicely on the lens without any sign of wiggle. Couto build cinema gears for every lens available at any size and ships very quickly worldwide. It’s important to know that alternative ultra-rigid gears, like aluminum, can make noise during pulls, but these are near-silent against the focus find, which is important when we have a shotgun microphone mounted on the camera. MATTE BOX AND STEP-UP-RINGS We wanted a lightweight matte box to help prevent light flares, and thus, went for Tiltas. It’s probably the smallest solution on the market and designed to be mounted directly onto the lens. However, the problem we encountered was that the matte box didn’t fit our lens because the kit only contains a small set of adapter rings (82mm, 77mm, 67mm, 72mm). Luckily, Couto came to our rescue once again and supplied us with filter threads step-up-rings that worked well with our matte box. MEDIA MANAGEMENT CFast 2.0 cards are the most common recording media for high-end cinema cameras, but unfortunately, not all of them are qualified by Z CAM. Loading unqualified media can result in dropped frames and a lack of ability to recording in certain compression ratios. Exascend and Angelbird offer qualified CFast 2.0 cards built for Z CAM, and they are known to be the most reliable high-speed cards available on the market. Additionally, you have the option to record directly to Angelbirds portable up-to-2TB SSD disks. These are super small, rugged, and fast portable devices built to fight dust, moisture, high temperatures, magnetic and x-rays, and can be connected with USB-C. CABLE MANAGEMENT Good cable management is a must, but it can be complicated to navigate through the different options. Alvin Cables is a reputable company that makes customizable cables for cinema cameras that you can consult with and buy from. We have used a 2 Pin Lomo to D-Tap to power the IDX mount, and a cable with a 2 Pin right-angled Lomo in both ends to power the DXA RED. To carry the audio signal between the DXA RED and Z CAM, we have used a 5 Pin Lemo to 3.5mm TRS mini plug, and the microphone is connected with a 3 Pin XLR male to female shielded cable. To connect the Shinobi Monitor, we have used a 0.6m straight to right-angled HDMI cable from Cerrxian. For the finishing touch, we have used a nice little camera management device called 'Sprig.' It helps organize your cables along the surfaces of the cage. We choose black 1/4-20 Sprigs, but they are also available in various colors and sizes 3/8-16. Good luck building your camera! This post might include affiliate agreements, for full information click here.
 -
In this course, instructor Nick Harauz will show you how to bring a Mixamo character into Cinema 4D and customize the animation. We'll look at decorating the character with Cinema 4D materials and then creating a grid floor pattern with the help of a free tool called JSplacement. We'll create an object buffer to have seperate control over our floor and man in After Effects. We'll then finalize our piece by adding HUD overlays and some simple shape animation in both 2D and 3D to finalize the layout. The assets used in this course are available for download. Download project files About the instructor Nick Harauz is a certified motion graphics instructor, and has previously been a master trainer for Red Giant, Cineversity from Maxon, Boris FX, Post Production World Online and Adobe Max. Nick has developed his motion design style over the last 15+ years and crafted high-end work for a variety of domestic and international brands such as Virgin Mobile, Proctor & Gamle, Diageo and MasterCard. Who is this course designed for? Motion Designers Cinema 4D users After Effects users COURSE OVERVIEW LESSON 01: MIXAMO DOWNLOAD In this first lesson, we'll take you through how to download the Mixamo character we'll be using for our Cinema 4D project LESSON 02: TWEEKING THE MIXAMO ANIMATION We'll tweak the Mixamo animation by extending it and getting rid of unnecessary keyframes LESSON 03: ADDING MATERIALE TO THE CHARACTER In this lesson, we'll add a material to illuminate our subject and create a stylistic Hud look LESSON 04: CREATING THE FLOOR We'll create a floor out of a disc and reference a grid like material from Jspalcement; a free app LESSON 05: ADDING A CAMERA AND BLINKING LIGHT We'll make a visible light blink and add a camera to our scene we'll animate LESSON 06: RENDER TO AFTER EFFECTS Now it's time to setup our project to render to After Effects. The techniques shown here are replicated from the other 3 previous HUD courses LESSON 07: BRINGING AND PREPPING THE AEC FILE In this lesson, we'll bring in the AEC file and separate the 3 layers from the object buffers we created LESSON 08: PREPPING THE PSD FILES We'll download and prepare a free Photoshop HUD design for use in After Effects with courtesy of Adobe Stock LESSON 09: BRINGING AND POSITIONING THE PHOTOSHOP LAYERS IN AFTER EFFECTS We'll bring in our prepared PSD file and position it in our After Effects Comp LESSON 10: ANIMATING THE TEXT PLACEHOLDERS In this this, we'll convert our Photoshop text for After Effects and animate it. We'll also add some extra tex via the numbers Effect LESSON 11: ANIMATED HEARTH GRAPH Now, we'll animate a heart monitor with the help of After Effects Audio Effects LESSON 12: ANIMATED CHART We'll replace a static graphic with After Effects shapes and animate them with some simple expressions LESSON 13: DNA STRAND In this lesson, we'll create a new Cinema 4D project and a simple DNA strand that we'll bring into our After Effects comp via Cineware LESSON 13: STYLISTIC TOUCHES In this last lesson, we'll add some glow and unify the colors of our Comp better. That's it you've made it all the way to the end of this course!
-
In this motion design course, we'll look at creating and distorting a stylized futuristic HUD Earth. We'll begin this course in Cinema 4D where we'll create the earth using an earth texture and atom array, we'll add additional elements to the bottom of our earth and render to After Effects where we'll stylize and add our distortion effects. The assets used in this course are available for download. Download project files About the instructor Nick Harauz is a certified motion graphics instructor, and has previously been a master trainer for Red Giant, Cineversity from Maxon, Boris FX, Post Production World Online and Adobe Max. Nick has developed his motion design style over the last 15+ years and crafted high-end work for a variety of domestic and international brands such as Virgin Mobile, Proctor & Gamle, Diageo and MasterCard. Who is this course designed for? Motion Designers Cinema 4D users After Effects users COURSE OVERVIEW LESSON 01: CREATING THE EARTH In the first lesson, we'll will take you through creating the HUD earth by downloading a free Earth Map, referencing it as a material and taking a sphere we'll create particles from using the hand Atom Array generator LESSON 02: CREATING THE EARTH OUTLINE We will modify our earth texture map in After Effects to create an Earth HUD outline LESSON 03: CREATING THE DISCS Several discs will be created and we'll offset and place them at the bottom of the earth LESSON 04: ANIMATING THE DISCS In this lesson, we'll look at using Mograph to animate our discs LESSON 05: ADDING MATERIAL TO THE DISCS We'll look at placing each of our discs within an atom array and then coloring them with the luminance channel of a material LESSON 06: ADDING HAIR TO THE 3RD DISCS In this lesson we'll look at adding hair to create thin strands around our HUD earth LESSON 07: RENDER TO AFTER EFFECTS Now, we'll create several Object buffers to render the Earth elements seperately to After Effects LESSON 08: PREPPING OUR AEC FILE AND OBJECT BUFFER LAYERS It's time to prepare our AEC file and reference each of the object buffers through track mattes LESSON 09: CREATING A BG In this lesson, we'll create a background with gradients and the grid effect LESSON 10: CREATING A GLITCH WITH FRACTAL NOISE We'll create a glitch with Fractal Noise and simple expressions LESSON 11: RGB GLITCHES In this lesson, we'll use the set channel effect to seperate our globe in independent color channels we'll control with the glitch effect and hold keyframes LESSON 12: ADDING TEXTURE, DISPLACEMENT AND TEXT We'll add a overlay texture along with displacement and some simple text LESSON 13: ADDING CIRCLE OUTLINES AND RODS In the last lesson, we'll look at cloning more object in Cinema 4D onto our Earth HUD
-
In this course, Nick Harauz will take you through using the Cloner Object inside of Cinema 4D to create a seamless Hexagon Floor and animated Hero Objects. After rendering our Cinema 4D project, we will bring this into After Effects and use 2D shapes, Replicators and Glow to add stylistic accents to the design. We will also explore using an After Effects Glow versus the Glow from Maxon One's VFX Suite. The assets used in this course are available for download. Download project files About the instructor Nick Harauz is a certified motion graphics instructor, and has previously been a master trainer for Red Giant, Cineversity from Maxon, Boris FX, Post Production World Online and Adobe Max. Nick has developed his motion design style over the last 15+ years and crafted high-end work for a variety of domestic and international brands such as Virgin Mobile, Proctor & Gamle, Diageo and MasterCard. Who is this course designed for? Motion Designers Cinema 4D users After Effects users COURSE OVERVIEW LESSON 01: CREATING THE MAIN OBJECT In the first lesson, we'll use a preset Cinema 4D spline to create the main Hexagon LESSON 02: CREATING THE HONEYCOMB FLOOR We'll create another hexagon that we'll clone and position just under our main object LESSON 03: ANIMATING THE FLOOR The Plain Effector and Fields will be used to create a pulsating type animation LESSON 04: LIGHTING THE SCENE We'll use Cinema 4Ds lights to illuminate our graphics LESSON 05: ADDING A CAMERA, POSITIONING THE SCENE AND RENDER A camera will be added to frame our scene and then render for use in After Effects LESSON 06: ADDING 2D HEX SHAPES AND OUTLINES PART 1 In this lesson, we'll bring all our shape comps into the Cinema 4D comp. We'll make all the layers 3D and attach them to the null from Cinema 4D LESSON 07: ADDING 2D HEX SHAPES AND OUTLINES PART 2 We'll create another comp and a different style animation that we'll offset LESSON 08: ADDING 2D HEX SHAPES AND OUTLINES PART 3 We'll create some line and Hex Bursts LESSON 09: ADDING 2D HEX SHAPES AND OUTLINES PART 4 We'll look at some final 2D shape animations by duplicating circles of a hex shape pattern LESSON 10: BRING THE SHAPES INTO THE MAIN C4D COMP Now it's time to bring all the shapes we've created over the last 4 lessons into the main comp, attaching it to the null from Cinema 4D and then offsetting each shape animation in time LESSON 11: STYLIZING THE SCENE You've made it all the way to the end of the course and now it's time to add, some color correction grain and glow to our scene. Let's get to it
-
In this motion design course, instructor Nick Harauz will take you through creating a HUD landscape with the help of Cinema 4D and After Effects. We'll start off by creating a loopable rotating landscape in Cinema 4D through a non-traditional method with Volumes. We'll then export our landscape as an AEC file and then stylize inside of After Effects using a variety of Effects. The assets used in this course are available for download. Download project files About the instructor Nick Harauz is a certified motion graphics instructor, and has previously been a master trainer for Red Giant, Cineversity from Maxon, Boris FX, Post Production World Online and Adobe Max. Nick has developed his motion design style over the last 15+ years and crafted high-end work for a variety of domestic and international brands such as Virgin Mobile, Proctor & Gamle, Diageo and MasterCard. Who is this course designed for? Motion Designers Cinema 4D users After Effects users COURSE OVERVIEW LESSON 01: CREATING THE LANDSCAPE We'll set up our Cinema 4D project and create a basic landscape. We'll then take that landscape and place it inside the Volume builder to create a stylized look. LESSON 02: CURLING THE VECTORS AND ANIMATING WITH FIELDS In this lesson, we'll look at how we can modify our vectors as well as use fields to animate them on screen LESSON 03: CAMERA AND NULLS Now, we'll add an animated camera and nulls to our scene at the position of some of our vectors LESSON 04: EXTERNAL COMPOSITING AND RENDER SETUP We'll continue to add some external compositing tags to the null objects, so that we can see them in After Effects and then setup our render so it references the viewport LESSON 05: VIEWPOST RENDERER AND AAC FILE We'll look at the the viewport renderer and AAC file LESSON 06: BRINGING IN THE AEC FILE In this lesson we'll look at how we can bring in an AEC file and setup our composition in After Effects LESSON 07: SET CHANNELS We'll use the set channels effect on duplicate copies of the Landscape to add some distortion LESSON 08: ADDING TEXT In this lesson, we'll add and attach some After Effects 3D Text to one of the nulls from Cinema 4D LESSON 09: RADIO WAVES Now it's time to add the After Effects Radio Waves effect, adjust its properties and position it so that it's referencing the 2nd null from Cinema 4D LESSON 10: LIGHT YOUR 3D OBJECTS We'll add some After Effects lights to illuminate the text and Radio Waves LESSON 11: STYLIZING THE COMP In this last lesson, we'll add texture, color correct our piece and add some grain to the final look
-
 Y ou can achieve excellent results using just the software controls, but the fastest and most accurate way to color grade is with a color control surface. It’s the heart of any professional color grading suite, and here is why. CREATIVE ADVANTAGE Every aspect of the image can be adjusted with a control surface, including exposure, hue, saturation and secondaries. It has wheels, knobs, dials and buttons for everything and you can accurately fine tune any parameter. One of the most important benefits is that you can use both hands to adjust several controls simultaneously, instead of making individual adjustments on single controls, one at a time, with a mouse. This allows for creative play and exploration of hue combinations that will be extremely hard to achieve with the mouse alone. It encourages you to come up with different looks faster, and it’s a much more reliable way to get to a good result. Keeping your eyes on the image instead of clicking around on the various controls inside the software UI is also a much better way to grade. PRECISE ADJUSTMENTS The slightest exposure or hue change will have a great impact on the image and you can gain much more precise results using wheels, knobs and buttons with resistance. It’s nearly impossible to do fine-grained adjustments with the mouse. SPEED When working with a control surface over time, you will develop what is called “muscle memory”. Your hands will start to intuitively reach for the dedicated knobs, dials, buttons and wheels while your eyes stay on the image. It saves a lot of time and makes color grading a breeze. In addition, the panel layouts are editable and you can customize any physical control to your own preferences. You have every tool at your fingertips, and that’s a big time saver! THE CLIENT LOVES THE PANEL Don’t underestimate the value of an impressed client. A panel is a great looking piece of hardware, and owning one shows that you are serious about your craft. Who isn’t impressed by the look of the Tangent’s Element Panels made from precision laser-cut solid aluminum with handcrafted black metal rings from Angry Face? FIND A PANEL THAT WORKS FOR YOU There are several alternatives on the market, and the first you will probably look at is Blackmagic Design’s own panels. The big advanced panel ($30,000) will be out of reach for most colorists, and the same goes for FilmLight’s Blackboard panel. Blackmagic Design does offer low cost alternatives such as the Mini ($3000) and Micro panel ($1000), which are more affordable. These are both well-built and have the most necessary controls included, but you need to be aware that there are some limitations. The most important one is that they only work with DaVinci Resolve. If you work with a variety of applications, there are good reasons to look at Tangent’s Element panels. It’s a far more versatile and future proof control surface from the reputable company Tangent, which consists of four units: Element Tk (Triple trackerball unit), Element Bt (Button panel), Element Kb (Knobs panel) and Element Mf (Multi-function panel incl. jog wheel). It is compatible with a wide range of professional applications and plugins including all the major ones used in post-production and on-set. Recently Tangent even added support for Lightroom, Audition and are now working on support for Unreal Engine. Another good reason to consider the Element panels is that the ergonomics are excellent and your keyboard can be positioned nicely in front of the panels. That isn’t necessarily the case with the Mini panel, because it is much deeper. Also, the build quality is excellent with high-quality optical encoders, dials and buttons, which give the perfect amount of resistance. Thanks to the smart modular design of the panels, you don’t necessarily have to buy all four units. The Tk is a good choice if you want the color wheels only, and if you want a smaller board to only control some specific features such as the printer lights and keyers, the Bt and Kb might be a combination that works for you. The full set with all the four units currently sells for $3300 and some colorists even prefer to put together multiple parts of each unit and expand their set of Elements beyond just the standard four. For those who are looking for a budget alternative, Tangent also offers the smaller Wave2 that is available for only $950. The plastic chassis might turn you off, but it’s actually quite sturdy, includes all the necessary controls, and features 3 displays and a jog wheel. The big benefit with this board is that it’s highly portable and can easily be carried around to different facilities and brought on location for on-set coloring. It’s by far the best all-in-one panel on the market. Tangent also offer a very popular entry level panel called Ripple for $350 with 3 trackerballs, dials and 2x customizable buttons. One last option is the Avid Artist Color Panel ($1195), but it’s discontinued. You can still find used ones on eBay, but for now the best advice is to stay away. It requires an Ethernet port to work, which your laptop of choice might not offer. Also, many of our members have reported connectivity issues with DaVinci Resolve and the panel SDK is not updated for Apple M1 compatibility. Steve Gabler
 -
If you are serious about color grading you need a monitor you can trust, and calibrating using DaVinci Resolve is easier than ever. You can achieve excellent results without hiring professionals and to a very low cost. We will give you a brief overview of what you need and how calibration in DaVinci Resolve works. WHAT DO YOU NEED? DaVinci Resolve Both the paid and free version will work. Laptop with a calibration software The calibration software can be run directly on the DaVinci Resolve workstation, but having a dedicated laptop means other displays such as the client monitor also can be calibrated easily. We use ColourSpace by Light Illusions because it’s the industry standard calibration software used by most colorists, and it’s supported by DaVinci Resolve. I can be run on Windows or via VM on Mac. CalMAN is also a great alternative. A professional monitor In this example we use the Flanders Scientific DM240 because it’s one of the most popular and affordable 24” color grading monitors on the market. It has ColourSpace integration and can store calibration LUTs internally. Probe There are many options available in all price classes, but you can get decent results with a cheap X-Rite i1D3. PREPARATIONS Make sure the monitor is connected to the DaVinci Resolve video output card, and that no existing calibration is active. The DaVinci Resolve workstation must be connected to the laptop that runs the calibration software. The probe must be connected to the laptop and be mounted on a tripod pointing straight to the centre of the monitor in a non-angled position. The light in the room must be turned off. HOW IT WORKS When everything is connected, the idea is that the laptop with the calibration software will control DaVinci Resolve remotely and send colored test patterns to the monitor and at the same time take readings with the probe. When the readings are done, the calibration software will create a calibration LUT that you can use to correct the monitor. There are three ways to load the calibration LUT. The LUT can be loaded directly into the monitor if your monitor supports LUTs. If your monitor doesn’t support LUTs, you can load it into a LUT box that is a little device you can connect to the monitor. You can also load the LUT directly into DaVinci Resolve as a Video Monitor LUT in the color management settings. That is a good and inexpensive solution if you have only one monitor connected. If you have more than monitors, e.g a client monitor, it will affect both of them and therefore not be the best way to load a LUT. Note that the LUT will not affect the GUI displays. That’s it. For details, read the documentation on your monitors site and on LightIllusions website
-
Hi Carl. Thanks for letting us know. Not sure what happened but new files are uploaded. Sorry for the inconvenience.
-
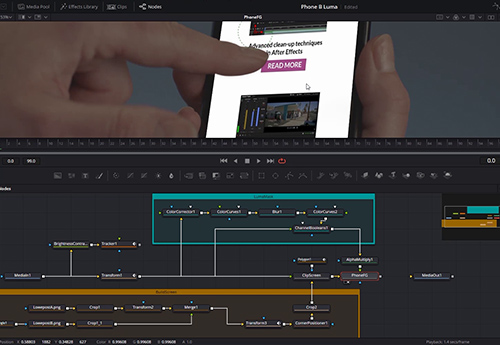 Learn the techniques that makes you master screen replacements, regardless of the difficulty level of the shot. Lee Lanier will walk you through different approaches on a several scree shots with different challenges such as, hidden corners, screens that are our of focus, motion blur issues, hands that are obscuring the screens, missing reflections in the screen and much more. Learn to solve the most complex shots inside of DaVinci Resolve Fusion. The footage and assets used in this course is available for download. Download project files About the instructor Lee Lanier has created visual effects on numerous features films for Walt Disney Studios and PDI/DreamWorks. Lee is a world-renowned expert in the video effects field, and has written several popular high-end software books, and taught at the Gnomon School of Visual Effects in Hollywood. Who is this course designed for? Visual Effects Artists Compositors DaVinci Resolve Users Lessons overview L01: Introduction L02: Optimization L03: Tablet corner pin tracking L04: Chroma keying L05: Tablet - Animating new screen L06: Tablet - Merging new screen L07: Tablet - Intergrating new screen L08: Tablet - Final adjustments L09: Phone A - Chroma keying L10: Phone A - Planar tracking L11: Phone A - Merging a new screen L12: Phone A - Intergrating the screen L13: Phone A - Rotoscoping masks 1 L14: Phone B - Rotoscoping masks 2 L15: Phone A - Final screen adjustments L16: Phone A - Paint fixing L17: Phone B - Phone stabilizing L18: Phone B - Building the screen L19: Phone B - Merging the screen L20: Phone B - Making a luma mask L21: Phone B - Adding a reflection L22: Phone B - Final Adjustments Bonus 1: Monitor A - Matchmoving Bonus 2: Monitor A - Applying Data Bonus 3: Monitor A - Chroma keying Bonus 4: Monitor A - Screen integration Bonus 5: Monitor B - Planar tracking
 -
Hi Kamil. Thanks for reaching out about this, the old project files are uploaded on the link.
-
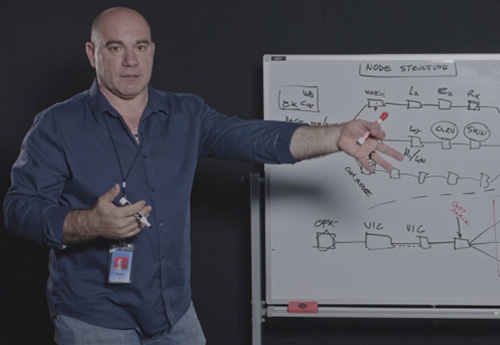 W alter Volpatto is one of Hollywood's most successful colorist and some of his movies include Green Book, Dunkirk, Star Wars: The Last Jedi and The Hateful Eight. He primarily works in DaVinci Resolve and uses a fixed node structure that he has developed over the years. Lowepost visited Walter at Company 3 LA with our camera team to learn in detail about how he builds his grades. Download his node tree (*.drx) here.
- 111 comments
-
- 84
-
-
-
DaVinci Resolve 17 is a major new release with a massive new DaVinci wide gamut color space that enables even higher quality image processing. This course is a must-see for all professional colorists, and the new color management solution will make you create better looking images! The course is thought by the world-renowned video- and workflow-specialist and author Lee Lanier. The first version of this course was recorded a year ago, and has been updated with many new lessons and theory and examples are added to the exisiting ones. In this training series you will learn to work with both display-referred and scene-referred management including ACES, applying DRTs with SDR and HDR projects, using DaVinci Wide Gamut, matching camera profiles with color space transforms and DCTLs, how to set up your projects for multiple color space outputs, RED IPP2 and RAW workflow, how to use the Gamut tool, LUTs, CSTs and OpenColorIO in Fusion, an overview of the Colorspace Aware Tools and much more. The DaVinci Resolve database files, footage and DCTL are available for download so that you can easily follow along. I want to especially thank Paul Dore, Dylan R. Hopkin, John Daro, Marc Wielage and Doug Delaney for their generous help and valuable inputs. Read more about the course