-
Posts
3 -
Joined
-
Last visited
Reputation
0 NeutralAbout Benjamin Handler
- Birthday 06/16/1989
Recent Profile Visitors
1,655 profile views
-

Re-creating a music video look
Benjamin Handler replied to Benjamin Handler's topic in DaVinci Resolve
Thank you everyone for the thoughtful replies. This thread has been super helpful just to hear how guys with more experience would approach a problem like this. An update: I talked with DP and we decided to find a middle-ground between the grade I'd already done and the reference. I ended just doing a few timeline-wide adjustments, instead of starting over. Added an inverted S-curve and toned down the saturation, mostly. Also a layer mixer node to push orange / blue set to low opacity (not sure if this best way of limiting color palette). Here's the updated link : https://vimeo.com/549688308 (PW = HL) A few questions Santiago: when you say linear does that mean, like, rec 709? This was shot on the Red Dragon 6k and I graded under the Log3G10 to Rec709 LUT. Thing is, I did a bunch of "film emulation-esque" adjustments under the LUT before seeing the DPs reference film, so I kind of shot myself in the foot there! I imagine I could've gotten closer to the reference without doing those things. Marc & Nicolas: I've heard of this parallel / layer node pulling. Just to clarify, the workflow would be something like: make a parallel node, with the top node as my "look" and the bottom node used to push skin more towards flesh tone? The idea being the parallel node will prevent the "look" node from effecting the skin, yes? I've tried this but I may be doing something wrong as it's never worked great for me. I'll look up tutorials and investigate but any quick pointers are definitely appreciated. Thank you guys for taking the time, -
Hi all, I'm grading a music video. Have done a 1st pass without notes from DP. Showed to DP and have since been given notes to make the video look more like their reference video: Here's the MV I'm currently grading with my first pass (my grade isn't close at all to reference): https://vimeo.com/537971712 password: HL In a general sense, any notes on how a look like this is done? And specifically, if you had the footage I was working with how you'd do it? I've pulled the Rainbow Kitten Surprise video into resolve and observed the scopes. One thing I've struggled with is making such a controlled look with low saturation but still have vibrant skin tones. Additionally, I'm guessing they've used some color mixer effect to limit hues outside of orange / blue, as well. and there's a tinting in high cyans. Any tips would be helpful!
-
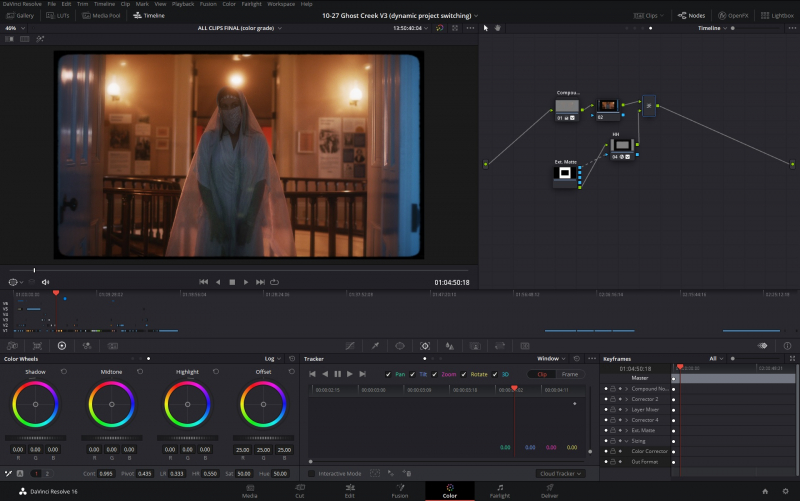
Hello all, I'm trying to apply a film matte to some clips in my timeline to create a vintage-y round-edge effect (see attached image). I've got the matte applied, but some clips in my project have digital zooms (edit > transform > zoom) which unfortunately zoom in on the clip and and past the matte. The only work around I've found is to apply the matte to the timeline (instead of clip, or a pre or post clip group). This would work, but not all the shots in this project can have the matte. If I apply the matte to a pre or post group instead, the zoom effect will zoom past the matte. Is there a way to selectively apply this matte without having it be effected by the zooms done to each clip? I would have thought that applying the matte to "Group post-clip" would have been essentially the same as applying it to the timeline. I've tried varities of applying the zoom on the edit sizing tab in color, as well as input sizing, node sizing while having the matte on different clip / pre / post clip groups. I haven't yet found a combo that won't zoom past my matte. I feel like I'm misunderstanding order of operations here and there may be a simple explanation I don't yet understand. any help would be appreciated!


