

Andy Minuth
-
Posts
148 -
Joined
-
Last visited
Content Type
Profiles
Case studies - Free
Case studies - Premium
Resources
Insider
Courses
Forums
Store
Posts posted by Andy Minuth
-
-
Hi Darren,
do you mean to apply LUTs via the legacy blend modes (Colour, Luminosity, etc.)? I think that is a bad idea for various reasons.
Here are three:
1. The common blend modes were made using 709 colour math and are not optimised for modern wide gamut spaces.
2. Critical components of LUTs are missing when only the colour is applied. Print film emulations for example darken saturated colours a lot. This is one of the key components of these looks. When applied through a colour blend mode, these parts are missing.
3. There is a risk of colour noise artefacts.
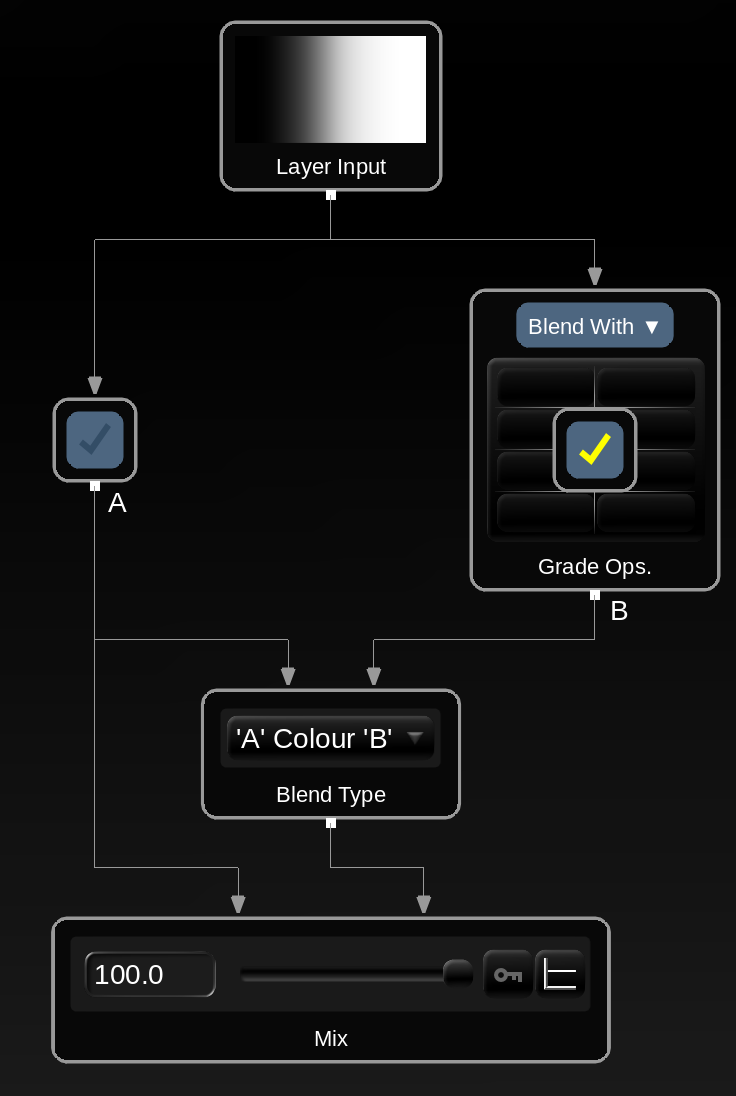
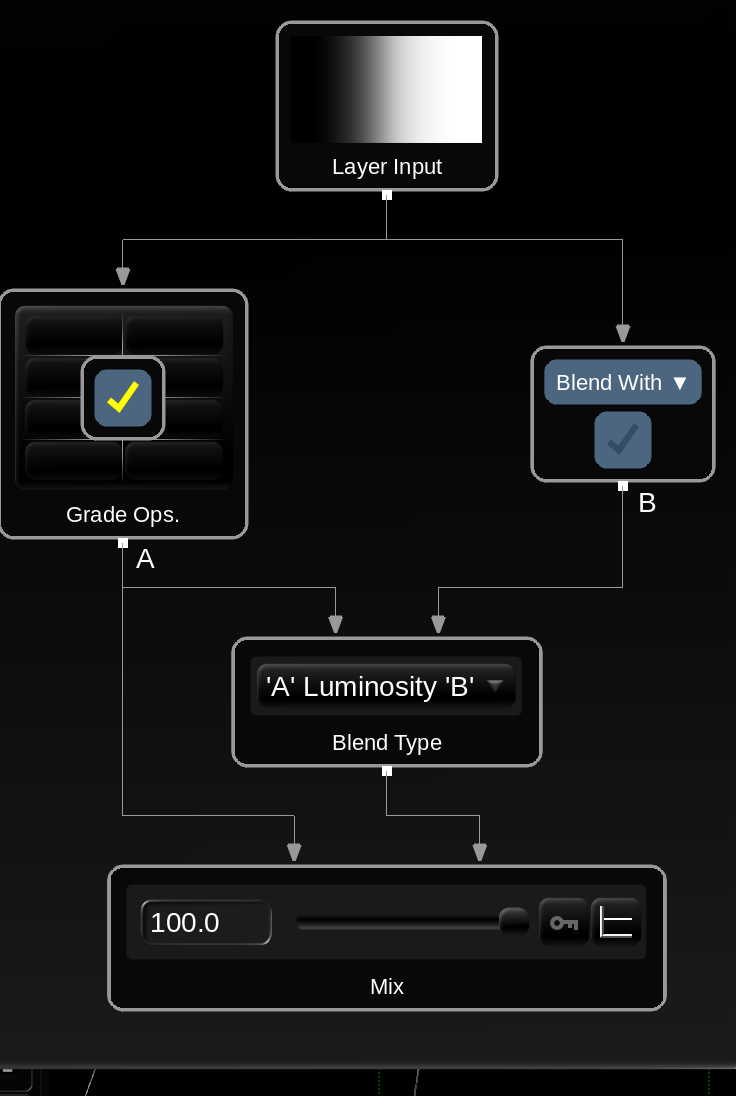
Nevertheless here is how I would do it in Baselight:
Put a LUT operator inside a layer and set the input and output colour space of the LUT accordingly.
Then in the layer flow graph use one of the settings from the screenshots. Both will apply only the "colour component" of the layer. The result blending slider works differently between both. In the one with the Colour blend mode and LUT on the 'B' branch, the slider will mix between no LUT applied (left) and LUT with Colour blend mode (right). In the other one with the Luminosity blend mode and LUT on the 'A' branch the slider will mix between Full LUT applied (left) and LUT with Colour blend mode (right).
Cheers,
Andy
-
Hi Ming,
the fl-remote application is part of an upcoming feature of Baselight/Daylight, but it isn't finished, yet.
At the moment we offer two different ways for remote sessions:
1. Follow Mode
You need two machines both running Baselight/Daylight and the footage on both end. You need to establish a network connection, so that one machine can access the project database of the other machine, or one common database in the cloud. Then one machine can follow, what the master machine is doing.2. Client View
This feature only a web browser or iPad on the receiving end. The "client" can watch the grading live (also in HDR), or examine the timeline individually, to give feedback. The client can access every frame of every shot and every shots metadata, independently from the cursor of the colourist. There is also a feedback channel between both ends.Best to contact us directly if you have questions about to setup one of these ways.
Andy
-
 1
1
-
-
On 3/2/2023 at 3:25 AM, Darren Shearer said:
I will talk to my camera guy about switching to EI as soon as possible and meanwhile, Andy, I guess I will treat the footage as I would REC 709 and do my initial adjustment in Film Grade as I find that to be the best starting point. Unless you had a wiser idea.
Hi Darren,
yes, that is what I would recommend.Cheers,
Andy -
Thanks for your insight, Mason.
Yeah, I assume that S-Log2 / Rec.709 should be the matching input colour space. And the cinema matrix is a creative tweak, that desaturates the image. So the starting point should be a desaturated image with proper contrast.
-
Hi Darren,
interesting to hear about the issue with the metadata. Are you maybe using an older version of Baselight 5.1 or 5.2 ?
Sorry to hear that the space it not fitting perfectly. But as I said, it seems like this camera mode is more offtrack. To properly evaluate/modify the space we would need some test shots. Ideally a scene including an Macbeth ColorChecker shot at different exposures. e.g. -3, -2, -1, 0, +1, +2, +3 or whatever works.Cheers,
Andy -
Hi Darren,
sorry to hear that. I just tested it here on my Mac again and it worked. I had to hold down 'Shift' to see all available colour spaces in the menu.
If you are on Windows the correct path for the .flspace file is:
C:\ProgramData\FilmLight\ColourspacesApart from that I would double check the correct path and ensure that there are no sub-folders in the colourspaces folder.
Thanks,
Andy -
Hi Darren,
I read a bit about the FS7.
For future projects my recommendation would be to leave the camera in 'Cine EI' mode and to record S-Log3 / S-Gamut3(.cine).
Only in custom mode one can choose a log tone-curve curve in combination with a custom colour matrix.
It seems like the cinema matrix is a creative tweak to 709, which desaturates the image a bit.I created a custom colour space for you.
You need to put the file into
/vol/.support/etc/colourspaces/which resolves to
Linux /usr/fl/etc/colourspaces
Mac /Library/Application Support/FilmLight/etc/colourspaces/It would be good to know, if that is helpful in your case.
Cheers,
Andy -
What does 'Matrix on' do on the camera side? Does it matrix to Rec.709 primaries?
I could create a custom space for that, but we need to know which primaries are encoded in the file.
-
Thanks, Levent. Was also great meeting you. Görüşürüz 😉
-
 1
1
-
-
A quick reminder about the approaching deadline on the 31st of July.
With the 'Spotlight' category we hope to give artists working on smaller budgets projects more recognition.
And of course, entry is open to users of any grading platform.
Good luck to all of you 😉 -
The easiest way is chaning the scene container path.
Daniele shows it in this video at 01:21:30
The container should always be the root directory of the project. In your example
/DI/FILM
The media is then referenced as
%C/ONLINE FILES/...In that scenario you would just change the scene container to
/DI/FILM01/
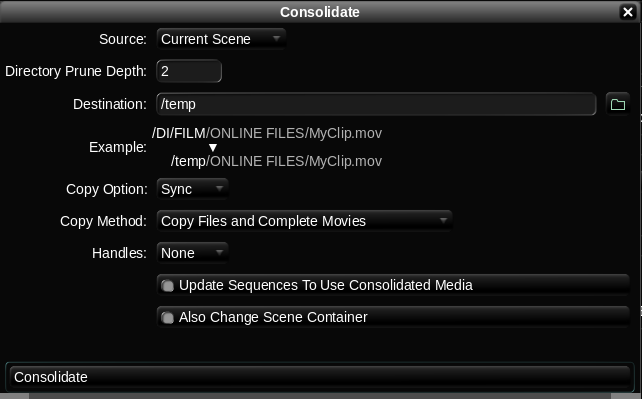
If you did not setup the container correctly in the scene, you can use the Consolidate tools to fix the paths to each clip.
First, prune the part of the paths, that should be part of the container (see screenshot).
Once the Consolidate starts, cancel it immediately. We are only interested in fixing the media paths in the clips. All clips should now look like %C/ONLINE FILES/...
Then go into scene settings and set the image container to the new path.If you only want to change a few clips, you can select them in Shots View and then use 'Conform X selected Shots' from the cog-wheel menu in shots view.
Cheers
Andy-
1
-
-
We have 3 days of training and workshops with Daniele Siragusano in Mumbai from April 5-7.
Check out the available sessions and register here:
https://www.filmlight.ltd.uk/store/events/baselight-week-mumbai/Cheers
Andy -
In case you haven't heard about it yet:
FilmLight has launched a new competition honouring colourists and the art of colour worldwide.
The awards will be judged by noted cinematographers and other industry creatives.
Entries will close on 15 September, with a shortlist announced on 15 October. The winners will be revealed on 15 November, and be invited to participate in a panel/presentation hosted by FilmLight and its partners at the EnergaCAMERIMAGE film festival in Poland.
Entry to the Colour Awards is free and open to users of any kind of grading system.https://filmlight.awardcore.com
The judging and awards are being organised with the co-operation of the ASC (American Society of Cinematographers), Imago (the International Federations of Cinematographers) and CSI (Colorist Society International).And if you are interested about our motivation behind this, please read: https://www.filmlight.ltd.uk/store/news_articles/honouring-colourists/
Cheers,
Andy-
 1
1
-
-
The recording of the event is now available: https://www.filmlight.ltd.uk/store/watch/colour-online/?vimeography_gallery=10&vimeography_video=546064407
-
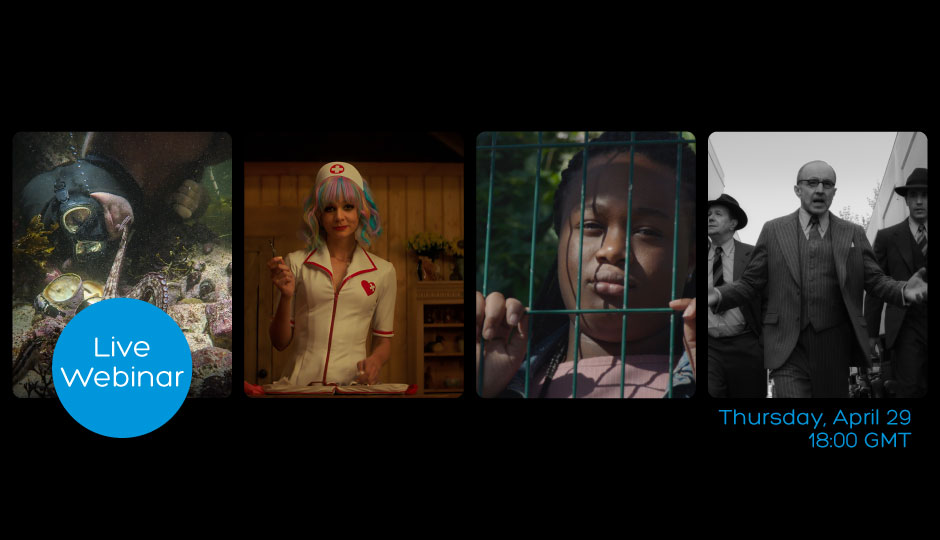
I would like to invite you all to FilmLight's next online event:
Colour Online: Film Awards Season
Thursday, 29 April 18:00 GMT
Let’s celebrate the recent nominees and winners of this year’s awards season. FilmLight is hosting a discussion with colourists- Kyle Stroebel (Refinery) - My Octopus Teacher
- Katie Jordan (Light Iron) - Promising Young Woman
- Jateen Patel (Molinare) - Rocks
- Eric Weidt - Mank
Of course, you will have the possibility to submit your questions to our four panellists.
And if you missed these events:
I suggest watching the recording of our 'Camerimage 2020' webinar, where among others Elodie Ichter (Harbor) discusses the grade of 'Nomadland'.
Colour at Camerimage 2020And Eric Weidt's amazing presentation about his previous collaboration with DP Erik Messerschmidt and Director David Fincher on 'Mindhunter'.
Colour on Stage: Eric Weidt - Mindhunter-
1
-
The recording of the event is available here: https://www.filmlight.ltd.uk/store/watch/colour-online/?vimeography_gallery=10&vimeography_video=521822858
I learned a lot during this session.
-
1
-
-
I am happy to invite you to our webinar about this new show on Netflix.
In this exclusive discussion, FilmLight interviews the talent behind the new sci-fi TV series from Netflix. Released on February 19, Tribes of Europa tells the story of three siblings fighting for survival in future Europe.
Join Colourist Stephan Kuch from PANOPTIMO and DoP Christian Rein as they talk about their long-term creative relationship, as well as their collaboration on ‘Tribes of Europa’ – from defining the workflow, to creating the look and feel of a Europe in which technology has collapsed and microstates are at war.
Don't miss Stephan breaking down some grades directly in the Baselight timeline.
Friday, March 5
11:00 Los Angeles | 14:00 New York | 19:00 London | 20:00 Munich-
1
-
-
Yes, if there is enough noise in the images the banding is masked by the noise.
-
Use the ACES or FilmLight scene template. Put the footage into the timeline and use 'Automatic' or 'From Metadata' tagging for the Input Colour Space. Then on the render page select the desired log output colour space.
There is nothing stopping you from rendering a log colour space into exr files. But a 10bit dpx will give you more image quality than exr in this case. Best would be rendering to 16bit dpx (for log colour spaces).
When you render a log colour space into exr, you might see banding in the image.
-
Hi Amit,
in our Dolby Vision manual that is linked above the process is explained also with screenshots: http://filmlight.ltd.uk/support/documents/baselight/manuals_bl.php
For Netflix IMF export, we have a Netflix HDR preset in the IMF export. Choose VideoLUT: 'No Scale' with it.
Cheers, Andy
-
1
-
-
I haven't thought this through, but something more geometrical would make sense I guess. Maybe something that represents the movements we can see in the histogram.
-
1
-
-
The ColourCrosstalk interface might not be our most intuitive one 😉
Given the powerfulness of the tool it is quite robust compared to other more "complex" operations. The only issue is that if one of the channels is very noisy you should avoid amplifying the noise into other channels.
But you can use this to your advantage: For example when you have a very noisy blue channel, increase the G in Blue Output. This will shift the colour palette towards a "simple" two-strip look and reduce the noise at the same time.
-
As a start I recommend moving only the 6 sliders on the left side. If one of you channels is very noisy e.g. the blue channel and you mix and amplify the blue channel into red and green then more noise is expected.
-
1
-
-
Hi Margus,
the AAF workflow is better suited for Online workflows and very popular in television:
- edit with full quality footage in AvidMC
- export AAF (and consolidated media) from Avid
- conform AAF in Baselight (Baselight has access to Avid MediaFiles or uses consolidated folder)
- grade in Baselight, but no need to rebuild any effects
- export AAF with injected grades from BL
- load AAF back into Avid: The timeline is reassembled with all effects and graded shots
- Export final delivery from Avid
In your scenario the lens workflow makes more sense. There you will provide a folder with BLG files to apply the grades in Avid. The BLG files have no problems if the edit changes, because the grades are applied based on metadata. If there is no grade available for a shot, there editor might need to apply a BLG file manually on a shot.
Applying grades to a different edit in Baselight works automatically. You have a lot of options how the grades should be transferred in the 'Multi-Paste' tool.
Cheers, Andy
-
2

Input and working colour space conundrum in Baselight For Avid
in Baselight
Hi Darren,
for 709 footage, you can keep all colour spaces on 'Rec.1886: 2.4 Gamma / Rec.709'. This will then give you a classic video grading pipeline.
The more modern approach would be a scene-referred grading workflow:
InputCS: According to the footage
WorkingCS: e.g. T-Log / E-Gamut
DRT: e.g. TruelightCAMv2
CursorCS: Rec.1886
'Legal to Full' and 'Full to Legal' in the cursor should be set according to the footage and Avid project settings. Most people have a legal range project in Avid, that means you should set the cursor to 'Full to Legal' in Baselight for Avid. 'Legal to Full' can be turned off for certain shots.
I hope this is helpful.
Andy