Abby Bader September 18, 2016 Share September 18, 2016 One of my clients have a project coming up and wants me to look into the 1900s Photochrome look. I would love some inputs on how to achieve the distinct and painterly look? The film is shot on Alexa 65. 3 Link to comment Share on other sites
Tom Evans September 19, 2016 Share September 19, 2016 Hi Abby. The look of The Grand Budapest Hotel was based on old photochrome images from the early 1900s. Their references were the photochrome library from the Library of Congress. 5 Link to comment Share on other sites
Abby Bader September 22, 2016 Author Share September 22, 2016 Thank you Tom. I will read the article :-) 3 Link to comment Share on other sites
Bruno Mansi September 24, 2016 Share September 24, 2016 A photochrome print was created by imprinting up to 15, tinted litho stones onto paper. The photochrome prints I've seen often have brownish tints, which sort of reminded me of my youth, when I mixed too many colours together from my paint tin! Maybe printing that many colours on top of each other is the reason for the muddy tints in the photochrome process. Anyway, I've heard that using 3D LUT Creator does a good job creating photochrome-style effects without introducing problems such as colour banding. 5 Link to comment Share on other sites
Abby Bader September 25, 2016 Author Share September 25, 2016 Interesting. I will try to blend some layer nodes together and see if the look can be recreated somehow. 2 Link to comment Share on other sites
Margus Voll September 28, 2016 Share September 28, 2016 You should be able to re create the look from the stills i bet? On what platform do you work? 1 Link to comment Share on other sites
Abby Bader October 6, 2016 Author Share October 6, 2016 Margus, I use Baselight and Resolve. It's the painterly, textured and unreal feel I am after. 3 Link to comment Share on other sites
Margus Voll October 8, 2016 Share October 8, 2016 I would take some example, look at scopes and play with it a bit. Would that make sense? This is how i build looks after reference. 2 Link to comment Share on other sites
Filip Zamorsky October 8, 2016 Share October 8, 2016 3D LUT Creator is a great tool. If you will find the way how to use it, you can achieve really great results. 3 Link to comment Share on other sites
Abby Bader November 10, 2016 Author Share November 10, 2016 Thank you guys for the great input! I managed to create a look that is quite close to 1900s Photochrome. I will upload some shots if I can get permission to share them with you. 4 Link to comment Share on other sites
Tom Evans November 11, 2016 Share November 11, 2016 Great, looking forward to see what you have come up with! 2 Link to comment Share on other sites
Thomas Singh November 24, 2016 Share November 24, 2016 Jill's images indeed look great and I love the movie! 2 Link to comment Share on other sites
Tom Evans November 25, 2016 Share November 25, 2016 The original spelling was actually “photochrom” and was developed in Switzerland. Once the process was introduced in America, the “e” was added to aid pronunciation. 3 Link to comment Share on other sites
Serge Kosevtsov November 26, 2016 Share November 26, 2016 (edited) Hi Abby. Thanks for topic. I'll follow this with interest! I wonder what lenses and filter were used on shooting? And what colour palette used? Of course I'd prefer to talk to DOP first and also discover the material used as inspiration. As for my taste the greatest look is Belgian Milk Sellers (maybe oversaturated a bit but still). More then it's very close to Alexa. But with no different of a palette and locations I'd say the main course is Chocolate deep darks and Bronze light. Edited November 26, 2016 by Serge Kosevtsov 3 Link to comment Share on other sites
Julien Chichignoud November 26, 2016 Share November 26, 2016 Hello everyone, first post here! I started playing with that type of look a bit, though didn't get the time to get very far, but my approach was to key broad ranges of colours, desaturate them, and bring back artificial colour back in. Depending on source material, I'd get 4-8 "slices" of chroma values that would each get a different colour added back in. So for example, to mimic the look of Serge's photo example above, I'd key the grass, the skintones, the sky, the dirt/bricks, the blue clothes, the red clothes, the gold objects + dogs, desaturate everything, and add a specific chroma value into each of them. Would also need to play with how to blend the colours into the B&W image (probably a bit of softening/spreading of the colours), maybe a multiply-type blending mode and playing with overall sharpness. Looking forward to following this thread! 5 Link to comment Share on other sites
Marcelo Cosme November 27, 2016 Share November 27, 2016 Hello colorists! I did a study on photochrome and got a look that pleased me a lot. As I have been testing directly I believe it can reduce the number of nodes. I started by creating parallel node and applying a general increase in temperature and contrast, then separated layer and sky and grass and made some saturation, hue and curve adjustments. To finish I simulated a kodak super 16mm film and made some more adjustments of contrast, hue and general saturation. I hope you enjoyed it and that I contributed to the understanding of this look. Regards! 5 Link to comment Share on other sites
Abby Bader November 29, 2016 Author Share November 29, 2016 On 26.11.2016 at 1:06 AM, Serge Kosevtsov said: Hi Abby. Thanks for topic. I'll follow this with interest! I wonder what lenses and filter were used on shooting? And what colour palette used? Of course I'd prefer to talk to DOP first and also discover the material used as inspiration. Hi Serge. The production rented some old Russian Kowa lenses. Great texture and soft spots. The project is not released but I will post some images when I get permission. 4 Link to comment Share on other sites
Thomas Singh November 29, 2016 Share November 29, 2016 A Photoshop tutorial that could be worth having a look at https://aircavs.wordpress.com/2010/06/18/photochrom-vintage-postcard/ 1 Link to comment Share on other sites
Serge Kosevtsov November 30, 2016 Share November 30, 2016 (edited) _ Edited November 30, 2016 by Serge Kosevtsov Link to comment Share on other sites
Serge Kosevtsov November 30, 2016 Share November 30, 2016 8 hours ago, Abby Bader said: Hi Serge. The production rented some old Russian Kowa lenses. Great texture and soft spots. The project is not released but I will post some images when I get permission. Great! And that's right - the texture here plays a big role. Alexa plus Kowa it should be amazing! Link to comment Share on other sites
Sebastiano Dell'eva February 7, 2017 Share February 7, 2017 Hello guys! I know this is a few months old now, but I was looking exactly into this for a music video shot on Red I just did. Unfortunately some of the night shots were not exactly on point (mainly due to the lenses that had to be used on the body rig for the shots). Having those as a bottleneck, we decided to go with other references! But I would love to see some shots Before & After, if you are able to put them here. Or even just see the final outcome somehow. Have a lovely day everyone! Link to comment Share on other sites
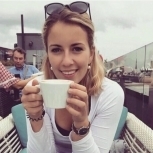
Abby Bader February 7, 2017 Author Share February 7, 2017 (edited) I'm not quite sure if we landed on that kind of look. Sometimes we are inspired by something and put example images on the table but as we start working we might end up in a different place. Here are before and after on one of the scenes. Edited February 7, 2017 by Abby Bader 2 Link to comment Share on other sites
Thomas Singh March 21, 2017 Share March 21, 2017 An introduction to Photochrome http://www.photographers-resource.co.uk/photography/history/introduction_to_photochromes.htm Link to comment Share on other sites